What Is DFU Mode and How To Enter and Exit on iPad Air 2/3/4/5
Jul 12, 2024 • Filed to: Mobile Repair Solutions • Proven solutions
Black screen, unresponsiveness, and software issues are some common iPad problems that most people face. When these problems and simple solutions do not work, it will be time to execute the DFU mode. DFU mode could help solve numerous iPad issues, but the steps to enter and exit DFU mode are not trivial.
In this article, you will learn how to enter and exit DFU mode for the different versions of iPad Air. You will also understand the importance of backing up your iPad and how traditional techniques of using iTunes and iCloud are not the most effective solution. A recommended application will be shared, and how it can be a game changer compared to commonly used methods.
Part 1. What Is DFU Mode Used for on iPad Air?
DFU stands for Device Firmware Update, and this update reloads your device's firmware and software, including the iPad Air. It is an even deeper restore mode than Apple's recovery mode, and it typically upgrades your device to the latest OS after a DFU. In the DFU mode, the iPad can interface using Finder or iTunes without needing to load the bootloader.
When to use DFU mode:
- Useful last-resort fix to rule out any software problems.
- Restore your device if it is stuck on the Apple logo page.
- Buggy or unresponsive
- Showing a black screen
- To perform a clean install of iPadOS
- iPad is not working as expected.

Part 2. How To Enable Disk Mode on Your iPad Air?
Disk mode is a feature in iTunes that works similarly to a flash drive. It allows you to transfer your documents from the computer and view them on your iPad. However, backing up your iPad before entering disk mode is advised. This section will share the strategies to back up your iPad and enter DFU with different iPad Air models.
Step 1. Back up Your iPad First
The two official ways of backing up iPads are through iTunes or iCloud. However, due to certain limitations, we recommend using Dr.Fone to back up your iPad. It is a suite of apps from Wondershare that helps to support problems faced on Apple devices, including backing up your iPad.
Advantages of Dr.Fone as compared to iTunes and iCloud:
- Dr.Fone can back up and restore data more flexibly and restore data selectively without overwriting any existing data or backups.
- Dr.Fone allows you to preview all content in iPad backup before backing up, letting you confirm data to be backed up.
- You can select any data or content you want in the iTunes or iCloud backup and restore them to your iPad.
- No date loss on iPad during transfer, backup, or restore.
How To Back Up Your iPad Using Dr.Fone
Below are the steps for backing up your data on iPad with Dr.Fome.
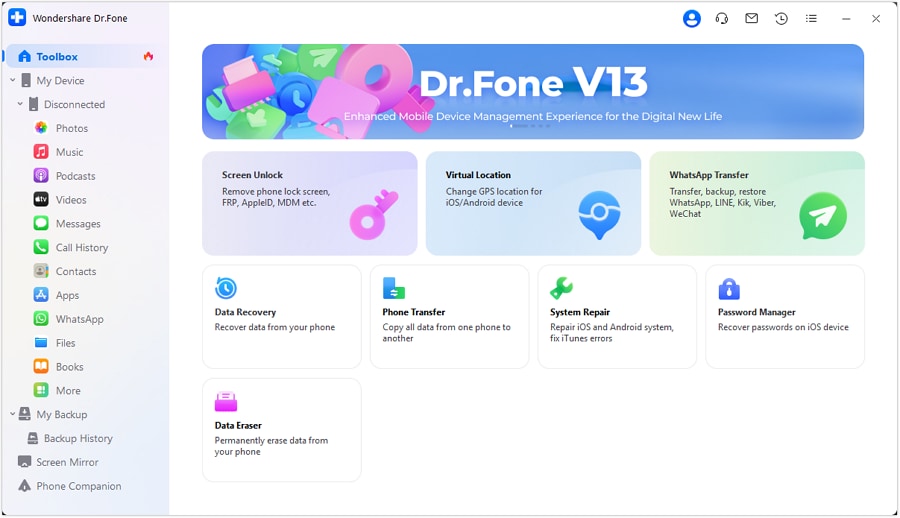
Step 1: Download Dr.Fone on your computer and launch the application. Click on Phone Backup. Use the Lightning cable to connect your iPad to the computer.
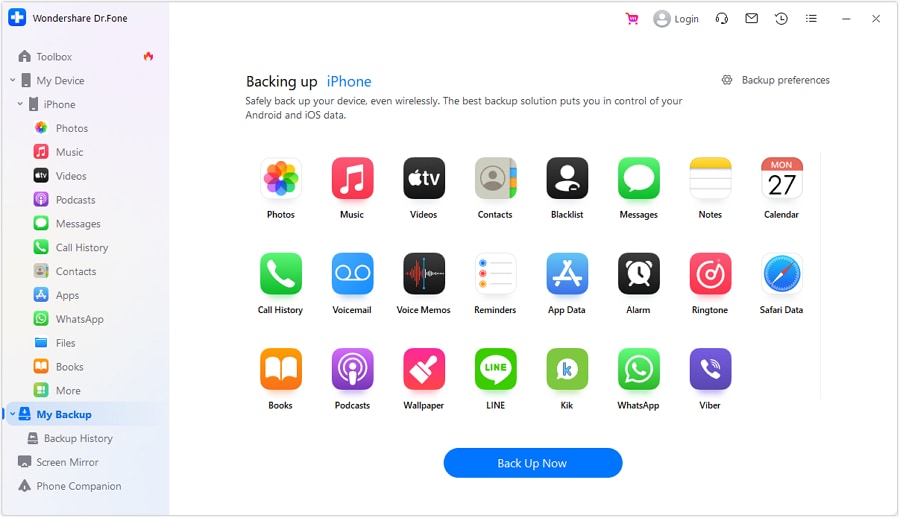
Step 2: Select the Backup option. Then select the files you want to back up on the left menu bar. Once done, click on Backup in the bottom right corner.
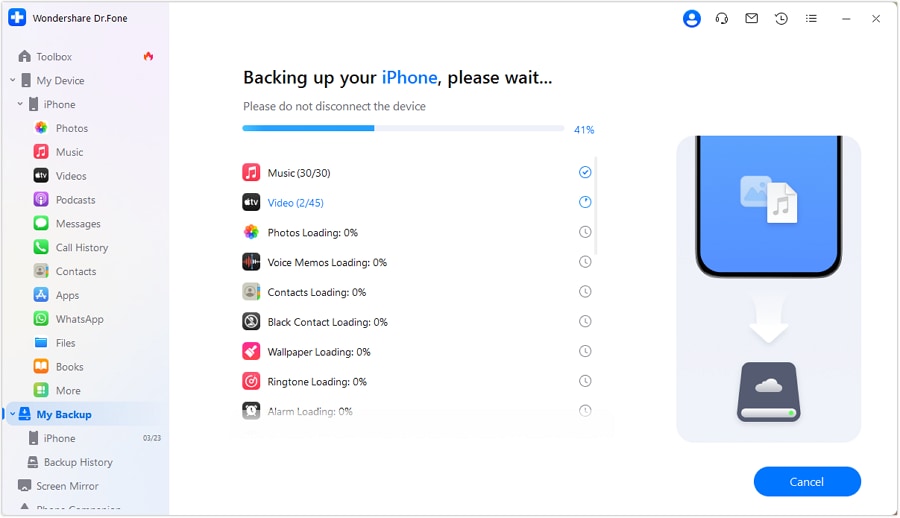
Step 3: Once completed, Dr.Fone will display all the items that have been backup.
Step 2. Choose Your iPad Air Model
Over the years, Apple has launched different models of iPad Air. After learning how to back up your iPad in the previous step, this step will teach you how to enter DFU mode for the different iPad Air models.
1. Apple iPad Air 5 (2022 Model) and Apple iPad Air 4 (2020 Model)
Use the following steps to learn how to put iPad Air 5 and iPad Air 4 in DFU.
Step 1: Connect your iPad Air to your computer with a cable.
Step 2: Press the Volume Up followed by the Volume Down button. Next, press and hold the Power/Touch ID button.

Step 3: Continue to press the Power/Touch ID button and simultaneously press the Volume Down button for 5 seconds.
Step 4: Remove the Power/Touch ID button, but keep pressing the Volume Down button for another 10 seconds. You will observe that the screen will remain black.
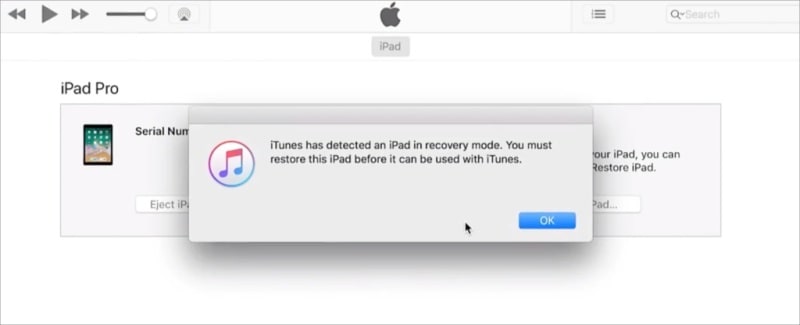
Step 5: Launch iTunes on your computer, and you should see the following pop-up text: iTunes has detected an iPad in recovery mode. You must restore this iPad before it can be used with iTunes. At this point, your iPad Air is now in DFU mode.
2. Apple iPad Air 3 (2019 Model), Apple iPad Air 2 (2014 Model), and Apple iPad Air 1 (2013 Model)
Use the following steps to learn how to put iPad Air 3, iPad Air 2, and iPad Air 1 in DFU.
Step 1: Turn off your iPad by pressing and holding the Power button for a few seconds.
Step 2: Connect your iPad to your computer and open the iTunes application.
Step 3: Press and hold both the Home button and Power button for 10 seconds.

Step 4: The iPad recovery mode will appear on the iTunes application, and the iPad is now in DFU mode.
Part 3. How To Get Your iPad Air Out of DFU Mode?
After learning how to enter into DFU mode, exiting should not be a difficult task. This part will share two methods of getting your iPad out of DFU mode. You will be able to learn the different tricks to exit from DFU modes from the various iPad Air versions.
Method 1. Force Restart iPad Air To Exit DFU Mode (Device Reboot)
A fast way to exit from DFU mode is simply restarting your iPad. As the different versions of the iPad have slightly different interfaces and buttons, you will learn how to force restart iPad with and without the Home button.
1. On Your iPad Air With a Home Button
For iPad Air 3, iPad Air 2, and iPad Air 1, which contain a Home button, the following are the steps to exit from DFU mode.
Step 1: Press and hold the Power button and Home button at the same time until the Apple logo appears.
Step 2: Release both buttons once you see the Apple logo, and the iPad will exit from DFU mode.

2. On Your iPad Air Without a Home Button
For iPad Air 5 and iPad Air 4, which do not have a Home button, the following are the steps to exit from DFU mode.
Step 1: Disconnect the iPad from the computer and press and release the Volume Up button.
Step 2: Press and release the Volume Down button.
Step 3: Press and hold the Power/Touch ID button until the Apple logo appears. The iPad will restart and exit from DFU mode.

Method 2. Exit DFU Mode without Crashing Down or Passwords
Although exiting from DFU mode should be fairly easy, sometimes, you might find your iPad stuck in the DFU mode and unable to exit despite executing the above steps. To use a foolproof method to go DFU mode on iPad without the risk of losing your data, we recommend using Dr.Fone-System Recovery (iOS).
This method will focus on using Dr.Fone to fix iOS system issues using Standard Repair to help exit DFU mode.
Step 1: Download Dr.Fone from the official Wondershare website on your computer and launch the application. On the home page, click on System Repair and enter the iOS Repair.
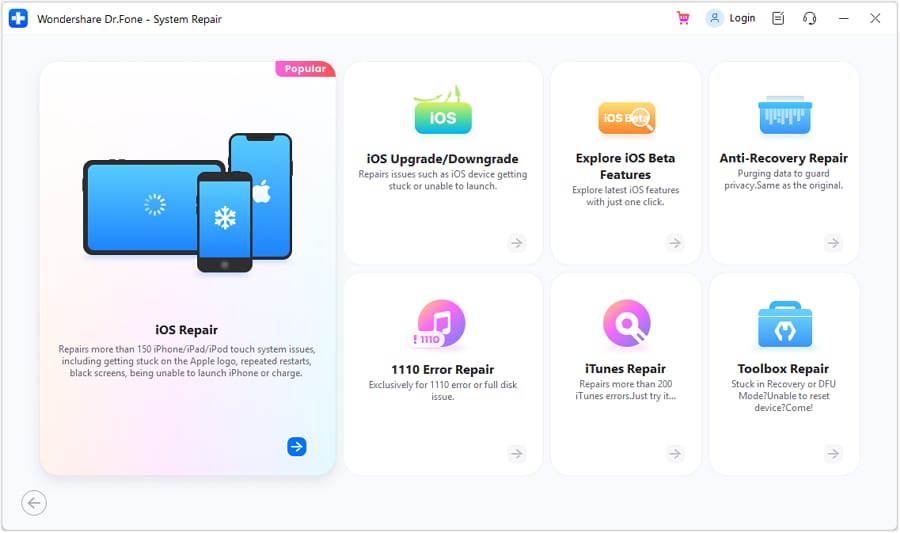
Step 2: On the next page, click on Repair Now in the bottom right corner, and it will proceed to the recovery step. Before entering Recovery Mode, select Standard Repair and follow the instructions to put your iPad in Recovery Mode.
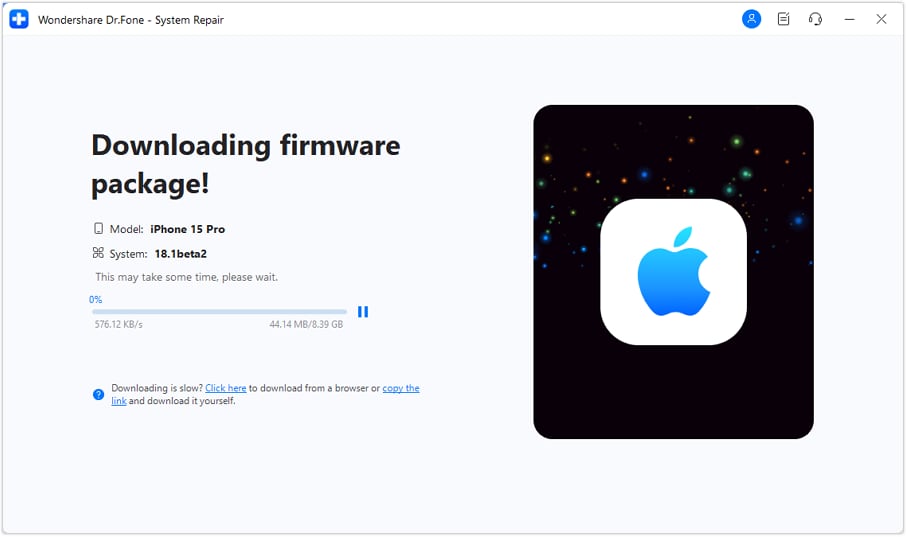
Step 3: After entering the Recovery Mode, select the desired iOS firmware and click Download to start downloading the firmware. Begin the iPadOS system recovery process by clicking on Repair Now.
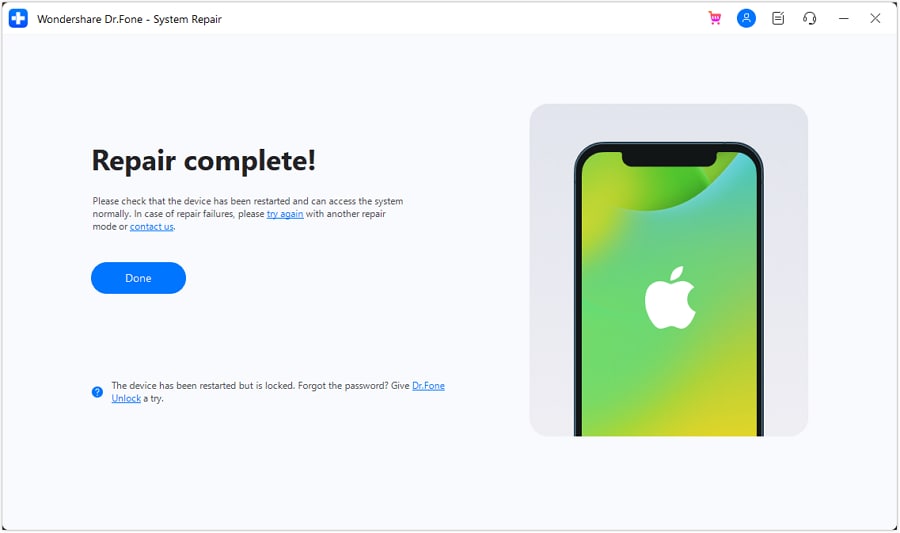
Step 4: Once the repair has been completed, a prompt window will display the successful completion. Click Done to complete the execution, and your iPad has successfully exited DFU mode.
Conclusion
This article summarizes DFU and the methods to enter and exit DFU mode for various iPad versions. Backing up your iPad is also critical to ensure your data and files are not lost during this process. Although iTunes and iCloud are traditional methods to back up and set up your iPad in DFU mode, they might not be the best solution.
The flexibility to backup and the ability to backup with incremental restore are some perks of Dr.Fone. We also recommend using Dr.Fone-System Repair to exit DFU mode, as it prevents data loss.
iPad Issues
- iPad Beta Install
- iPad DFU Mode
- 1. Backup iPad in DFU Mode
- 2. Put iPad in and get out of DFU mode
- 3. Restore iPad from DFU mode
- 4. Get iPad In and Out of DFU Mode
- iPad Recovery Mode
- 1. iPad Recovery Mode Not Working
- 2. Restore iPad Stuck in Recovery Mode
- 3. Put iPad in Recovery Mode
- iPad Update/Downgrade
- 1. Downgrade iPadOS 16 Beta to 15
- 2. Fix iPad Stuck on Preparing Update
- 3. Fix iPad Stuck On Update Requested
- 4. Fix iPad stuck at Verifying Update
- 5. Fix iPad not updating
- iPad Common Problems
- 1. 5 Ways to Fix iPad Boot Loop
- 2. Fix Poor Wi-Fi Signal on iPad
- 3. Fix iPad crashes
- 4. Fix Wifi keeps dropping on iPad
- 5. Fix iPad Not Connecting to Hotspot
- 6. Fix iPad Overheating
- 7. Fix Common iPad Problems Easily
- 8. Fix iPad Keeps Restarting
- 9. Fix iPad Stuck in Headphone Mode
- 10. Fix iPad Won't Connect to Wi-Fi
- 11.Solutions for iPad Won't Rotate
- 12.Solutions for iPad Won't Turn Off
- 13.Fix My iPad Won't Turn On
- 14.Ways to Speed Up the Slow iPad
- 15.Fix iPad Won't Sync with iTunes
- 16.Fixe Ghost Typing and False Touch
- 17.Repair iPad Touch ID Not Working
- 18.Fix iPad Keeps Freezing
- 19.Fix Disabled iPad
- iPad App Problems
- 1. Fix iPad Sound Not Working
- 2. Fix Wallpaper not Displaying
- 3. 12 Fixes for Apps Not Downloading
- 4. Fix All iPad Email Problems
- 5. Fixe iPad No Sound in Games
- 6. Ways to Fix No Sound on iPad
- 7. Fix iPad Not Receiving Emails
- 8. Fixe Safari Crashing on iPads
- 9. Fix YouTube Not Working on iPad
- 10. Force Quit Frozen Apps On iPad
- 11.Fix 'Cannot Connect to App Store'
- iPad Button Problems
- 1. Fix iPad Home Button Not Working
- 2. Fix iPad Power Button Not Working
- 3. Fixes for iPad Volume Button Stuck
- iPad Charging Problems
- 1. Fix iOS 16 Battery Drain Issues
- 2. Fixe iPad Battery Draining Fast
- 3. Ways to Speed Up iPad Charging!
- 4. Fixes for iPad Not Charging
- 5. Fix IPad Not Charging
- iPad Keyboard Problems
- 1. Fixe iPad Keyboard Not Working
- 2. Fix Keyboard Trackpad Not Working
- 3. Smart Keyboard Folio VS Magic Keyboard
- iPad Screen Problems


James Davis
staff Editor
Generally rated4.5(105participated)