How to Recover Deleted Notes on iPad With or Without Backup
Jul 12, 2024 • Filed to: Data Recovery Solutions • Proven solutions
For most of us who are pretty wrapped up in school or at work, the Notes app is such a lifesaver. It basically helps us to remember things from time to time. But beyond that, it serves a more important purpose. The Notes app functions as a convenient platform to capture our sudden thoughts and craft them into amazing ideas. Therefore, it’s true to say that Notes is certainly among the iOS apps that most of us can’t leave without.
Based on its performance over the years, the Notes app can be deemed safe in terms of data storage. It’s secure enough to keep your entries out of harm’s way. However, user error is an exception. Let’s say you’ve erased your notes by accident. Well, it’s apparently an isolated case. But don’t worry. The iPad notes that disappear are not lost forever.
In this article, we will discuss other possible reasons why iPad notes suddenly go missing. We will also provide some techniques on how to recover deleted notes on iPad. Read on to learn more.
Part 1. Discovering the Ultimate Power of iPad’s Notes App
Notes is one of the default applications on iPad, along with Phone and Messages. It is mainly used to take down notes and create a to-do checklist. But just like the other iOS apps, Notes has also received a few enhancement updates from Apple. Such improvements have made the Notes app more capable. To say the least, Notes is no longer just a mere note-taking app. It can absolutely do more than that. Below are some secret iPad Notes features you need to know about.
Add the Notes app as a Control Center shortcut.
There’s no need to search the ocean of apps on your home screen just to write down something. By adding the Notes shortcut in the Control Center, you can conveniently do it in just a couple of little taps. The Notes button in the Control Center brings you directly to a blank note where you can start writing.
Ask Siri to write notes for you.
Did you know that you can actually ask Siri to take down notes for you? Well, you’ve just read it. Siri is capable of navigating the Notes app and creating its text entries. All you need to do is give Siri a command and recite the notes you want to save. After a minute or two, check your Notes app, and surely it’s there.
Insert tables in your notes.
Hold your horses. Of course, tables in the Notes app are very basic compared to Excel’s worksheet. It’s primarily just to help you sketch your thoughts and organize them simplistically. By far, these tables are just doing fine despite being ordinary. No problem at all.
Padlock your notes.
Apple offers some ways to help you add another layer of security to your notes. You may use Touch and Face ID or a passcode to safeguard your privacy. If it’s your habit to store confidential information in the Notes app, it’s best to implement these measures.
Part 2. Common Reasons Why iPad Notes Disappeared
Despite being mindful and alert, deleting important notes by mistake still happens. It’s natural and quite common to iPad users nowadays. But aside from that, there are some other reasons why iPad notes have disappeared mysteriously. Find them from the list below.
Your Notes app possibly has some software bugs.
Software bugs are often considered minor problems. However, they may escalate and become a serious concern if taken lightly. But if things go south and you lose your entries, remember there are some solutions you can try. Learn how to recover deleted notes on iPad in easy steps.
It’s possible that your iOS runs into a problem.
If the iPad software is not working properly, you may expect that apps will not execute too. That’s probably the reason why your iPad notes have disappeared. A simple restart might resolve the iOS problem once and for all. But if your notes still don’t return after a few tries, it’s time to elevate your ways. Find out how to retrieve deleted notes on iPad without backup.
iPad’s iOS update is disrupted.
It’s important to take note that iPads and other Apple devices are at their most vulnerable state during iOS updates. If they are interrupted while the process is ongoing, some files or apps may get corrupted and stop working. That’s a serious implication. It may lead to permanent and irreversible damage to the device.
iPad becomes completely unresponsive due to physical damage.
Definitely, there’s no way to get ahold of your Notes app if your iPad becomes unresponsive. Physical damage to the device rarely results in self-deletion of files. However, you may lose access to the general function of your device and have a hard time viewing your files.
Part 3. Easy Ways How to Recover Deleted Notes on iPad With or Without Backup
Losing your notes or any important file is indeed a nightmare. It’s not a minor concern that we can pay no heed to. So if you ever experience the same problem, don’t think twice to act fast. Exhaust all the remedies you know to bring your notes back to the device. Below are some methods you can try on how to recover deleted notes on iPad with or without backup.
Method 1: Retrieve Deleted Notes From Recently Deleted Folder
Similar to Photos, the Notes app also has a Recently Deleted Folder. It’s generally a folder where the notes go after you delete them. The Recently Deleted Folder keeps the notes for at least 30 days before they get deleted permanently. Here’s how to retrieve deleted notes from there.
- Step 1: Launch Notes on your iPad.
- Step 2: Click Back to access the folder list.
- Step 3: Click Recently Deleted.
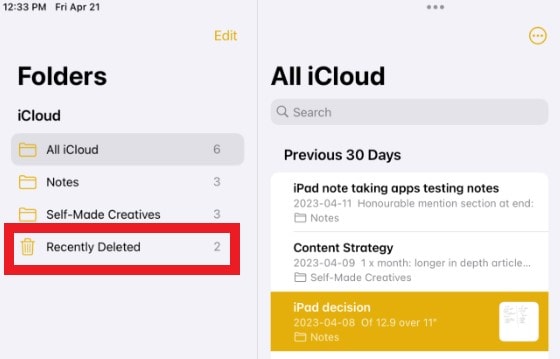
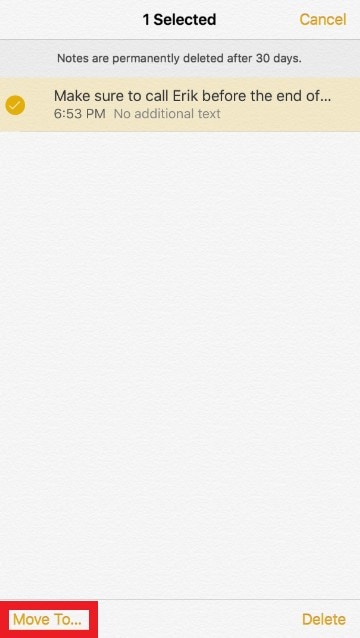
- Step 4: Click Edit. Check the tickbox next to the notes you want to recover.
- Step 5: Click Move. And then, choose the folder where you want to restore the notes.
Method 2: Search Your Notes on the iPad’s Home Screen or Notes App
The notes you’re looking for may be just there around the corner and really not missing. Use the search bar on the home screen and the Notes app to locate them. Here’s how to do it.
From Home Screen
- Step 1: Unlock your iPad to access its home screen.
- Step 2: Touch the middle section of the home screen and swipe it down to bring out the search field.
- Step 3: Tap Search and start typing. Type in the title of or a few prominent keywords from the notes you’re looking for.
From Notes App
- Step 1: Open the Notes app on your iPad.
- Step 2: Tap the search bar above the list of notes.
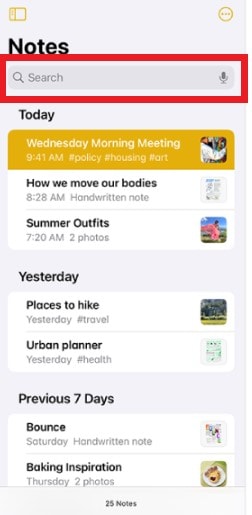
- Step 3: Type in the title of or a few prominent keywords from the notes you’re looking for.
Method 3: Recover Deleted Notes on iPad Using iTunes
If the first two troubleshooting techniques don’t get you anywhere, try to recover the deleted notes from iTunes backup. Take note that this method will not work unless you back up your iPad to iTunes regularly. Hence, always sync your files to iTunes or other backup software like Wondershare Dr.Fone. Here’s how to retrieve deleted iPad notes from iTunes backup.
- Step 1: Launch iTunes on your computer.
- Step 2: Connect your iPad to your computer using a data cable. And then confirm your device.
- Step 3: Click Summary on the left panel.
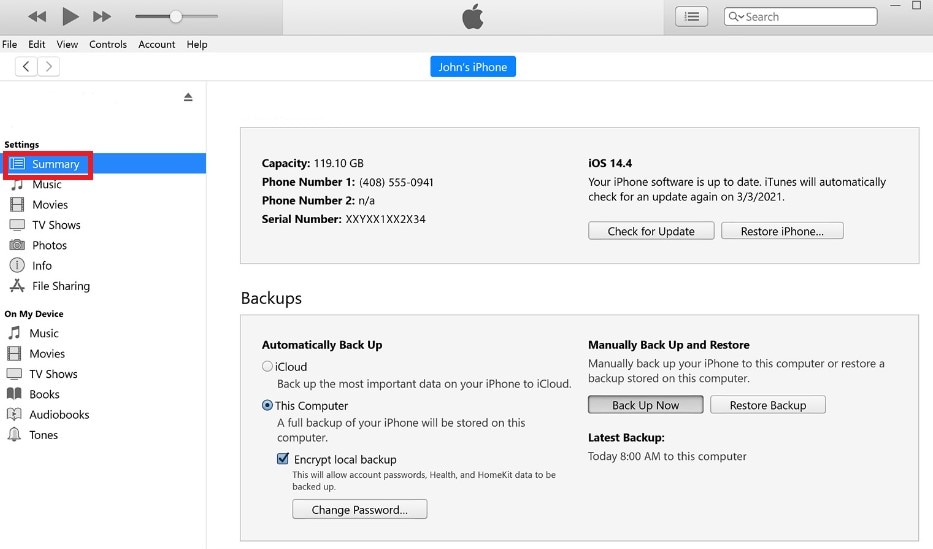
- Step 4: Head over to the main dashboard and click Restore Backup.
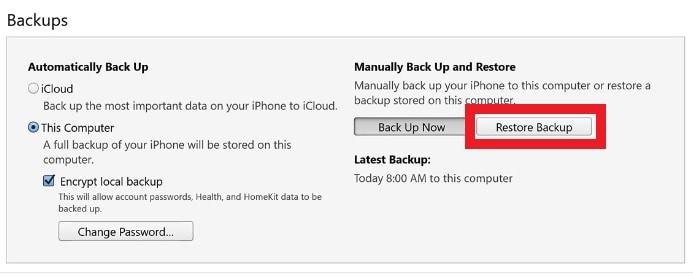
- Step 5: Choose the backup file you want to retrieve. And then click Restore.
Method 4: Recover the Deleted Notes Using Wondershare Dr.Fone
Let’s say you don’t have a backup file of the deleted notes. Can it still be retrieved? The short answer is yes. Well, thanks to Wondershare Dr.Fone. It is capable of recovering lost data from your iPad with or without backup. Here’s how to use it.

Wondershare Dr.Fone
World's 1st iPhone and iOS data recovery software
- Provide with three ways to recover iPhone data.
- Scan iOS devices to recover photos, video, contacts, messages, notes, etc.
- Extract and preview all content in iCloud/iTunes backup files.
- Selectively restore what you want from iCloud/iTunes backup to your device or computer.
- Compatible with the latest iPhone models.
- Step 1: Download Wondershare Dr.Fone from its official website. Install it on your computer.
- Step 2: Launch the newly installed Wondershare Dr.Fone.
- Step 3: Click Toolbox on the left panel. And then head over to the main dashboard. Find and click Data Recovery.
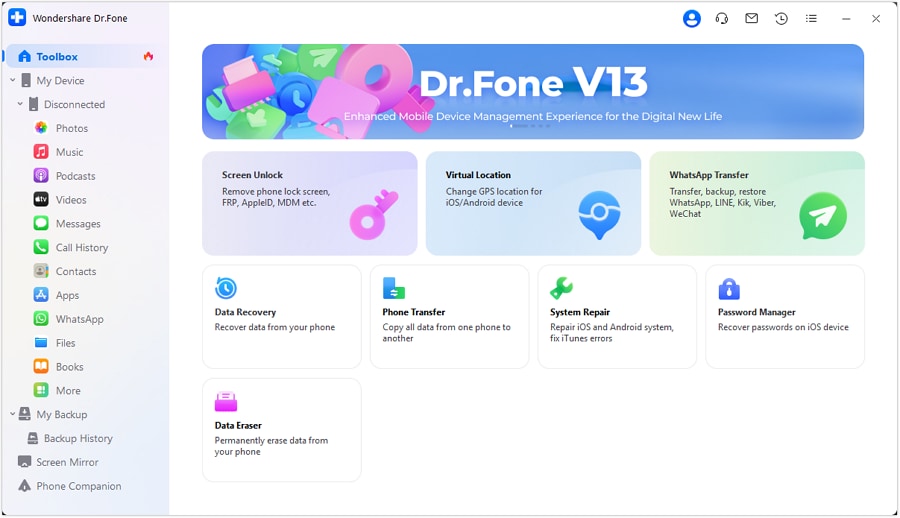
- Step 4: Choose iOS.
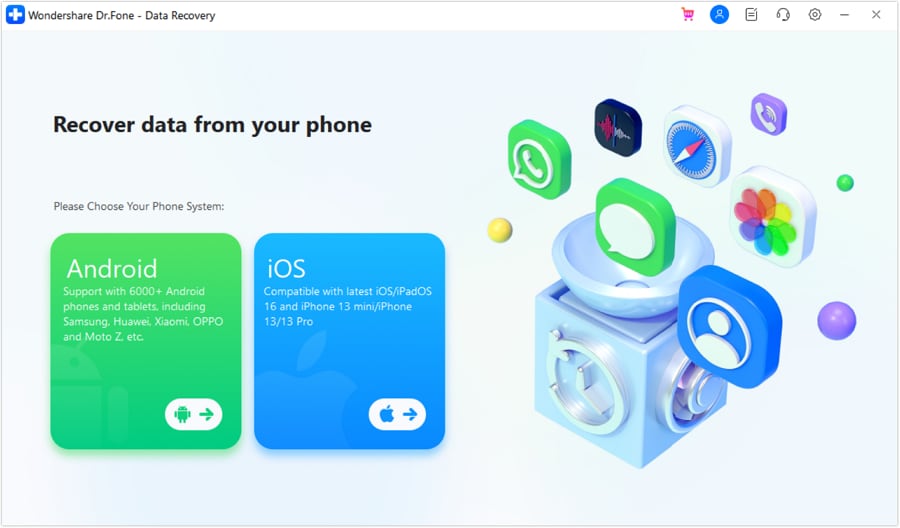
- Step 5: Choose Recover Data From iOS Device.
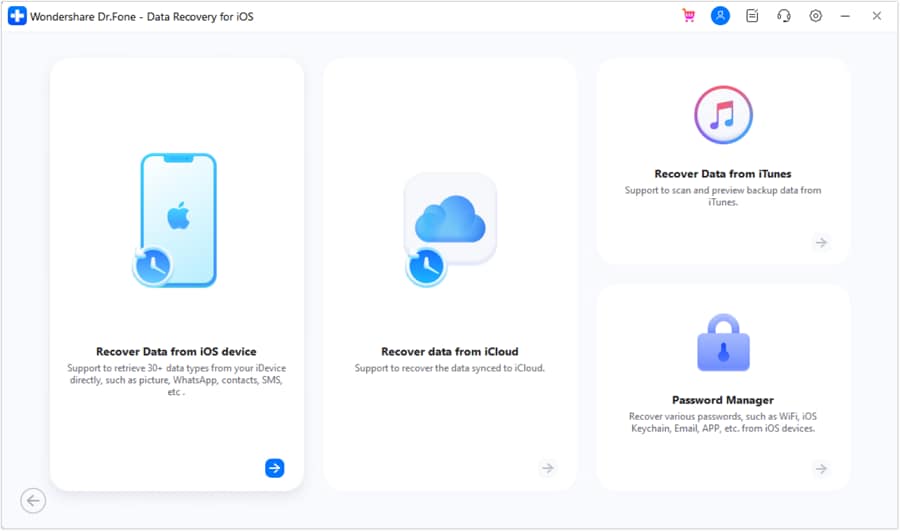
- Step 6: Connect your iPad to your computer using a data cable.
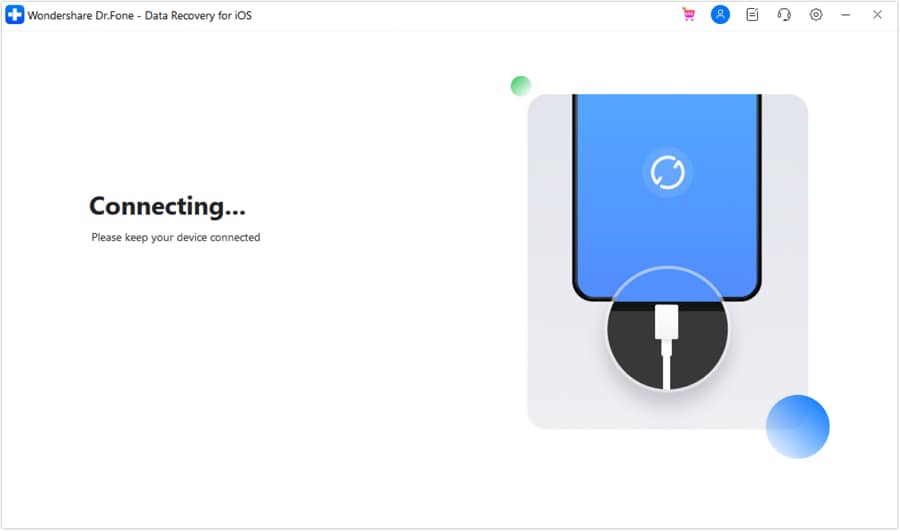
- Step 7: Check the tickbox beside Note & Attachment. And then click Start Scan.
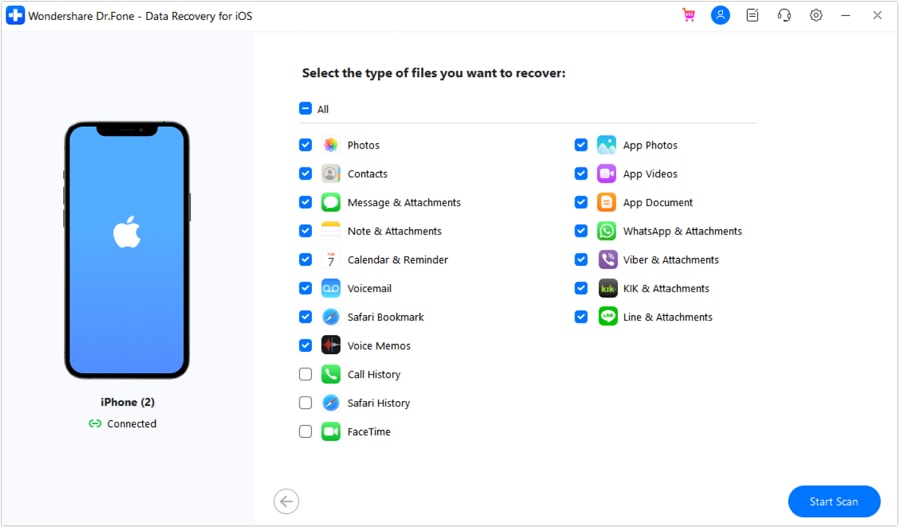
- Step 8: Wondershare Dr.Fone will then start scanning and previewing the available notes and files from your iPad. At this point, don’t interrupt the process. Wait until the quick scan is complete.
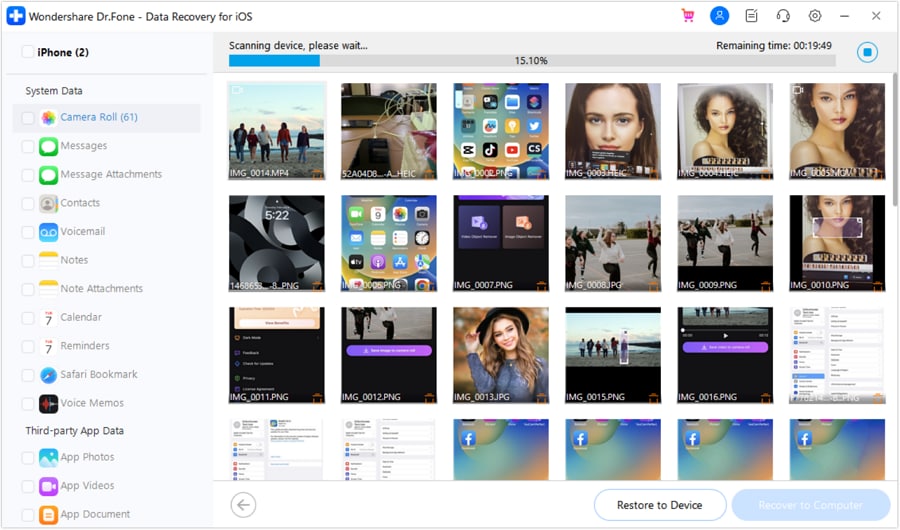
- Step 9: After the quick scan, you may now browse through the collections of files and notes that have been recovered from your iPad. Select the deleted notes you want to recover.
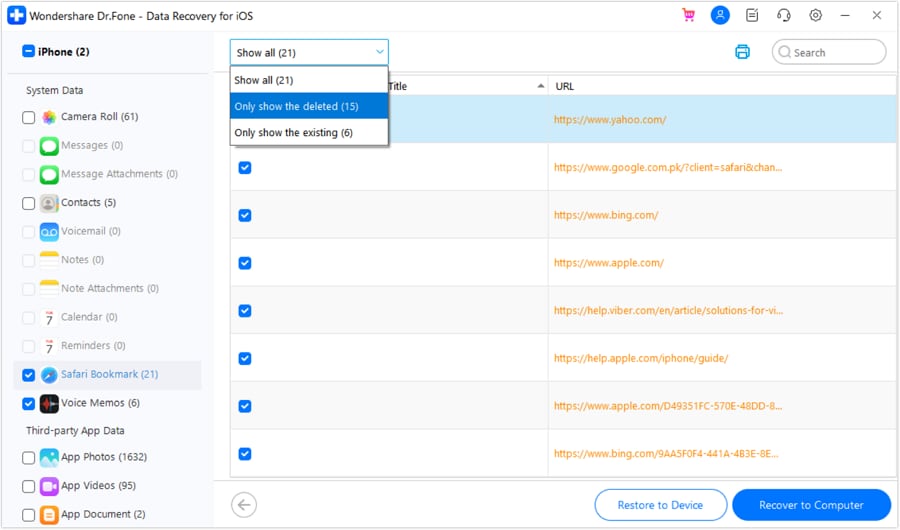
- Step 10: Click Restore to Device. Alternatively, click Recover to Computer if you wish to save it on your desktop.
- Step 11: Confirm your device and review the files you want to restore. Right after, click Continue.
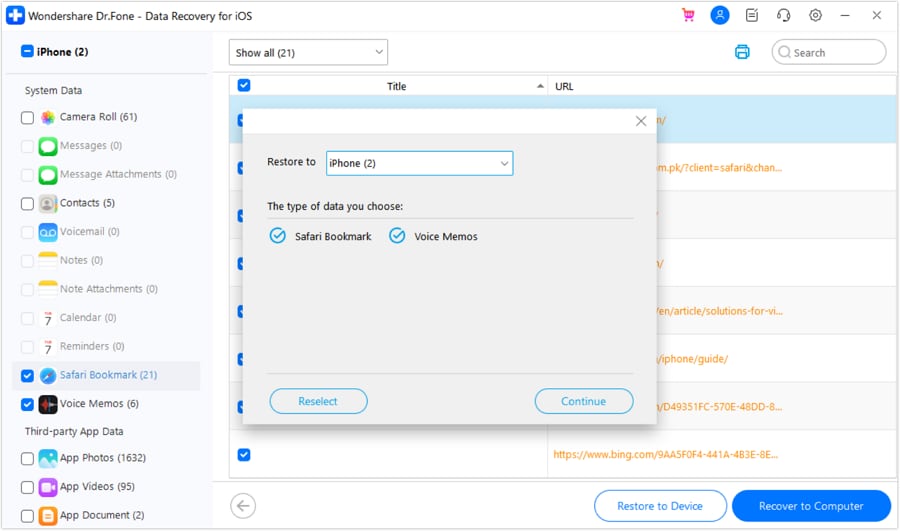
- Step 12: Disable the Find My service on your iPad to proceed/
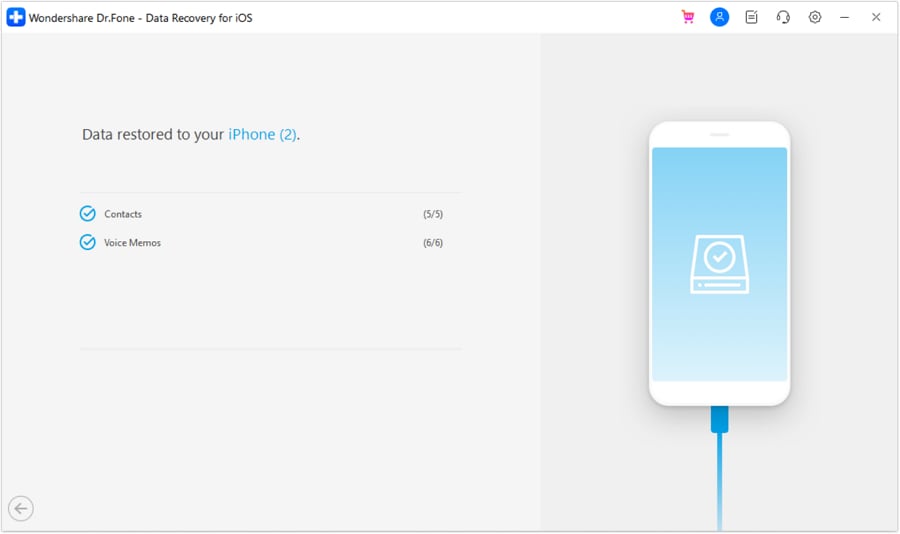
- Step 13: Once done, Wondershare Dr.Fone will prompt a notice that the procedure is successful.
Conclusion
The iPad’s Notes app often contains sensitive and important information. Thus, we should take extra caution when handling our entries. Deleting them accidentally or losing them to an unexpected iOS problem is understandable. But you should act fast to bring the notes back. Refer to the abovementioned techniques on how to recover deleted notes on iPad with or without backup. Furthermore, download Wondershare Dr.Fone on your computer for assistance. It’s an all-in mobile solution that can help you with data recovery and many other procedures.
iPad Tips
- iPad Manage
- 1. Download Movies on iPad
- 2. Download Music on iPad
- 3. Delete Duplicate Photos on iPad
- 4. Use iPad as An External Hard Drive
- 5. Delete Device Management on iPad
- 6. iPad Remote Management Software
- 7. Send Text Messages from iPad
- 8. Download WhatsApp on iPad
- 9. Change Weather Location on iPad
- iPad Backup
- 1. Ways to Restore iPad Without iTunes
- 2. Restore iPhone from iPad Backup
- 3. Backup iPhone/iPad in DFU Mode
- iPad Erase
- 1. Clear iPad data effectively
- 2. Delete Bookmarks on iPhone/iPad
- 3. Delete Browsing History on iPad
- 4. Ways to Delete Movies from iPad
- 5. Clear Cookies on iPad
- 6. Permanently Delete Emails from iPad
- 7. Wipe your iPad and Erase Everything
- 8. Clear System Data on iPad Storage
- iPad Mirror
- 1. Screen Recorders for iPad
- 2. Mirror iPad to Fire TV Stick
- 3. Screen Share Mac to iPad
- 4. Screen Mirror iPad Display
- 5. Share iPad Screen with PC
- 6. Screen Mirroring iPhone to iPad
- 7. iPad Mirror to PC without Lagging
- 8. Mirror iPad to Mac without Lagging
- iPad Recover
- 1. Recover Deleted Files on iPad
- 2. Recover Data from Broken iPad
- 3. Recover Deleted Safari Bookmarks
- 4. Recover Deleted Notes from iPad
- iPad Reset
- 1. Hard Reset/Factory Reset iPad 2
- 2. Reset iPad Air / Air 2
- 3. 5 Tactics to Reset Your iPad Mini
- 4. Factory Reset Your iPad Air/Pro
- 5. Factory Reset Your iPad 2023
- 6. Reset iPad, iPad Pro, and iPad Mini
- 7. Reset iPad Network Settings
- 8. Factory Reset iPad without Password
- iPad Tricks
- 1. Block People in Facebook on iPad
- 2. 25+ Cool Tips and Tricks on iPad
- 3. Play PC Games on iPad
- 4. Detect Spyware on iPhone
- 5. iPad Mini Jelly Scroll Issue
- 6. Fix Apple Keyboard Trackpad
- 7. iCloud Unlock without Passcode
- 8. Restore iPad from DFU Mode
- 9. Bypass Activation Lock on iPad
- 10. Photo Transfer Apps for iPad
- 11. Remove MDM from iPad Like a Pro
- 12. Reset iPad without Password
- ● Manage/transfer/recover data
- ● Unlock screen/activate/FRP lock
- ● Fix most iOS and Android issues
- Manage Now Manage Now Manage Now Manage Now


Selena Lee
chief Editor