[Solved] My iPhone Won't Restore: 5 Common Problems and How to Fix Them
Jul 18, 2024 • Filed to: Backup & Restore Data • Proven solutions
Recently I saw that many people have complained that their iPhone won't restore. Some iPhone won't restore after iOS 14 update; Some iPhone won't restore because of errors, like error 21; Some iPhone will not restore but stuck in Recovery Mode, and some people even said that iTunes couldn't recognize iPhone that is in Recovery Mode. I collected need-to-know information and viewed all the solutions, finding out that for different situations, you should apply different solutions to solve the iPhone won't restore problems.
Check out the right solutions below according to your situation!
Part 1. iPhone Won't Restore after Update
Symptom:
You updated your phone as one would, agreed to the terms and conditions, and asked the phone to connect to iTunes. But for some reason, the phone will not be recognized and continue asking you to connect to iTunes. This means that the iPhone won't restore from iTunes.
Solution:
This pesky little error happens when iTunes doesn't recognize your iPhone for some reason. This can happen if the version of iTunes you're using is outdated or anti-virus software is interfering with iTunes' capabilities to check for connected devices. No need to worry, though. Fixing this issue is as easy as ABC.
- Step 1. Update your iTunes to the latest version (Even if you don't use it for anything else).
- Step 2. Closeout any anti-virus you might be running. Trust me. Your iPhone won't give you a virus. (Remember to turn it back on again, though)
- Step 3. Start your iPhone in Recovery Mode. You might be asking what this ‘Recovery Mode' is. It's just a way for iTunes to recognize your phone a bit better. Reaching the recovery mode is easy.
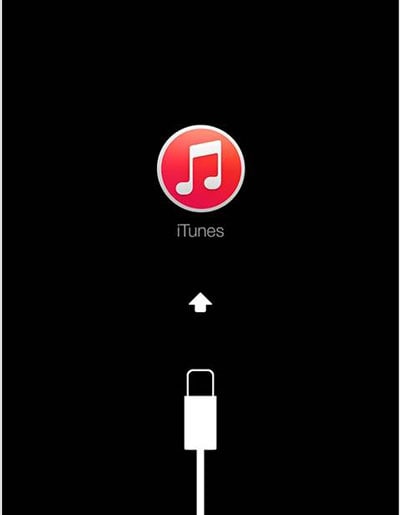
- Power down the iPhone
- Plug it via USB to your computer and hold down the home button while powering it on.
- This should bring up a ‘connect to iTunes' screen from where you should normally restore your iPhone.
Part 2. Unknown Error Occur
Symptom:
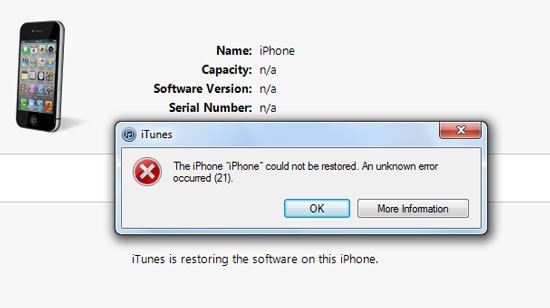
Sometimes, your iPhone likes to play dirty and not even tell you what's going wrong. It'll just give you a strange error message like error 21, error 9006, or error 3014 and leave you scratching your head.
Solution:
When an unknown error occurs, the first thing you need to do is to make clear what the error means. For example, error 21 means it's a hardware issue. And then follow the solutions Apple gives to solve the problem. Apple has given a list of errors; you can check them out. Also, you can use a tool to help you get it through. Here I'd like to share with you Dr.Fone - System Repair (iOS), professional software to fix various iPhone errors, iTunes errors, and iOS systems problems.

Dr.Fone - System Repair (iOS)
Fix iOS System Issues on Your Own
- Fixes various iOS issues like iPhone stuck on Apple logo, white screen, stuck in recovery mode, etc.
- Works smoothly with all versions of iPhone, iPad, and iPod touch.
- Retains existing phone data during the fix.
- Easy-to-follow instructions provided.
Part 3. iPhone Won't Finish Restoring from iCloud
Symptom:
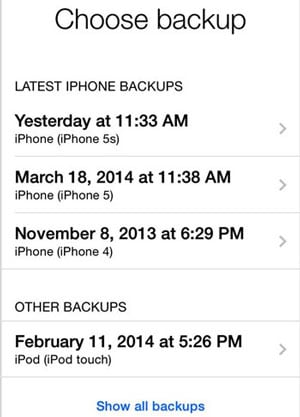
Everything seems to have worked after restoring the iPhone from iCloud. However, it still tells that it's not finished restoring under Settings > iCloud > Storage & Backup. The message said, 'This iPhone is currently being restored and will automatically back up when it is done.'
Solution:
If your iPhone won't finish restoring from iCloud, the first thing you must do is to check whether the Wi-Fi is connected correctly. Next, it is known that there is a bug in iCloud that could result in the restoration's failure. So, in this case, you should try to restore your iPhone again until it is finished.
Part 4. iPhone Won't Restore After Jailbreak
Symptom:
Try to restore a jailbroken iPhone with iTunes, only to get the message 'this device isn't eligible for the requested build.'

Solution:
If your iPhone is jailbroken, then fear not, for it is quite easy to restore it. Here's how it's done.
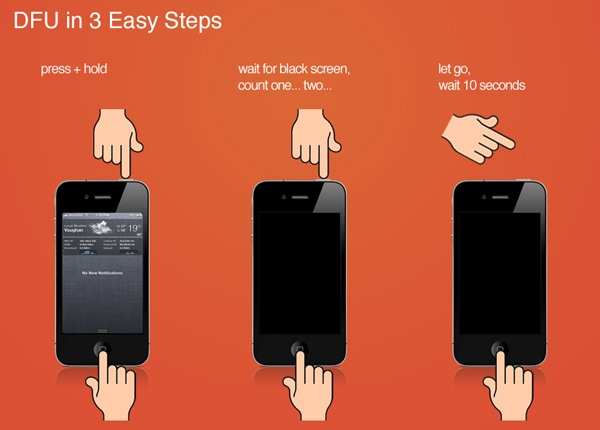
- Step 1. Put the iPhone into DFU mode.
- Hold down the Power button and Home button simultaneously for 10 seconds.
- Let go of the power button while still holding down the home button
- Hold the home button for another 10 seconds, and you have successfully opened DFU mode. Good job!
- Step 2. In the iTunes Summary window, click the Restore iPhone option.
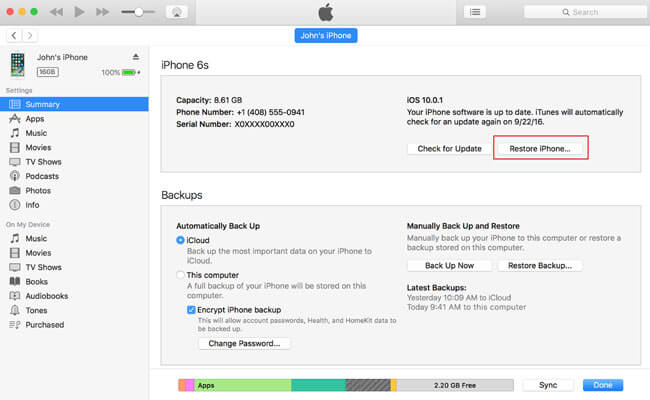
- Step 3. When the restore is finished, instead of restoring from a backup file, you're supposed to set your iPhone as a new device if you want to play it safe.
As for data left in the iTunes backup, you can try Dr.Fone - Backup & Restore (iOS) to preview and selectively restore them to your iPhone again.
Extracting and Restoring iTunes Backups to your iPhone
You went ahead and downloaded Dr.Fone to restore your iPhone. But what do you do after downloading it? It's really simple.

Dr.Fone - Backup & Restore (iOS)
World's 1st software to selectively restore iTunes backup to iPhone and iPad
- Provide three ways to restore iPhone data.
- Restore all file types like photos, video, contacts, messages, notes, etc.
- Extract and preview all content in iCloud/iTunes backup files
- Selectively restore what you want from iCloud/iTunes backup to your device.
- Compatible with the latest iPhone models.
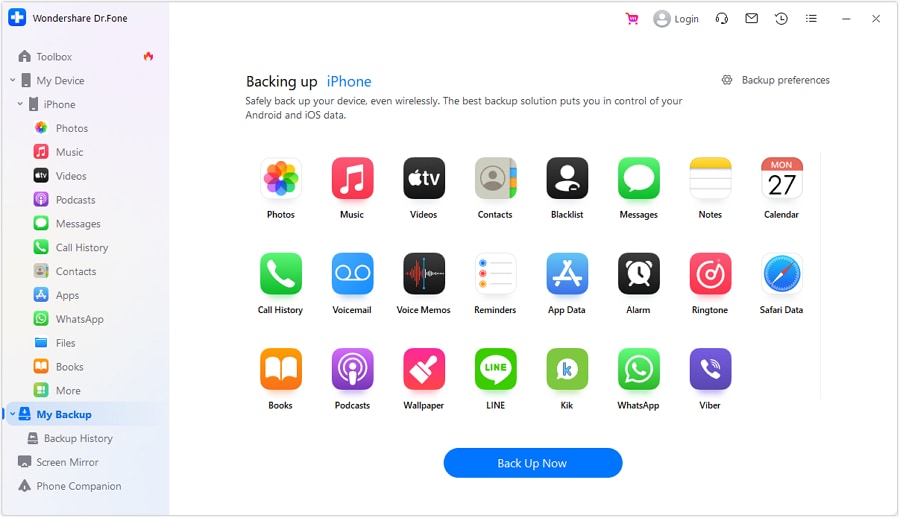
- Step 1. Run Dr.Fone and choose the "Restore" option.
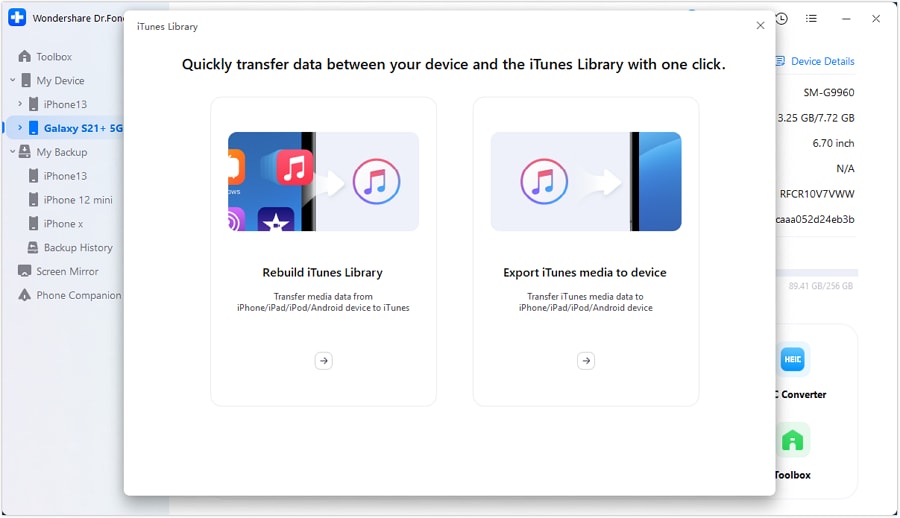
- Step 2. Select "Restore from iTunes backup" from the left blue column. Dr.Fone will then show you a list of all the iTunes backup files you have, from which you just have to select one. Click "View" or "Next".
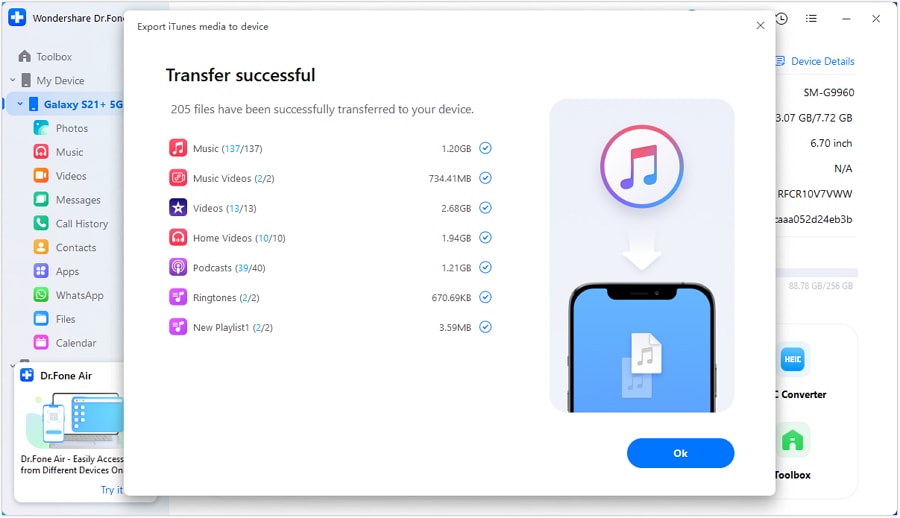
- Step 3. You can view the backup data in different file types. Select the data items and click "Restore to Device" to restore the data from the backup file to your iPhone.
Part 5. General Fix for All Kinds of iPhone Not Restoring Issues
Your iPhone might not restore properly in many different situations. But there is a way to fix all of them super easily. Dr.Fone - System Repair (iOS)! This program fixes various issues in iOS, including iPhone won't restore problems! But the most exciting part about it is that it does all this without any sort of data loss. So you can fix your device without any fear of losing your data.
You might be wondering why you'd want to use Dr.Fone's software? For a start, it's got some great features unheard of in other programs.

Dr.Fone - System Repair (iOS)
Fix all kinds of iPhone won't restore issues without losing data!
- Safe, easy and reliable.
- Fix with various iOS system issues like iPhone won't restore, stuck in recovery mode, stuck on Apple logo, black screen, looping on start, etc.
- Fix different types of iTunes errors and iPhone errors, such as error 4005, iPhone error 14, error 50, error 1009, iTunes error 27 and more.
- Only fix your iOS to normal, no data loss at all.
- Supports the latest iPhone and the latest iOS 14 fully!
Steps to fix iPhone not restoring with Dr.Fone
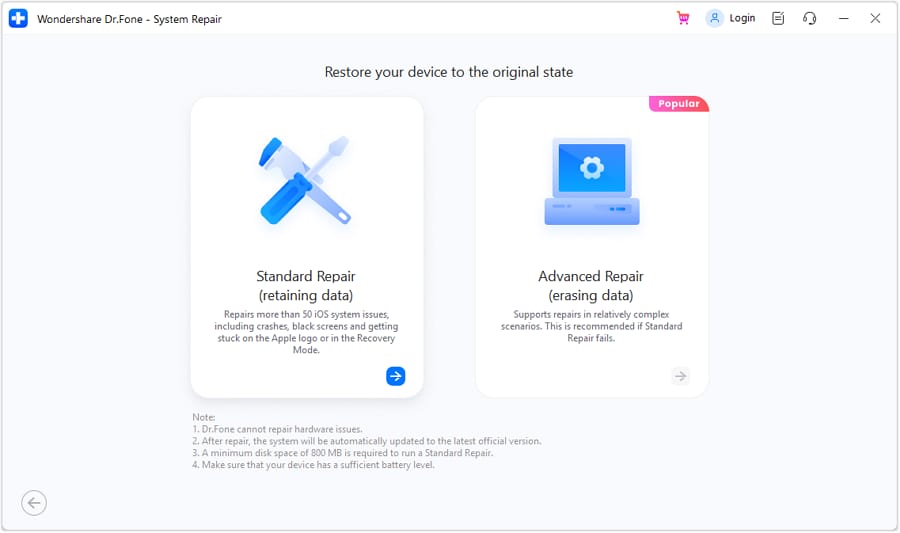
- Step 1. Select Repair feature
Select the Repair function when you open Dr.Fone. Connect your device to your computer, and Dr.Fone will then detect it. Click on "Start" to get right to fixing your iPhone.
- Step 2. Download the firmware for your iPhone
Dr.Fone will detect the connected device and offer you the latest version of iOS compatible with it. Click on ‘Download' and wait for the download process to complete.

- Step 3. Wait for the program to work its magic
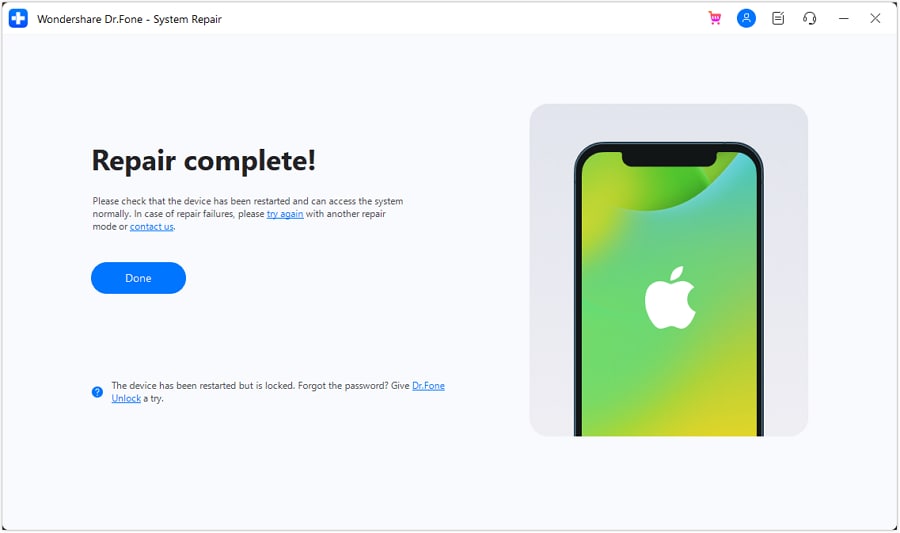
Dr.Fone will then go ahead and fix any issues that prevent your iPhone from restoring. Within minutes, you should have a device that works as it should normally. This entire process of fixing the iPhone won't restore problems takes less than 10 minutes. So you can just go and grab a cup of coffee as your phone's being repaired.
Conclusion
It's quite annoying when your iPhone won't restore. But as we saw, it's super easy to fix with a few simple steps and with the help of tools like Dr.Fone - System Repair. With tools like this one, worrying about errors such as iPhone won't restore errors becomes a thing of the past.
If you have any other good ideas or suggestions, just feel free to leave your comments below. We are just here to reply to you in 24 hours. Enjoy your iPhone restore process!
You Might Also Like
iPhone Backup
- iPhone Data Backup
- 1. Back up iPhone in Recovery Mode
- 2. Back Up iPhone With/Without iTunes
- 3. Back up iPhone to Mac
- 4. Back up iPhone/iPad to Computer
- 5. Back up iPhone to Mac Catalina
- 6. Back up Jailbreak Apps And Restore
- 7. iPhone Backup Software
- 8. Back up iPhone/iPad Easily
- 9. Back up iPhone/iPad in DFU Mode
- 10. Back up iPhone Apps and App Data
- 11. Back up Notes on iPhone and iPad
- 12. Back up iOS to External Hard Drive
- 13. Export Notes from iPhone to PC/Mac
- 14.Back up iPhone Photos to Google Photos
- 15. Back Up Your iPhone Voicemails
- 16. Back Up to External Drive
- 17.How to Back Up to NAS
- 18.Back Up iPhone With Broken Screen
- 19.Back Up iPhone to Google Drive
- 20.Buy Used iPhones
- 21.Sell Used Phone for Cash
- 22.Sell Used iPhone for Dollar
- 23.How Much is My iPhone Worth
- iPhone Data Recovery
- 1. Recover iPhone Data Without Backup
- 2. Restore Calendar on iPhone
- 3. Recover Call History on iPhone
- 4. Recover iPhone Lost Data
- 5. Restore iPhone in Recovery Mode
- 6. Undelete iPhone Backup Files
- 7. Recover Deleted iPhone Messages
- iPhone Data Restore
- 1. Restore iPhone from iTunes Backup
- 2. Restore iPhone after Downgrade
- 3. Restore iPhone from Backup
- 4. Restore iPhone from iPad Backup
- 5. Restore iPhone from DFU Mode
- 6. Restore iPhone Deleted Text Message
- iPhone Backup Problems
- 1. Find iPhone Backup Location on Mac
- 2. iPhone Backup Password Never Set
- 3. iPhone Backup Password Forget
- 4. iCloud Backup Taking Forever
- 5. iPhone Won't Backup to iCloud
- 6. iTunes Won't Backup iPhone
- iPhone Restore Problems
- 1. iTunes Stuck on Verifying iPhone
- 2. Not Space to Restore iPhone Backup
- 3. iTunes Backup Not Restoring
- 4. iPhone Won't Restore
- WhatsApp Backup & Restore
- 1. WhatsApp from Google Drive to iOS
- 2. Restore Old WhatsApp Backup
- 3. Restore WhatsApp Chat on iPhone
- 4. Retrieve WhatsApp Chat History
- 5. See Deleted Messages on WhatsApp
- 6. Restore WhatsApp Stuck on iPhone
- 7. iPhone WhatsApp to Google Drive
- 8. Back Up WhatsApp on iPhone
- 9. Backup WhatsApp Data before Changing Number
- iPhone Backup Tips
- 1. Extract Data From iPhone
- 2. Encrypt iPhone Backup
- 3. Reset iPhone Backup Password
- 4. Extract iPhone Backup in Win 10
- 5. How Long take iPhone to Backup
- 6. Find iPhone Backup Location
- 7. iPhone Backup Password
- 8. View iPhone Backup on Computer
- 9. iPhone Backup with iTunes/iCloud
- 10. iPhone Backup Unlockers
- 11.How To Encrypt iPhone Backup
- 12. Best Backup Chargers for iPhone
- 13. Speed Up Your iPhone Backups
- 14. Save Data When iPhone Disabled
- 15.Check Last Backup on iPhone
- ● Manage/transfer/recover data
- ● Unlock screen/activate/FRP lock
- ● Fix most iOS and Android issues
- Back up Now Back up Now Back up Now


Selena Lee
chief Editor