How to Sync iPhone with Multiple Computers without Losing Data
Jul 12, 2024 • Filed to: Manage Device Data • Proven solutions
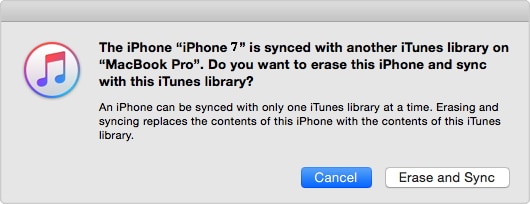
Having two or more than 2 computers can surely be an exciting experience, but if you are an Apple iPhone user, then this excitement will soon fade away when you try to sync your device with these 2 different PCs. Apple does not allow the users to sync their iOS devices to iTunes library on multiple computers. In case if you try to do so, a popup window opens to warn you that the iPhone is synced with another iTunes library and an attempt to sync to the new library will erase the existing data. So if you are also facing a similar problem and having the dilemma on can I sync my iPhone to more than one computer, this article will be of great help.
Part 1. Sync iPhone with Multiple Computers with Dr.Fone
Dr.Fone - Phone Manager (iOS) is professional software from Wondershare that facilitates transferring files between iOS devices, computers, and iTunes. The software enables you to sync your iPhone to multiple iTunes libraries on different computers. With Dr.Fone - Phone Manager (iOS), the process is not only quick and easy but also without any worries as existing data on your iPhone is not erased during the sync procedure. Using this amazing software, you can sync music, videos, playlists, apps, and other content from your iPhone to multiple computers. Stuck in a situation on how to sync my iPhone with two computers, read below to get the best solution.

Dr.Fone - Phone Manager (iOS)
Transfer MP3 to iPhone/iPad/iPod without iTunes
- Transfer, manage, export/import your music, photos, videos, contacts, SMS, Apps, etc.
- Backup your music, photos, videos, contacts, SMS, Apps, etc. to computer and restore them easily.
- Transfer music, photos, videos, contacts, messages, etc from one smartphone to another.
- Transfer media files between iOS devices and iTunes.
- Fully compatible with iOS 7, iOS 8, iOS 9, iOS 10, iOS 11 and iPod.
Steps to Sync iPhone with Multiple Computers with Dr.Fone - Phone Manager (iOS)
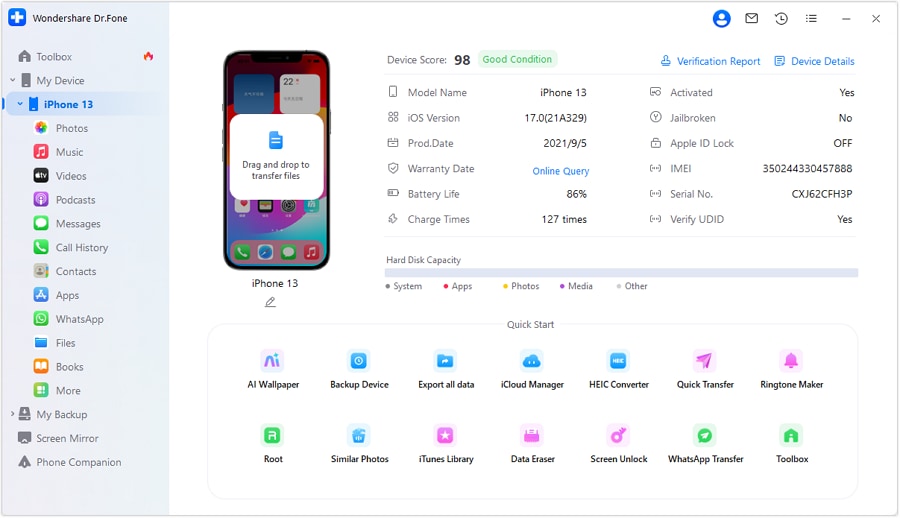
Step 1. Download, install, and launch Dr.Fone on your new PC. Choose "Phone Manager" from all functions, and connect your iPhone to the new PC.
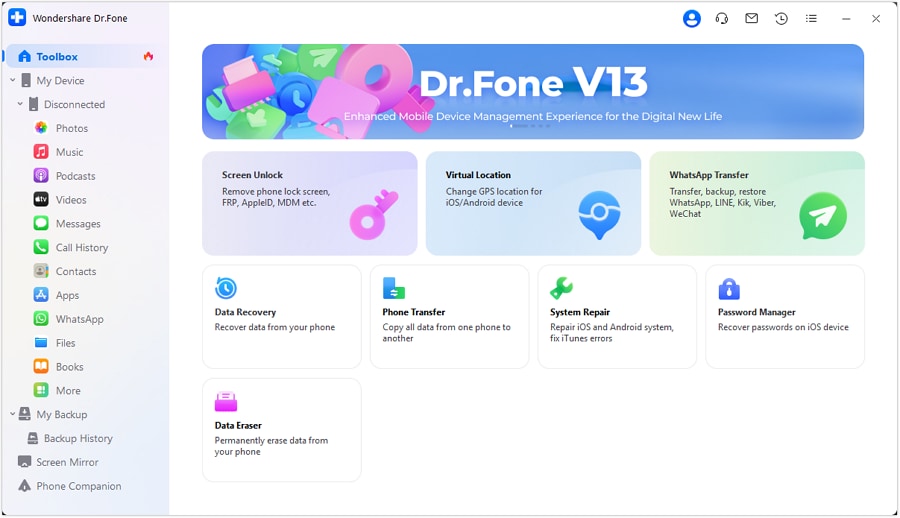
Step 2. From the main software interface, click Transfer Device Media to the iTunes option. A new popup window will open from where click Start and the scanning of media files on your device will be done.
Step 3. On the next page, Dr.Fone will display the list of exclusive media files that are not present on the iTunes library. Select the type of media files that you wish to transfer to iTunes library and click Start at the bottom right corner. (By default, all items are checked) to start the process. Once the files are transferred and the process completes, click OK.

Step 4. Now all your media files of your iPhone are present in your iTunes library of your new PC. The next step is to transfer the files from iTunes to the iPhone. On the main Dr.Fone software, click on Transfer iTunes Media to Device. A pop-up window will appear to show the list of files on iTunes. Select the ones that you want to sync and click on Transfer at the bottom-right corner.

With the above steps, you can successfully sync iPhone to multiple computers.
Part 2. Sync iPhone with Multiple Computers with iTunes
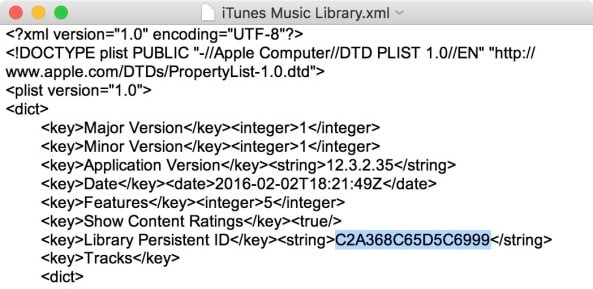
If you are too possessive about your iPhone and do not want to experiment with any new software for syncing needs, then iTunes can also be used to sync the iPhone with multiple computers. Though at first instance, this may sound against the working of iTunes, in reality, it can be done by tricking your iPhone. While connecting your iPhone to the new computer, you can trick it in a way so that it thinks that it is connected to the same old library. Understanding deeply, iTunes library which is linked to your iPhone or other iOS devices is recognized by Apple based on Library Persistent ID key which is hidden on your PC/Mac. If you can copy and paste this key between multiple computers, you can track your iPhone by making it think that it is connected to it’s originally iTunes library. Thus using iTunes as well, you can sync the iPhone to multiple computers.
Steps to Sync iPhone with Multiple Computers with iTunes
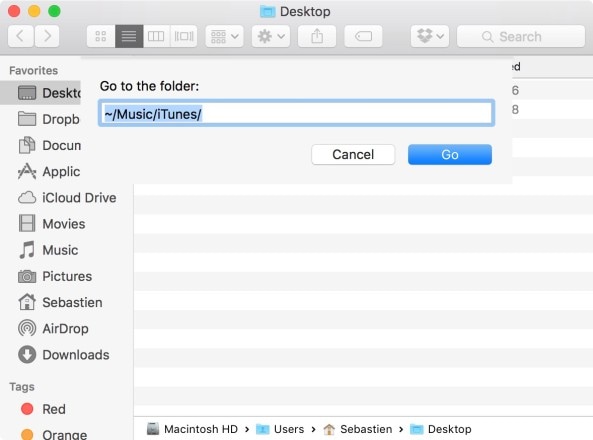
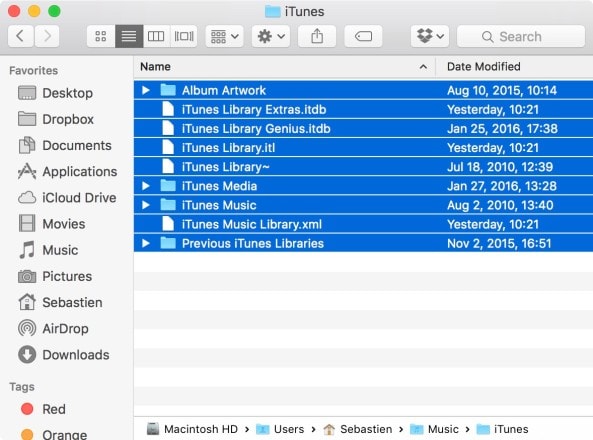
Step 1. Open the new Finder window on the Mac system that you use to sync your iPhone normally, and then from the top menu bar, navigate to Go and select “Go to the folder:” option from the drop-down menu. Once the text prompt opens, type “~/Music/iTunes” and then click on Go.
Step 2. A list of files will be shown and from this list, you need to backup .itdb, .itl and .xml files along with the “Previous iTunes Libraries” folder.
Note: Though the selected files are needed for the process from the given list, it is recommended to backup all the files so that you have a copy of these files if anything goes wrong.
Step 3. Open the file “iTunes Music Library.xml” with TextEdit and search for the Library Persistent ID, which is a 16 character string, and copy it. Make sure not to change anything in the file.
Step 4. Now open the new/secondary Mac system with which you wish to sync your iPhone. Repeat the above 1- 3 steps on the new Mac. Ensure that iTunes is closed on this system.
Step 5. Now on the new/secondary Mac system delete all the files with .itl in the folder “Previous iTunes Libraries”. If you do not find this folder in your system, skip this point.
Step 6. Open “iTunes Music Library.xml” on a new/secondary Mac system with TextEdit and find the Library Persistent ID. Here the ID on the new/secondary Mac system needs to be replaced with the ID string that was copied from the original or first system. Replace the ID that was received in step 3 and save the file.
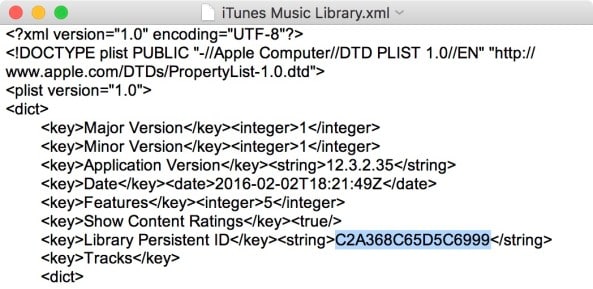
Step 7. On the new/secondary Mac system, open “ iTunes Library.itl” with TextEdit and all the contents in this file needs to be deleted. Save the file.

Step 8. Now launch iTunes on a new/secondary Mac system. An error - The files “iTunes Library.itl” does not appear to be a valid iTunes library file. iTunes has attempted to recover your iTunes library and renamed this file to “iTunes Library (Damaged)”.” will appear. Ignore the error and click “OK”. Connect iPhone to Mac and you can sync it with iTunes library on this system.
Once the above steps are completed, you would be able to sync the iPhone with two computers without erasing any existing content.
So whenever someone asks you if you can sync an iPhone to two computers, you can confidently say Yes.
iPhone Transfer
- Data Transfer
- 1. Video from iPhone to External Drive
- 2. Transfer MP4 to iPhone
- 3. Put Wallpapers on iPhone
- 4. Move Photos to SD Card
- 5. Best Apps to Transfer from iPhone to Android
- iPhone to PC
- 1. Transfer Pictures From iPhone to PC
- 2. Transfer From iPhone to Computer
- 3. Transfer Album from iPhone to PC
- 4. Transfer Data from iPhone to PC
- 5. Copy Voice Memo from iPhone to PC
- 6. iPhone Camera Roll to Computer
- 7. Podcasts from iPhone to Computer
- 8. Transfer Notes from iPhone
- 9. Techniques Used in Mobile Phone Forensics
- iPhone to Mac
- 1. Voice memos from iPhone to Mac
- 2. Synce Notes from iPhone to Mac
- 3. Export iBooks to PC and Mac
- 4. Transfer Photos from iPhone to Mac
- 5. Transfer Music from iPhone to Mac
- Computer to iPhone
- 1. AirDrop From Mac to iPhone
- 2. Use AirDrop from Mac to iPhone
- 3. Transfer Data from PC to iPhone
- 4. Transfer Videos from PC to iPhone
- 5. Unsync iPhone from Computer
- 6. Sync iPhone with Multiple Computers
- Transfer to iPhone
- 1. Switch Cards Between iPhones
- 2. Facetime for Android to iPhone
- 3. Transfer Data from Motorola to iPhone
- 4. Samsung to iPhone Transfer
- 5. Transfer iPhone Apps to iPhone
- 6. Clone iPhone/iPad to iPhone
- Transfer from iPhone
- 1. Transfer Video from iPhone to Laptop
- 2. Transfer Data from iPhone to Laptop
- 3. Transfer Notes from iPhone to iPad
- 4. Transfer Data from iPhone to Android
- 5. Switch from iPhone to Google Pixel
- 6. Switch from iPhone to Samsung S10
- 7. Switch from iPhone to Samsung
- 8. Transfer from iPhone to Samsung S20
- iPhone Transfer Tips
- 1. Ford Sync iPhone
- 2. Sync iCal with iPhone
- 3. iPhone Calendar Not Syncing
- 4. iPhone Transfer Software
- WhatsApp Transfer
- 1. WhatsApp from iPhone to iPhone
- 2. WhatsApp from iPhone to Android
- 3. WhatsApp from iPhone to Samsung S10
- 4. WhatsApp Messages to iPhone
- 5. WhatsApp from iPhone to Samsung S9
- iTunes Transfer
- ● Manage/transfer/recover data
- ● Unlock screen/activate/FRP lock
- ● Fix most iOS and Android issues
- Transfer Now Transfer Now Transfer Now


James Davis
staff Editor