How to Downgrade From iOS 15/17 to iOS 14/16
Jul 12, 2024 • Filed to: Mobile Repair Solutions • Proven solutions
We have often noticed that many users may want to downgrade to iOS 16 or older versions for various reasons when updated to iOS 17. For example, the apps stop working, Wi-Fi gets broken, or poor battery life. This causes a lot of difficulties for me.
Some of the negative effects of iOS 15 are camera problems, the finder may be unresponsible, there may be issues with car play connectivity, files may quit unexpectedly. There may be issues with finding the network, there can be problems with the home screen widget, and the SharePlay message can be unavailable.
But in this article, we will help you solve all the above problems easily. We will show you how to downgrade from iOS 15/17 to iOS 14/16 successfully. So let us get started.
Part 1: What should we do before downgrading?
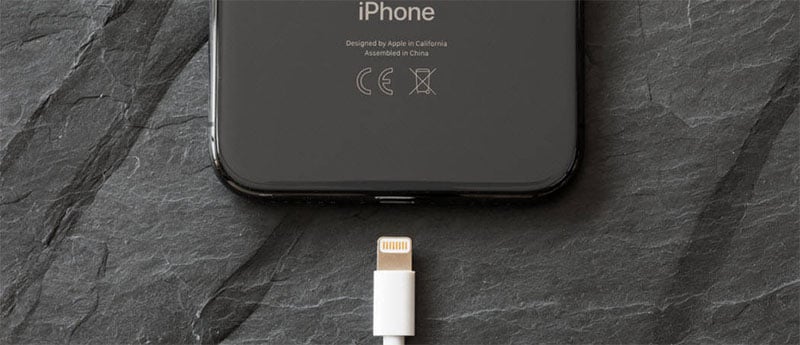
1. Charge your iPhone
Make sure your iPhone is fully charged before downgrading as this process may take some time, and your phone may get discharged.
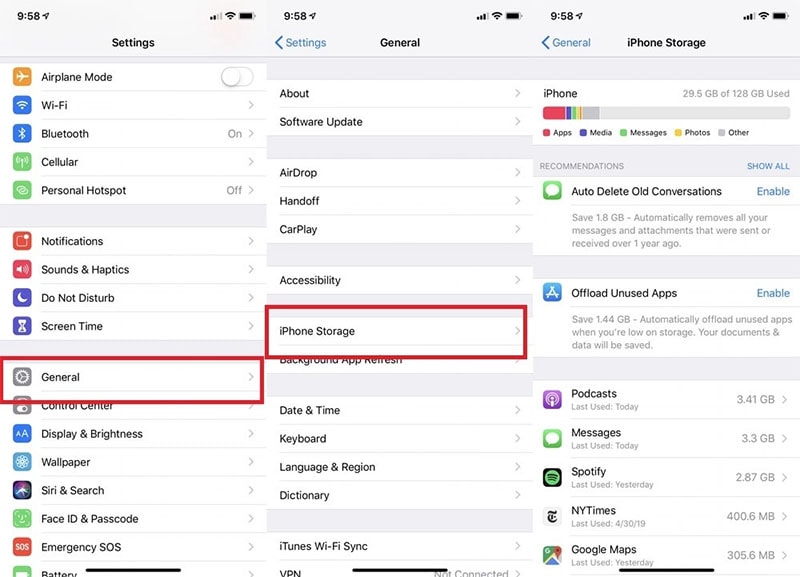
2. Check your iPhone's available storage space
As we all know, downgrading or upgrading iOS requires enough storage. It would help if you had enough free storage to download different features.
3. Back up your data
It is important to back up your data to prevent losing any crucial data during the process, so please remember to back up your iPhone or iPad data with iTunes or iCloud. Of course, you can also ask for help from a 3rd-party program. And if you are tired of finding the best solution to back up your data, Wondershare Dr.Fone can surely help for its flexible nature. It is compatible and offers you selective backup and restore options.

Part 2: How to downgrade from iOS 15/17 to iOS 14/16?
Here are the steps along with advantages and disadvantages:
1. Downgrade iOS with iTunes
You can easily downgrade your iOS 15/17 with iTunes or downgrade iOS without iTunes. Since with the use of the iTunes app, you can install downloaded firmware files on your devices, so this feature allows you to install an older version of iOS firmware on your phone. So, you can downgrade your phone to your preferred version. If you wonder how to downgrade iOS 15/17 with iTunes, you will find all the information here.
Here are the steps:
Step 1: First of all, you need to visit the IPSW website in order to search for the firmware that best matches your iOS device model. Please select the firmware version that you wish in your device to be downgraded. Download it now.

Step 2: On your PC now, open "iTunes" app. After that, take your iOS device and using the lightening cable, connect it with the PC.
Step 3: Now, in the iTunes interface, simply hit the "Restore iPhone" button and hold the shift button on your keyboard. For Mac users, you need to use the Option key to hold it while clicking the "Restore iPhone" button.
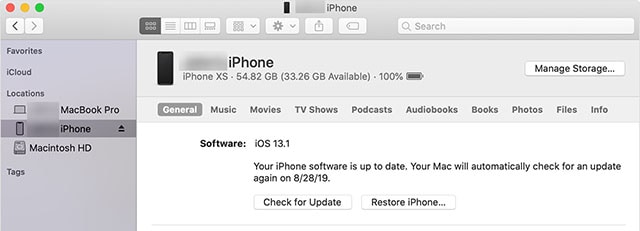
Step 4: Finally, navigate to the place where you have downloaded the IPSW firmware and choose it. It is ready to be installed on your device. When you see that the firmware is installed, your iOS device will be downgraded.
But the downside of downgrading iOS 15/17 with iTunes is that all your data stored on your device will be deleted. Besides, the firmware that you wish to install should be signed by Apple. It is not possible to install non-signed firmware on your iPad or iPhone.
So, if you are wondering how to downgrade iOS 15/iOS17 without iTunes, then here are the steps:
2. Downgrade iOS Without iTunes
Step 1: Disable "Find My iPhone"
For this, you simply need to head to the iPhone "Settings," followed by the name at the top of the screen. Look for the "Find My" option and select "Find My iPhone. Enter the Apple ID and password when asked and turn off the Find My iPhone feature.

Step 2: Download the Right Restore Image
You can download the right restore image for the older that you are willing to downgrade to and for your phone model.
Step 3: Connect your iOS device with your computer
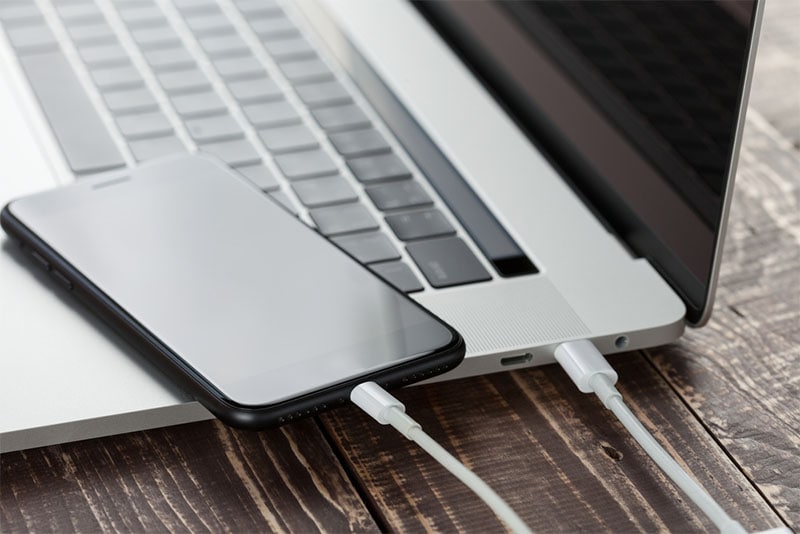
After the download is done, get your iOS device connected with your PC via a USB cable.
Step 4: Open finder now
Suppose you are using macOS10.15 or later or macOS Big Sur 11.0 or later. If it does not open automatically on your iOS device, you may open the finder app. Now on the name of your iOS device under “Locations” which is in the sidebar.
Step 5: The next step is to trust the computer
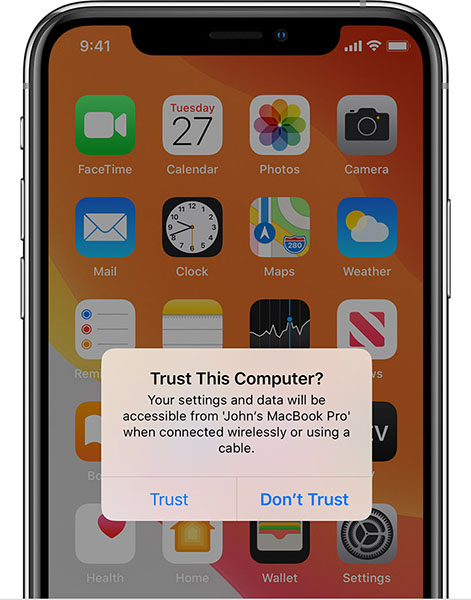
Once you click on your iOS device, you need to Trust your PC. For this, you will see a pop-up on your iPhone asking you to trust. Tap on “Trust” and enter the passcode. This step is important. Otherwise, you won't be able to get things done right.
Step 6: Install the older iOS version.
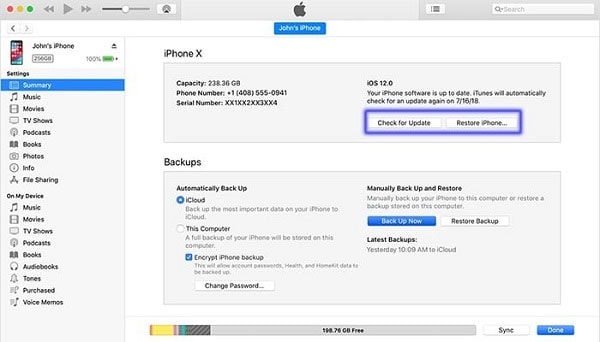
Before you downgrade, you need to make sure if you are on the "General" screen. Now, simply hold down the “Option”/“Shift” key and select "Check for Update" or "Restore iPhone."
Please note:
- If you choose the former option, i.e., "Check for Update," there will be no impact on your data during the downgrade process. However, the problems may occur later as the downgraded version may show some complexity with the features in iPhone.
- If you choose the latter option, this will begin the downgrading process from very scratch. You will need to restore your device with iCloud backup later.
Once you decide which option to choose, you will get a pop-up. Here, click on the restore image to complete the process.
If you are thinking about downgrading from iOS 15/17 without losing data, here is the solution.
3. Use Wondershare Dr.Fone - Sysem Repair to downgrade iOS in a few clicks
Another convenient way to downgrade your device in a few clicks is to use wondershare Dr.Fone - System Repair (iOS). This tool can fix a wide range of issues like white screen, restore iPhone in recovery mode, fixing other iOS issues; it will not erase any data while repairing the iOS system issues. The various benefits of it are:
- It fixes your iOS back to normal in simple steps.
- No need to use iTunes if you want to downgrade the iOS version.
- Great compatibility with all iOS models and versions.
- Fixes all the major and minor iOS issues like stuck in Apple logo, black or white screen of death, etc.
This is how you can use Dr.Fone - System Repair (iOS) to downgrade iOS 15 to 14 or downgrade iOS 17 to 16.
Note: Please check on https://ipsw.me/product/iPhone to make sure the compatible firmware is available before downgrading.
Step 1: Install and launch
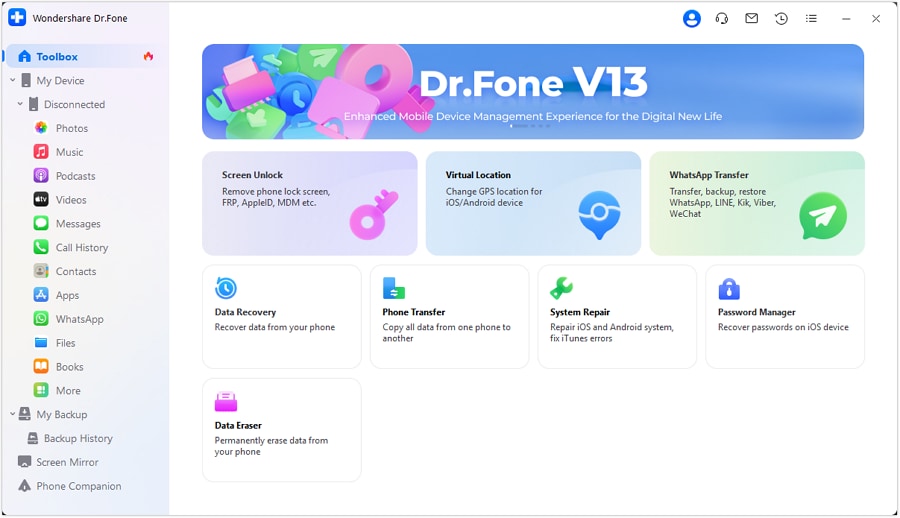
Firstly, download the tool via clicking "Start Download" button and launch it once installed completely. Now, choose "System Repair" from the main window. And then click "iPhone" > "iOS Upgrade/Downgrade".
Step 2: Connect device
After that, connect your iPhone, iPad, or iPod touch to your computer with its lightning cable. When Dr. Fone notices your iOS device, you can see two options: Upgrade iOS and Downgrade iOS.
The Upgrade iOS assists you upgrade to official iOS version with ease without the fear of data loss. However, with the Downgrade iOS can help you downgrade iOS. In order to get the downgrading thing done, we will opt for the second one.
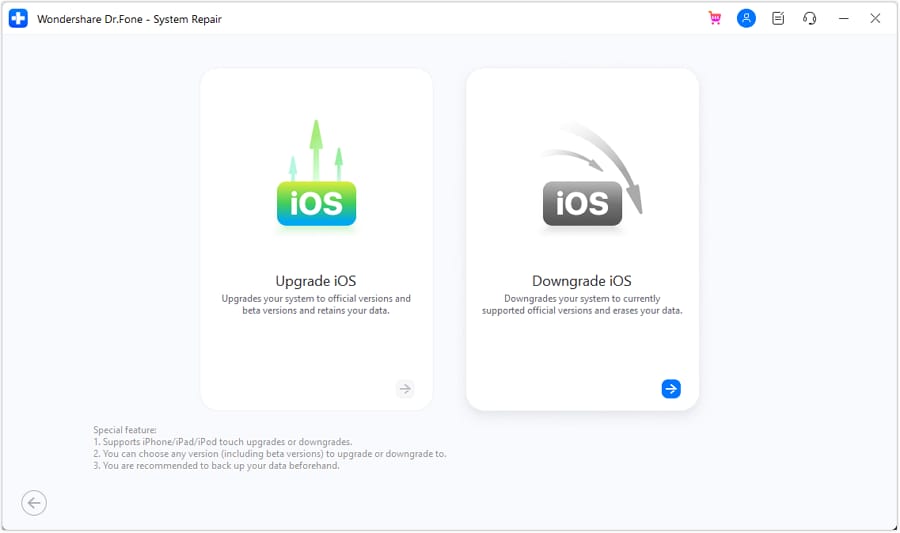
Step 3: Start the process
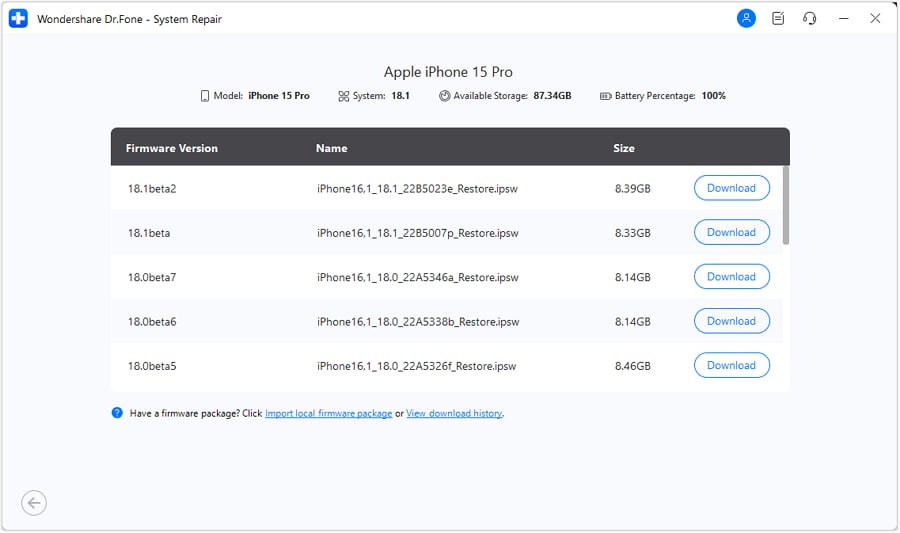
You will see the device info on the PC screen. Simpl verify it. To downgrade your device's iOS from 15 to 14, you need to select the desired firmware package version and hit on the "Download" button to move forward.
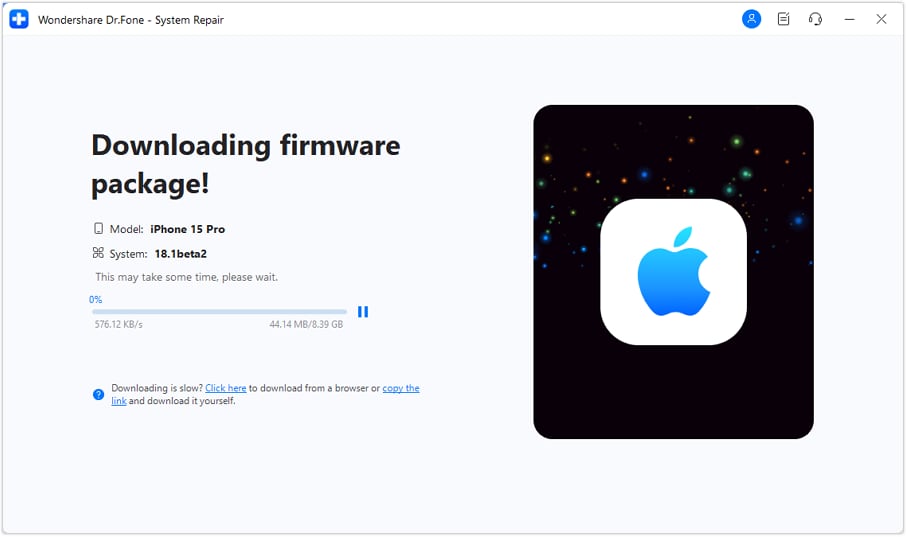
Step 4: Start downloading iOS firmware
Within a short while, it will begin to download the firmware package you selected. Please keep the device connected during the whole process.
Step 5: Firmware verifying
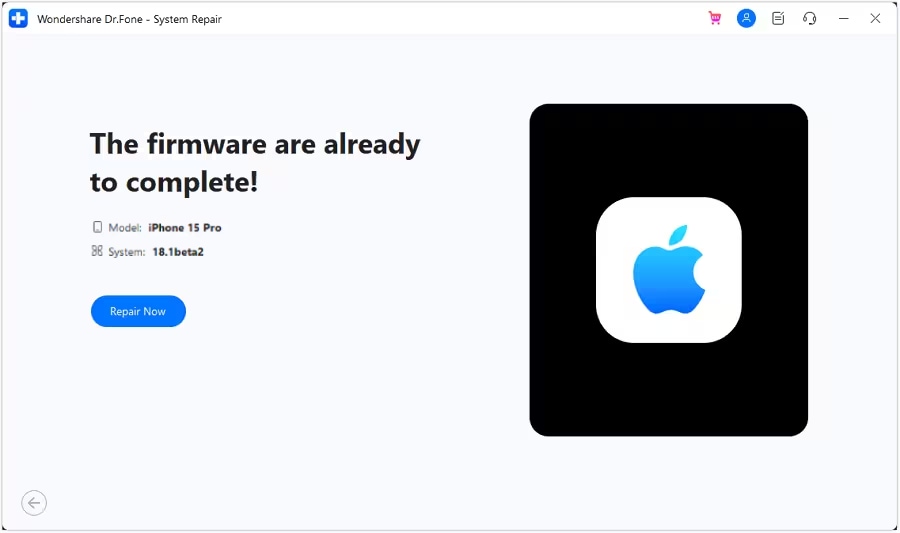
Now the program will begin to verify the firmware.

Once it is verified, click on "Repair Now". This way, along with downgrading the iOS, the tool will be fixing the glitches, if any making your device better than before.
Part 3: Downgrade or upgrade?
We know the level of excitement about the latest iOS firmware that you have. However, there are chances that the latest iOS version might not be as stable as iOS 14 or iOS 16. And apparently, the dilemma of whether to downgrade or upgrade is eating you up. So, here is a list of pros and cons for downgrading your iOS 15 to iOS 14 or downgrade iOS 17 to iOS 16.
Pros:
- iOS 14 or iOS 16 is definitely more stable than the latest one.
- You won't have to experience any software glitches that might occur in the latest iOS.
Cons:
- You may lose data if your device is not backed up.
- You will not be able to make use of the latest features of iOS 17.
- Using an older version of iOS is not always fun.
- Getting used to the new iOS 17 interface might be slightly uncomfortable.
The Bottom Line
Therefore, we can conclude that there are various tools and ways through which you can downgrade your iOS 15/17 to iOS 14/16. But some methods are complicated to use for any non-technical person. At the same time, there are both pros and cons of downgrading iOS 15/17 with or without iTunes. For example, there can be data loss, or your device may be incompatible with many features.
If you want to downgrade your device without any issues and with simple clicks, then wondershare Dr.Fone - System Repair (iOS) is highly recommended where you can conveniently downgrade your iOS 15/17 with just a few clicks. Besides, it can fix issues in standard mode, advanced mode, with many other benefits.
Upgrade & Downgrade
- iOS Beta Install
- 1. Download iOS Beta Profile
- 2. Download the iOS 13 Beta
- 3. iOS 16 Beta Download
- 4. Uninstall iOS Beta
- 5. Install iPhone Beta Profile
- 6. Install Mac Beta Profile
- 7. Install iOS 15 Beta Profile
- 8. Upgrade iPad to iOS 14
- iOS News
- 1. Update iPhone 4s to iOS 9
- 2. Cheaper iPhone
- 3. Customize iPhone Home Screen
- 4. Know About iOS 15 Lock Screen
- 5. Add Lyrics to Song on Apple Music
- iPhone Downgrade Tips
- 1. Downgrade iOS Like a Pro
- 2. Roll Back to an Older iOS Version
- 3. Downgrade to iOS 15
- 4. Install Developer Profile
- 5. Downgrade iOS without iTunes
- 6. Downgrade to iOS 14
- 7. Download and Install the iOS 16
- iPhone Update Tips
- 1. iPhone & iPad Security Updates
- 2. Undo an Update on iPhone
- 3. Update iPhone with/without iTunes
- 4. Fix iPhone Checking for Update Stuck
- 5. Fix iPad Software Update Failed
- 6. Fix iPhone Stuck On Update
- 7. Fix iPhone Won't Update
- 8. Fix Update Server Not Be Contacted
- 9. Fix iPhone Stuck on Update Requested
- 10. Resolve iPhone Cellular
- 11. Resolve iPhone Error 1110
- 12. Fix iPhone Frozen
- iOS 11/12 Problems
- 1. Fix iPhone Stuck on Waiting
- 2. Fix iPhone Can't Make Calls
- 3. Fix iPhone Stuck on Logo
- 4. Fix Photos Disappeared from iPhone
- 5. Fix iPhone Keeps Freezing
- iOS 13 Problems
- 1. Fix CarPlay Not Connecting
- 2. Fix Resolve Apps Won't Open
- 3. Fix Song/Playlist Missing
- 4. Fix iPhone Asking for Passcode
- iOS 14 Problems
- 1. Fix Map Voice Navigation Won't Work
- 2. Fix iMessage Not Working
- 3. Recover Deleted Data on iOS 14
- 4. Recover Disappeared Notes on iOS 14
- iOS 15 Problems
- iOS 16 Problems
- 1. Fix iPhone Wi-Fi Not Working
- 2. Fix iOS 16 Battery Drain Issues
- 3. Fix Screen Mirroring Not Working
- 4. Fix Apple CarPlay is Not Supported
- 5. Fix iPhone Screen Not Responding
- 6. Fix iPhone Apps Keep Crashing
- 7. Fix Call Failed iPhone Issue
- 8. Fix iPhone Stuck On Apple Logo
- 9. Counter iPhone Heating Problems
- 10. Fix iPhone Stuck in Boot Loop
- 11. Fix iPhone Bluetooth Not Working
- iOS 17 Problems
- 1. iPhone Freezing After Update
- 2. iOS 17 Wallpapers Blurry at Top
- 3. Fix iPhone Charging Slow
- 4. Enable Live Activities iOS 17
- 5. Fix iOS 17 Apps Crashing
- 6. Fix iPhone Stuck on Verifying Update
- 7. Overheating after 17 Update
- 8. Fix iOS 17 Keyboard Bug
- 9. Fix iOS 17 Green Screen Issue
- 10. iOS 17 Bugs & Fixes
- 11. No iOS 17 Update on Your iPhone
- 12. iOS 17 Unable to Download
- 13. Missing contacts with iOS 17 update


Daisy Raines
staff Editor
Generally rated4.5(105participated)