How to customize your iPhone home screen in iOS 14
Jul 18, 2024 • Filed to: Latest News & Tactics • Proven solutions
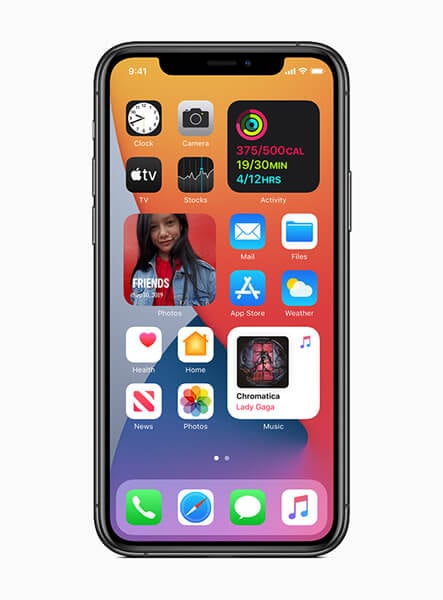
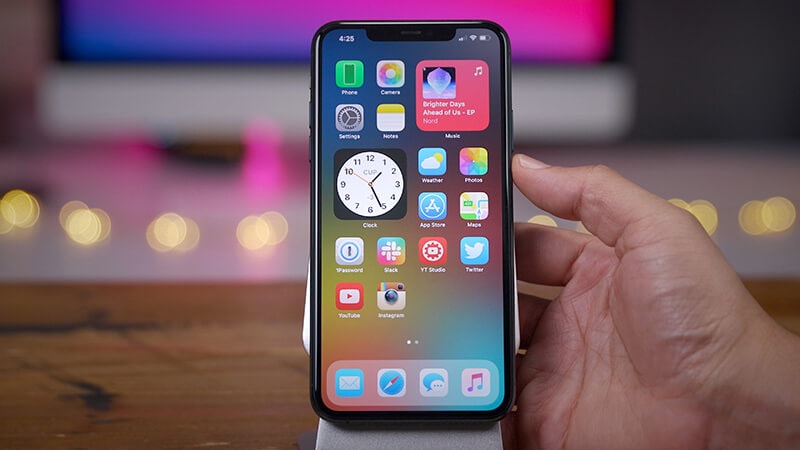
Up until recently, the only customization that could have been done to an iPhone was putting a third-party case on it or changing the wallpaper. That changed with the iOS 14, as it brought an unprecedented degree of freedom in terms of customization on the iPhone. With the new Shortcuts app that comes with the update, you can change icons of the apps on your home screen to march your background and overall theme to better reflect your personality.

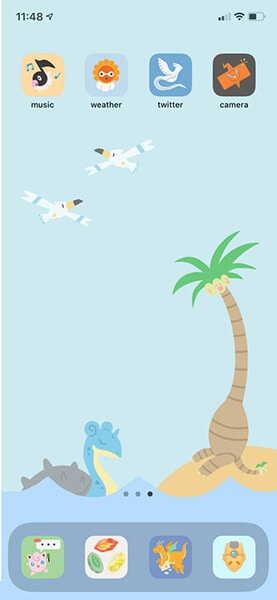
Ever since the public release of iOS 14, people have been sharing their home screens. Some have tweaked it a bit to their liking while others have overhauled the design. With iOS 14 you can make your phone look like anything from the Nook Phone from Animal Crossing to a variety of colors and symbols matching your zodiac sign. We will offer a step-by-step guide for you to take full advantage of the new customization options.
Get the Shortcuts app
The first step is to make sure you have your iPhone up to date and the Shortcuts app installed. It comes with the iOS 14 update, so unless you’ve accidentally uninstalled it, you should be able to access it right away.
While with the Shortcuts app you can easily customize your apps, you might also want to download some third-party apps that allow you to customize widgets (also a new function on iOS 14). While some of the Apple apps offer widgets, there are not many customization options there. That’s where apps like Widgeridoo come in. There are numerous apps out there that offer free and paid services of widget customization. You can check out a few of them and see which ones work best for you.
A customized widget adds another valuable component to the custom-made home screen. You can use them to track your steps, the percentage of the battery, and other information you might want on-screen, but Apple doesn't provide.
You can choose the size of the widget according to your taste and needs. there are three available options – small medium and large. They take up space of four apps, eight apps, and 16 apps, respectively.
Decide on your theme

If you want a custom home screen with all the exciting details, you should decide on the theme, or aesthetic you aim to achieve. If you know your way around graphic design, you can even create your own app icons. If that’s not your thing, fear not, there are numerous app icon packs out there to choose from. A quick googling and Etsy browsing will sure to get you something you will love.
Once you have settled on your theme and downloaded all the icons for the apps, it’s time to start applying them one by one. It seems like a daunting process, but it’s fairly easy and we’re here to help.
Change the app icons

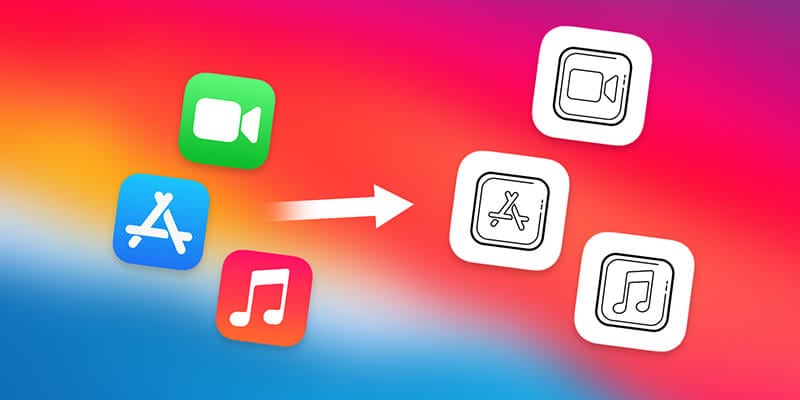
Once you’re pleased with your selection of art, head over to the Shortcuts app, tap the plus sign in the upper right corner and press Add Action. Tap Scripting, then Open App, then Choose. Now you can pick the app you want to customize, click Next. You have created a shortcut, which you will be prompted to give a name, then press Done.
Now you have to add your shortcut to the home screen. Do this by tapping the three-dot menu on the shortcut you created and tap Add to Home Screen. Now you have to tap on the icon of the app and you will be able to assign the image of your liking to the app.
Now tap the three-dot menu on the shortcut you just made, then tap it again on the next screen and tap Add to Home Screen. Tap on the icon under Home Screen Name and Icon, and you’ll be presented with three options: Take Photo, Choose Photo, and Choose File. Go grab the image you want to reassign that app, and you’re all set. Once the app with the desired icon is added on your home screen, you will have to move the original app to the App Library by long-pressing it and choosing the Move to App Library option. That’s it.
Like much of iOS, the process is intuitive and once you do it once, you’ll be able to go through the process of assigning different apps with custom icons without needing guidance. If you’re new to the iPhone, you can transfer all your data from your previous device with the help of Dr. Fone, a robust toolkit that will take care of all your iOS and Android-related worries.
You should keep in mind that there’s a slight downside to the icon customization. When you click your customized app, it will first take you to the Shortcut app before automatically taking you to the app you want. This will require a couple of seconds and you have to decide if a customized aesthetic is worth the slight wait for you.
Finalize the look

Once you’re done with customizing all your apps and have widgets to go with them, you should also change your wallpaper to tie everything together. If you opted to get your icons from Etsy or other sources there might have been a ready-made wallpaper there as well, but of course, you can choose anything that will go well with your theme.
To change the wallpaper head to Settings, click on Wallpaper, then Choose a New Wallpaper and set your picture to complete the look.
Creating widgets and reassigning apps with customized icons seem like a lot of work, but if you’re dedicating to making your iPhone stand out and reflect your personality well, you’ll certainly enjoy the final product.
Upgrade & Downgrade
- iOS Beta Install
- 1. Download iOS Beta Profile
- 2. Download the iOS 13 Beta
- 3. iOS 16 Beta Download
- 4. Uninstall iOS Beta
- 5. Install iPhone Beta Profile
- 6. Install Mac Beta Profile
- 7. Install iOS 15 Beta Profile
- 8. Upgrade iPad to iOS 14
- iOS News
- 1. Update iPhone 4s to iOS 9
- 2. Cheaper iPhone
- 3. Customize iPhone Home Screen
- 4. Know About iOS 15 Lock Screen
- 5. Add Lyrics to Song on Apple Music
- iPhone Downgrade Tips
- 1. Downgrade iOS Like a Pro
- 2. Roll Back to an Older iOS Version
- 3. Downgrade to iOS 15
- 4. Install Developer Profile
- 5. Downgrade iOS without iTunes
- 6. Downgrade to iOS 14
- 7. Download and Install the iOS 16
- iPhone Update Tips
- 1. iPhone & iPad Security Updates
- 2. Undo an Update on iPhone
- 3. Update iPhone with/without iTunes
- 4. Fix iPhone Checking for Update Stuck
- 5. Fix iPad Software Update Failed
- 6. Fix iPhone Stuck On Update
- 7. Fix iPhone Won't Update
- 8. Fix Update Server Not Be Contacted
- 9. Fix iPhone Stuck on Update Requested
- 10. Resolve iPhone Cellular
- 11. Resolve iPhone Error 1110
- 12. Fix iPhone Frozen
- iOS 11/12 Problems
- 1. Fix iPhone Stuck on Waiting
- 2. Fix iPhone Can't Make Calls
- 3. Fix iPhone Stuck on Logo
- 4. Fix Photos Disappeared from iPhone
- 5. Fix iPhone Keeps Freezing
- iOS 13 Problems
- 1. Fix CarPlay Not Connecting
- 2. Fix Resolve Apps Won't Open
- 3. Fix Song/Playlist Missing
- 4. Fix iPhone Asking for Passcode
- iOS 14 Problems
- 1. Fix Map Voice Navigation Won't Work
- 2. Fix iMessage Not Working
- 3. Recover Deleted Data on iOS 14
- 4. Recover Disappeared Notes on iOS 14
- iOS 15 Problems
- iOS 16 Problems
- 1. Fix iPhone Wi-Fi Not Working
- 2. Fix iOS 16 Battery Drain Issues
- 3. Fix Screen Mirroring Not Working
- 4. Fix Apple CarPlay is Not Supported
- 5. Fix iPhone Screen Not Responding
- 6. Fix iPhone Apps Keep Crashing
- 7. Fix Call Failed iPhone Issue
- 8. Fix iPhone Stuck On Apple Logo
- 9. Counter iPhone Heating Problems
- 10. Fix iPhone Stuck in Boot Loop
- 11. Fix iPhone Bluetooth Not Working
- iOS 17 Problems
- 1. iPhone Freezing After Update
- 2. iOS 17 Wallpapers Blurry at Top
- 3. Fix iPhone Charging Slow
- 4. Enable Live Activities iOS 17
- 5. Fix iOS 17 Apps Crashing
- 6. Fix iPhone Stuck on Verifying Update
- 7. Overheating after 17 Update
- 8. Fix iOS 17 Keyboard Bug
- 9. Fix iOS 17 Green Screen Issue
- 10. iOS 17 Bugs & Fixes
- 11. No iOS 17 Update on Your iPhone
- 12. iOS 17 Unable to Download
- 13. Missing contacts with iOS 17 update


Alice MJ
staff Editor