How to Transfer Photos from Samsung Galaxy S22 to Mac
Jul 12, 2024 • Filed to: Manage Device Data • Proven solutions
You've heard the stories - Android phones don't play too well with Apple Macs. It could be another way around, end users suffer. Is it true? Yes, and no. Yes, because Macs stubbornly do not allow that kind of access to Android phones the way they do iPhones. If so, how do I transfer photos from my new Samsung Galaxy S22 to the Mac? Here are 5 ways to do so.
- Part I: How to Transfer Photos from Samsung Galaxy S22 to Mac Using A Cloud Service
- Part II: How to Transfer Photos from Samsung Galaxy S22 to Mac Using Email
- Part III: How to Transfer Photos from Samsung Galaxy S22 to Mac Using SnapDrop
- Part IV: How to Transfer Photos from Samsung Galaxy S22 to Mac Using A USB Cable
- Part V: How to Transfer Photos from Samsung Galaxy S22 to Mac In 1 Click With Dr.Fone
Part I: How to Transfer Photos from Samsung Galaxy S22 to Mac Using A Cloud Service
We have grown comfortable with the cloud in recent years and have been storing our data and collaborating with each other in the cloud increasingly. Ever since Samsung shut down its famous Samsung Cloud, users are now left with two options - either use Microsoft OneDrive or use Google Photos, both built-in. Here is how to use Google Drive and Google Photos to transfer photos from Samsung Galaxy S22 to the Mac.
Step 1: Assuming the default photo gallery app on your new Samsung Galaxy S22 is set to Google Photos, you only need to ensure that photos are being backed up to the cloud. To check that, launch Google Photos and tap your profile picture/ name at the top right corner.
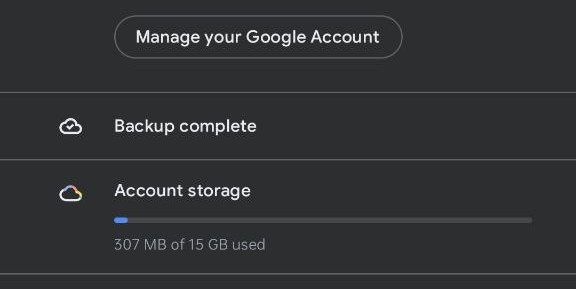
Step 2: You should see a Backup Complete notification or maybe even a progress bar if connected to Wi-Fi and backup is enabled.
Step 3: Given that photos are being backed up to Google Photos, we can now simply visit the Google Photos portal in a web browser on the desktop/ laptop to transfer photos from Samsung S22 to Mac using Google Drive or a similar cloud service.
Visit Google Photos in a web browser on your computer at https://photos.google.com
Step 3: Sign in and you will see your Google Photos library as you see it on your Samsung S22. Select the photos you want to download, click the vertical ellipses, and select Download to download the selected photos.
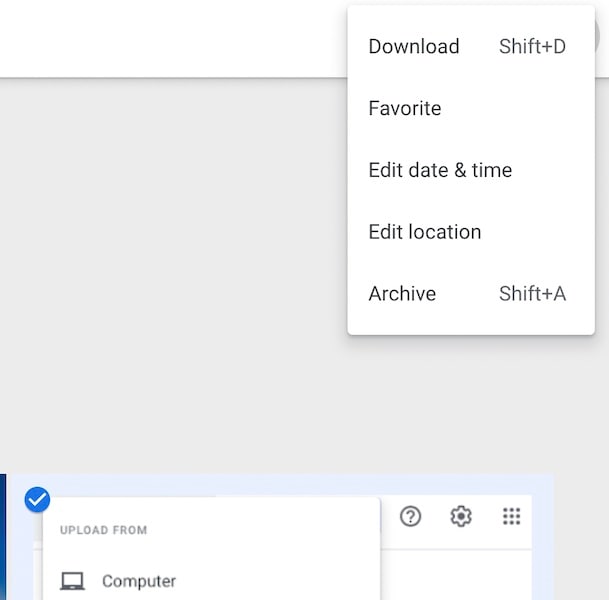
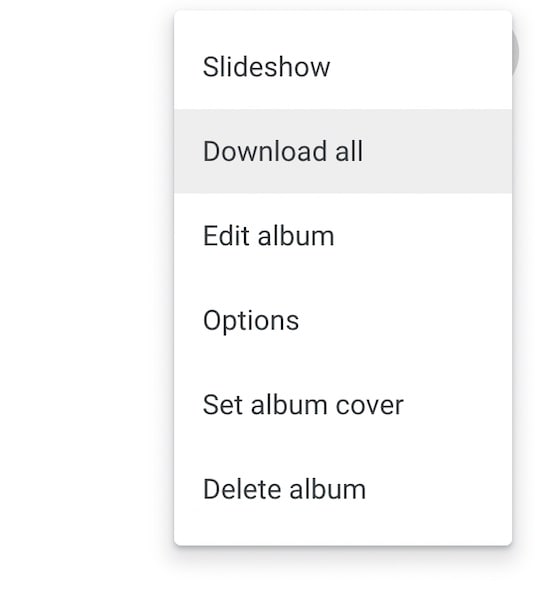
Step 4: To download photos inside an album, open the album and select the photos, then click the ellipses and select Download. If you want to download all photos in an album, simply open the album and click the ellipses to get the Download All option.
Advantages and Disadvantages
It can be seamless to transfer photos from Samsung S22 to Mac using cloud such as Google Photos since all you need to do is use Google Photos and you can download the photos on the Mac easily by visiting the Google Photos website. However, as easy as this seems to be for a few photos, it can be cumbersome, clunky, and time-consuming since photos first need to be uploaded to the cloud and then downloaded from the cloud.
Part II: How to Transfer Photos from Samsung Galaxy S22 to Mac Using Email
Email is as versatile a tool as any other, so why not transfer photos from Samsung Galaxy S22 to a Mac using email? Oh yeah, sure! Some people are just more comfortable that way, they would email data to their selves for storage. Can do the same for photos, too. It can even be quicker to do. Here's how:
Step 1: Launch Google Photos on your new S22
Step 2: Select the photos you want to transfer to mac using email
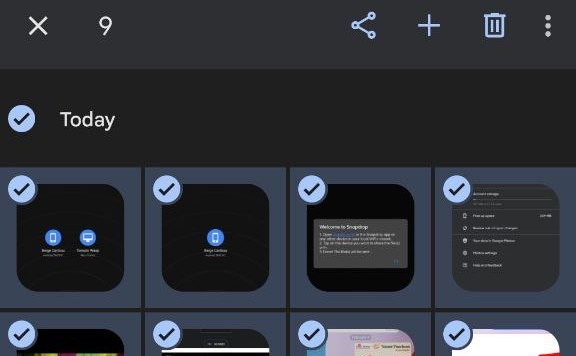
Step 3: Tap the Share icon and select Gmail
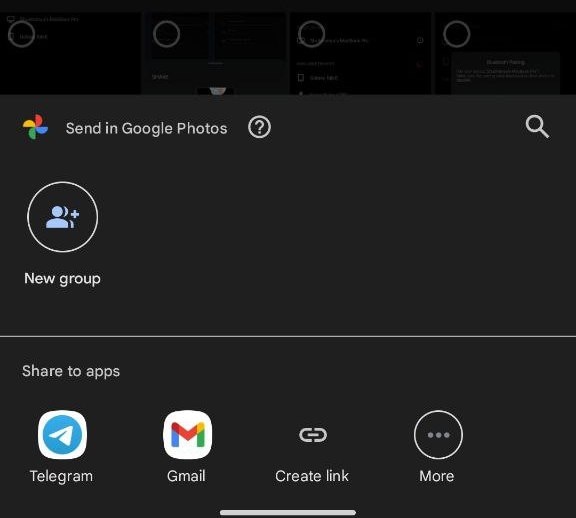
Step 4: The chosen photos are now already placed in the compose email screen. Compose the email and send to anyone you want. You can even save it as a draft and open it on your computer.
Advantages and Disadvantages
As you might be acutely aware, email has an attachment size limit. Gmail offers 25 MB per email. That about 4-6 full-resolution JPEG image files today. Another disadvantage here is that while photos are being stored in Google Photos (consuming storage in your quota) they are also going to consume space in the email, creating unnecessary double consumption. However, it's one of the most reliable ways to transfer! Email feels like it's been around forever, doesn't it?
Part III: How to Transfer Photos from Samsung Galaxy S22 to Mac Using SnapDrop
SnapDrop may be called as AirDrop for Android in a way. Your Samsung S22 and your Mac need to be connected to the same Wi-Fi network so that SnapDrop can work.
Step 1: Install SnapDrop from the Google Play Store
Step 2: Launch the app
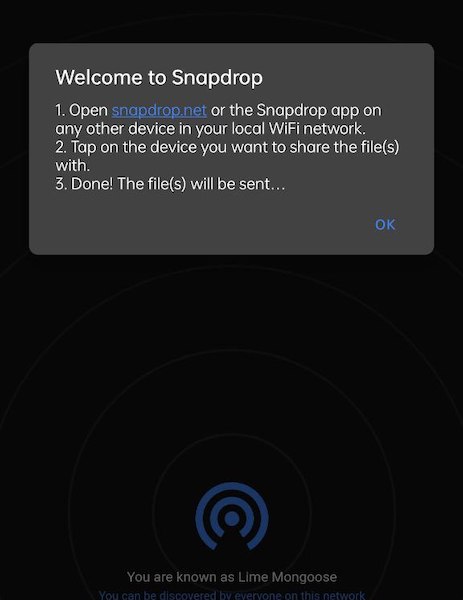
Step 3: Visit https://snapdrop.net on your computer web browser
Step 4: The smartphone app will discover nearby devices on which SnapDrop is open
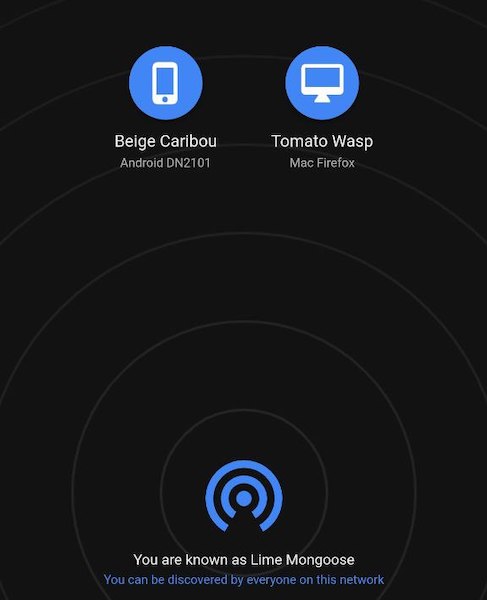
Step 5: Tap the Mac on the smartphone app and select the images, files, videos, whatever you want to transfer, and tap Select
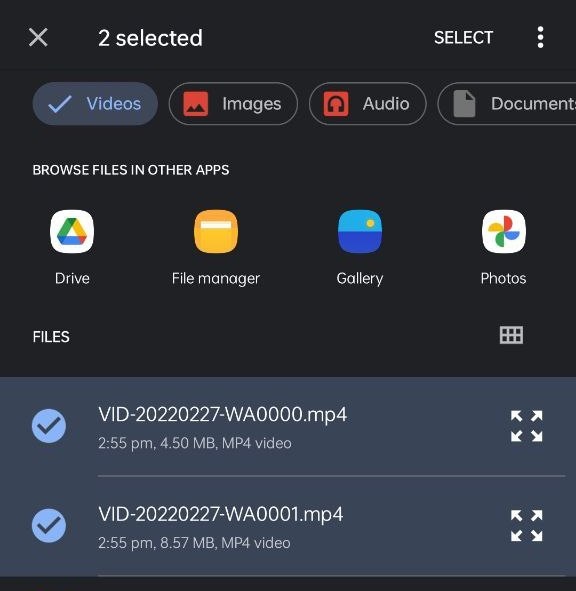
Step 6: On the Mac, the browser will notify that file was received in SnapDrop and ask to Ignore or Save. Choose Save to save the file to your preferred location.
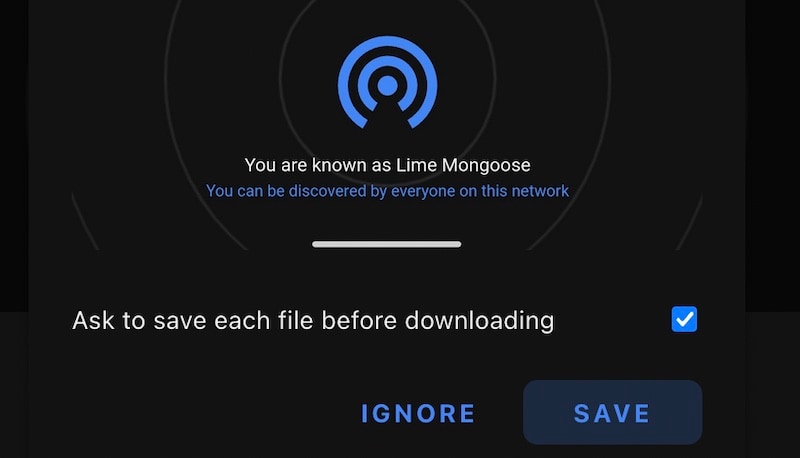
It is that easy to use SnapDrop.
Advantages and Disadvantages
As with everything, there are some advantages and certain disadvantages to SnapDrop. First, SnapDrop requires a Wi-Fi network to work. This means that it will not work if there is no Wi-Fi in the house. Another something you will recognize quickly when sending multiple files is that you will have to receive each file manually, there is no way to accept all transfers in one click. That right there is the single largest issue with SnapDrop. However, for advantages, SnapDrop can work with just the web browsers. So, while we asked you to download the app, you can do that in your mobile web browser as well with the same experience, no need to download the app. For single file transfers, or for random, sporadic file transfers, the ease and simplicity of this is hard to beat. But, this is certainly not going to work for multiple files, and we are guessing you don't have just one photo to transfer from S22 to Mac, do you? This will not be ideal for transferring several hundred photos unless you want to sit and click Save for each of them.
Part IV: How to Transfer Photos from Samsung Galaxy S22 to Mac Using A USB Cable
Have to admit, using the good old USB cable seems to be the way Apple wanted Android users to stick with, considering how seamless the process to transfer photos from Samsung Galaxy S22 to Mac using a USB cable. Here's how it goes:
Step 1: Connect your Samsung Galaxy S22 to the Mac using a USB cable
Step 2: Apple Photos app will launch automatically when your phone is detected and your Samsung S22 will reflect as a storage card in the app, showing all photos and videos for you to import.
Step 3: All you need to do now is select and click Import.
Advantages and Disadvantages
The advantage here is that all photos and videos will be imported into Apple Photos straightaway if that is what you want. That is also its disadvantage if iCloud Photos is not your cup of tea.
Part V: How to Transfer Photos from Samsung Galaxy S22 to Mac In 1 Click With Dr.Fone
What if I don't want to use Photos or just want something different, something more? Well, that means you should try Dr.Fone. Dr.Fone is a software designed and perfected over the years by Wondershare Company and the result shows. The user interface is smooth and slick, navigation is as easy as it gets, and the software has a laser focus on getting the job done quickly without making you spend more time than you need in the software. You can use it for nearly all your smartphone issues, ranging from devices stuck in the boot loop to something routine such as using this tool periodically to keep clearing out junk and other data to free up storage in your devices.
Here's how to transfer photos from Samsung Galaxy S22 to the Mac in 1 click using Dr.Fone - Phone Manager (Android):
Step 1: Download Dr.Fone here
Step 2: Launch and select the Phone Manager module
Step 3: Connect your phone
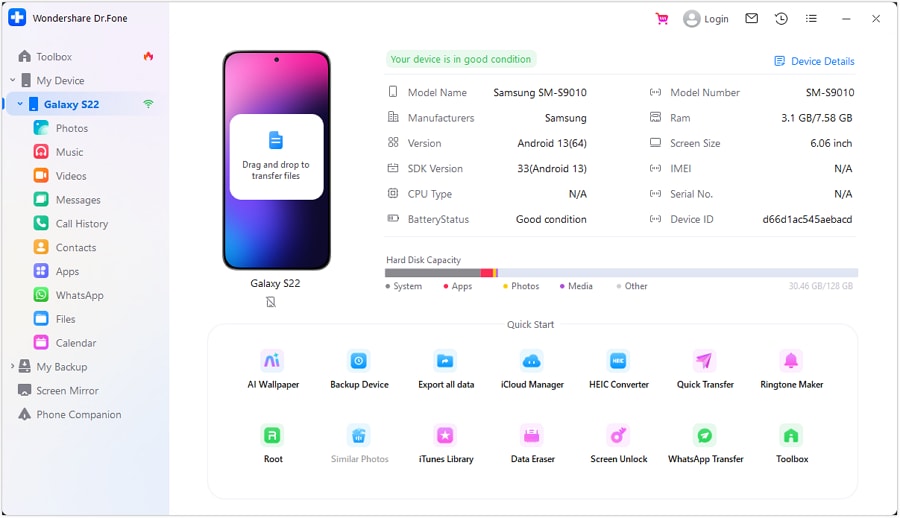
Step 4: Once recognized, click Photos from the tabs at the top.
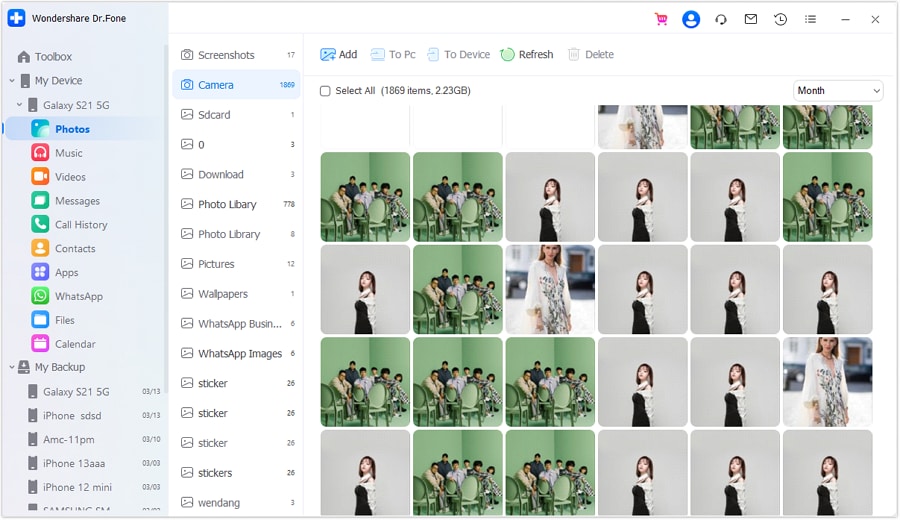
Step 5: Select the photos to transfer and click the second button (arrow pointing outwards). This is the Export button. From the dropdown, choose Export to PC
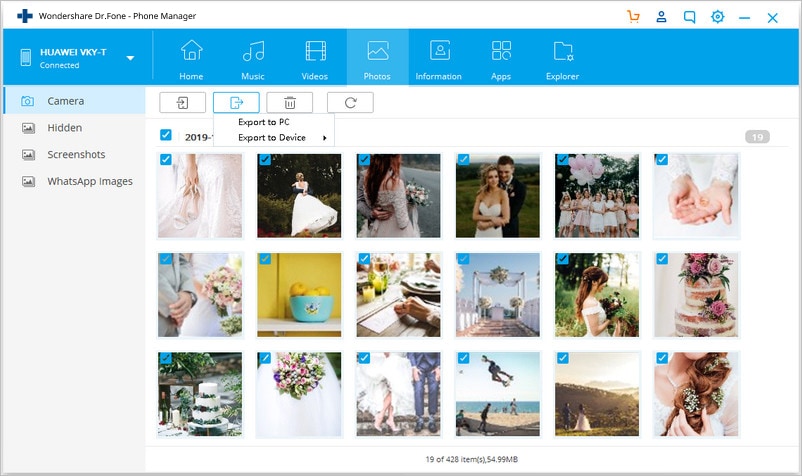
Step 6: Choose the location to transfer photos from Samsung S22 to Mac
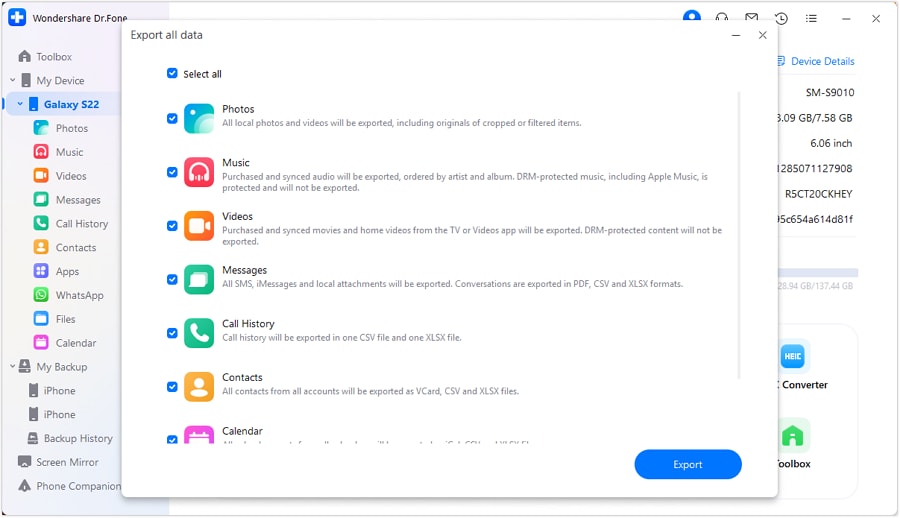
This is how easy it is to use Dr.Fone to transfer photos from Samsung S22 to Mac. What's more, this software also allows you additional benefits such as the transfer WhatsApp data from one device to another device. Then, to complete the package, Dr.Fone is a complete suite of tools you might need across the board when it comes to your smartphone. Suppose you update your phone, and it gets corrupted. It gets stuck somewhere and becomes unresponsive. What do you do? You use Dr.Fone - System Repair (Android) to fix it. Suppose you forgot the passcode to your Android lock screen. How to unlock the Android passcode easily? Yes, you use Dr.Fone to do that. You get the idea. It is the swiss-army knife for your smartphone.
Advantages and Disadvantages
Advantages of Dr.Fone - Phone Manager (Android) are plenty. One, it is by far the most intuitive piece of software to use out there. Second, there is nothing proprietary here, your photos are exported as regular photos, not as some proprietary database readable only by Dr.Fone. That way, you are always in control of your data. Furthermore, Dr.Fone is available on both Mac and Windows. Disadvantages? Really, can't think of any. Software is simple to use, gets the job done, works reliably, is stable. What else could one want!
Transferring photos from Samsung S22 to Mac is not going to be as hard as one might think, owing to several options available today. For sporadic requirements, we can use email and SnapDrop which are quick and easy ways to get the job done for a few photos here and there, but when you want to get serious and transfer large amounts of photos, there really is only one way to go, and that is using dedicated software such as Dr.Fone - Phone Manager (Android) that will allow you to transfer photos from Samsung S22 to Mac easily and quickly, whenever you want, in one click, without drama and anxiety of data loss or corruption.
Samsung Manage
- Samsung Data Manage
- 1. Best Samsung Manager
- 2. Manage Contacts on S9/S8
- 3. Manage Music on Samsung
- 4. Manage Music on Samsung S8
- 5. Transfer Photos to Samsung S8
- 6. Manage Photos on Samsung S9
- 7. Best Galaxy S9 Manager
- 8. Samsung Gear Manager
- 9. Samsung Task Manager
- 10. Remove Samsung Bloatware
- Samsung Erase
- 1. Tips for Selling Old Samsung
- 2. Wipe A Samsung Phone
- 3. Tips to Erase Data
- 4. Remove Samsung Apps
- 5. Uninstall Apps on Samsung
- Samsung Mirror
- 1. Share the Phone Screen
- 2. Screen mirror to Samsung TV
- 3. Use Allshare Cast To Mirror
- 4. Samsung Mirror Screen to PC
- Samsung Record
- 1. Screen Record on Samsung A50
- 2. Screen Record on Samsung S10
- 3. Screen Record on Samsung s9
- 4. Samsung S8 Screen Record
- 5. Top Samsung Screen Recorder
- Samsung Root
- 1. Root Samsung Galaxy S7
- 2. Jailbreak Samsung Phones
- 3. Root Samsung Galaxy S3
- 4. Root Samsung Galaxy S4
- 5. Root Samsung Galaxy S5
- 6. Root Samsung Galaxy J5
- 7. Samsung Root Apps Without PC
- 8. Top 6 Samsung Root Software
- 9. Used Apps to Root Samsung Note
- 10. Root Samsung Galaxy S3 mini
- 11. Root Galaxy Tab 2 7.0
- 12. Unroot Android Devices
- Samsung to Mac
- 1. Transfer Photos to Mac
- 2. Samsung File Transfer for Mac
- 3. Transfer Photos from Samsung
- 4. Transfer Pictures to Mac
- 5. Transfer Pictures from Samsung
- 6. Transfer Files to Macbook
- Samsung to PC
- 1. Transfer Contact from Samsung
- 2. Transfer Photos to PC
- 3. Transfer Photos to Laptop
- 4. Transfer Photos from Samsung
- 5. Transfer Files to PC
- 6. Transfer Photos From Note 8 to PC
- USB Debugging
- Samsung Tips
- ● Manage/transfer/recover data
- ● Unlock screen/activate/FRP lock
- ● Fix most iOS and Android issues
- Manage Now Manage Now Manage Now


Daisy Raines
staff Editor