How to Transfer Photos from Samsung to PC?
Jul 12, 2024 • Filed to: Manage Device Data • Proven solutions
Samsung is one of the leading smartphone brands. The display and camera of a Samsung android phone are known for its reliability and quality. This is the reason why most of the world’s population uses Samsung to capture videos and pictures. But as most of the phones come with a limited storage capacity. The same thing is with Samsung. Now to empty the storage there is a need to transfer photos from Samsung to pc.
Doing this will free up the storage thus providing you with an opportunity to capture more memorable moments. Moreover, these days the mobile phone is used as a main source of entertainment. Therefore, most people use phones to store downloaded videos and pictures. This occupies a lot of phone storage. To sort out low free storage issues one of the best techniques is to transfer files from Samsung phone to pc or transfer photos from Samsung phone to computer or transfer video from Samsung to pc.
It doesn’t matter which Samsung phone you are using you can easily transfer photos from Samsung galaxy s5 to pc or transfer photos from Samsung galaxy s6 to pc or transfer photos from Samsung galaxy s7 to pc and so on by simply connecting Samsung s7 to pc or by connecting Samsung s8 to pc and so on.
Part One: Transfer photos from Samsung to pc directly by copy & paste
The phone’s storage capacity is not as big as that of a computer’s hard disk. It is limited to 512 GB in most of the cases. But as these days people use smartphones on a large scale for capturing pictures, videos, and downloads. It fills up the storage space easily. As a result, the data need to be transferred to other devices.
There are many ways to transfer photos from Samsung galaxy to pc using USB. What you need to do is to connect your phone with your computer using a USB cable. Once your phone is connected you can transfer your data.
But the question is how to import photos from Samsung to pc efficiently without any error and that too in a shorter time.
Well, copy and paste is the simplest technique for this. Let us follow some steps for the same.
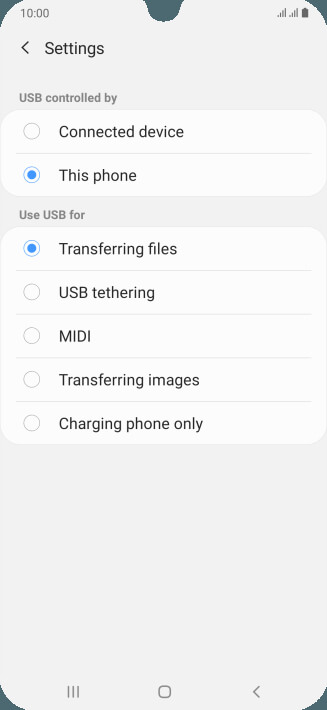
Step 1: Connect your Samsung phone with your PC using a USB cable. Use the original Samsung cable for faster and efficient data transfer. Once connected you are required to select “Transferring images” from various options on your phone as shown. You can also choose “Transferring files” in case you want to transfer some other data along with images.
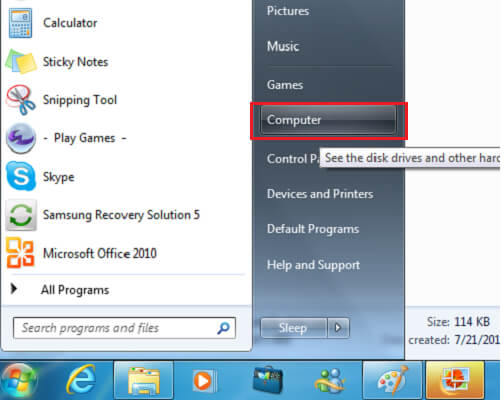
Step 2: Select “Computer” from all programs as shown.
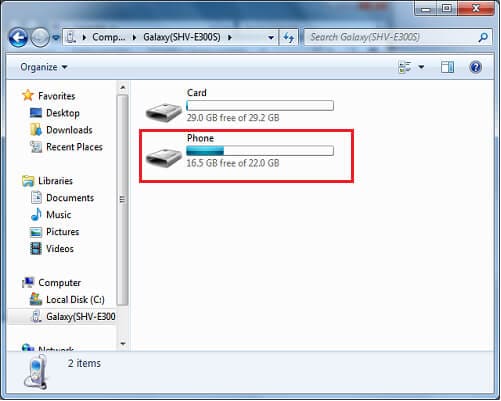
Step 3: Now select your device. It will be shown under “Devices and drives”. Once found double click to open it. You can also use right-click and then choose open. Once opened it will be shown with the name “Phone”. In case you are using a separate SD card, two storages will be shown as can be seen in the images.
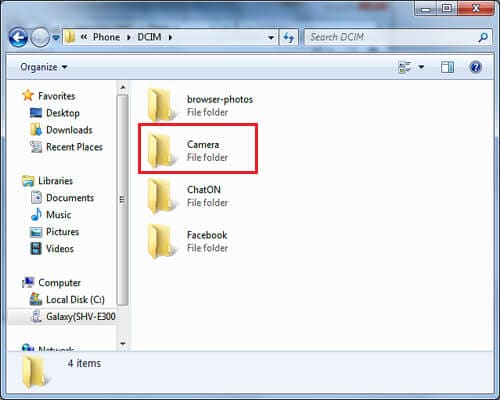
Step 4: Click on the phone or SD card to access your images. Once you click on the phone a lot of folders will be shown. Choose “DCIM” to access your pictures.
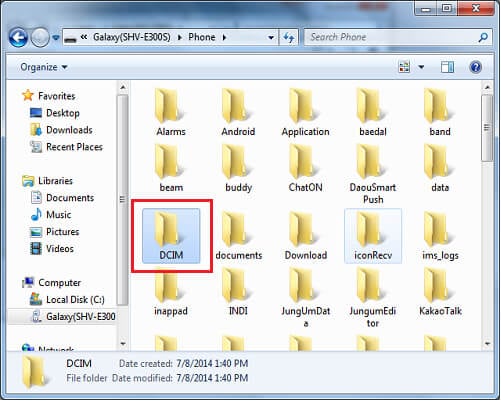
Step 5: Now choose the folder from where you want to transfer pictures. If they are in the camera folder then click on it to open.
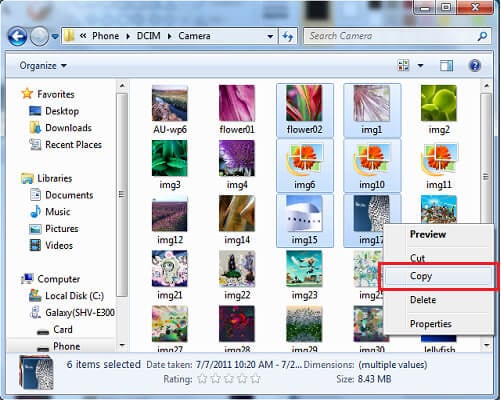
Step 6: Select the pictures and right-click to copy.
Step 7: Select the folder or location where you want to save pictures and right-click to paste.
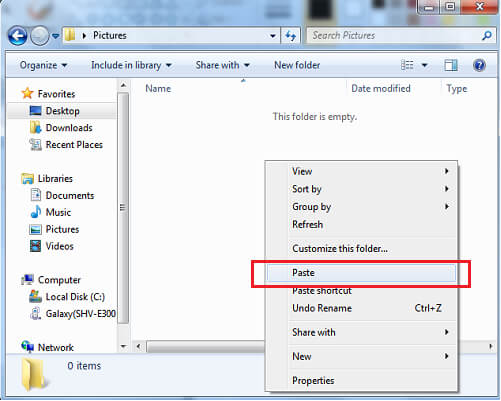
Once pasted successfully you can access your pictures on PC, where you pasted them.
Part Two: Download pictures from Samsung phone to Computer in one Click
Simply copy and paste is a good option to choose when you need to download photos from Samsung phone to computer. But what will be the scenario when you want to transfer multiple files in a single go. It requires precision in the case of a copy-paste technique. Moreover, it will consume more time.
To fix this issue Dr.Fone - phone manager is presented to you. Dr.Fone lets you transfer videos, photos, music, documents, etc from your phone to PC all at a once. It just provides you with a simple and rapid platform to transfer files from Samsung phone to pc.

Dr.Fone - Phone Manager (Android)
Transfer Data Between Android and Mac Seamlessly.
- Transfer files between Android and computer, including contacts, photos, music, SMS, and more.
- Manage, export/import your music, photos, videos, contacts, SMS, Apps etc.
- Transfer iTunes to Android (vice versa).
- Manage your Android device on computer.
- Fully compatible with Android 8.0.
Let us go through 3 simple steps to transfer photos from Samsung phone to computer.
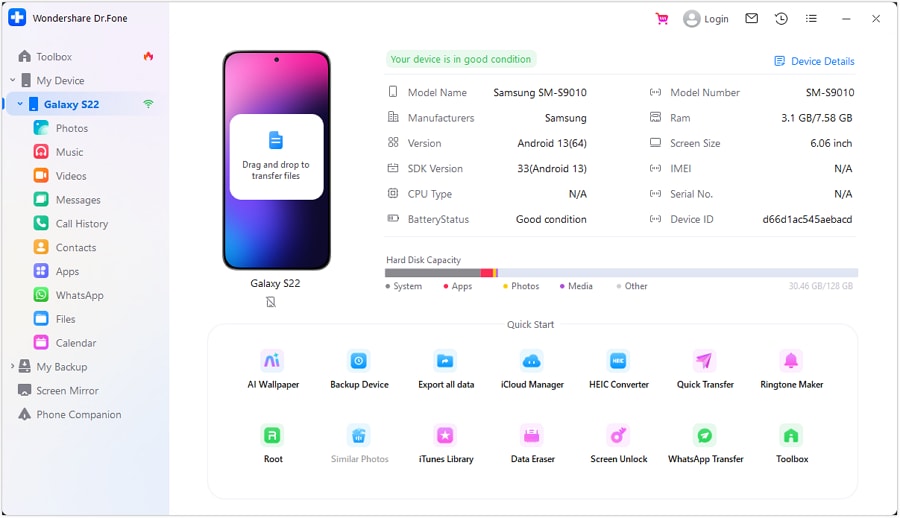
Step 1: Connect your Android device
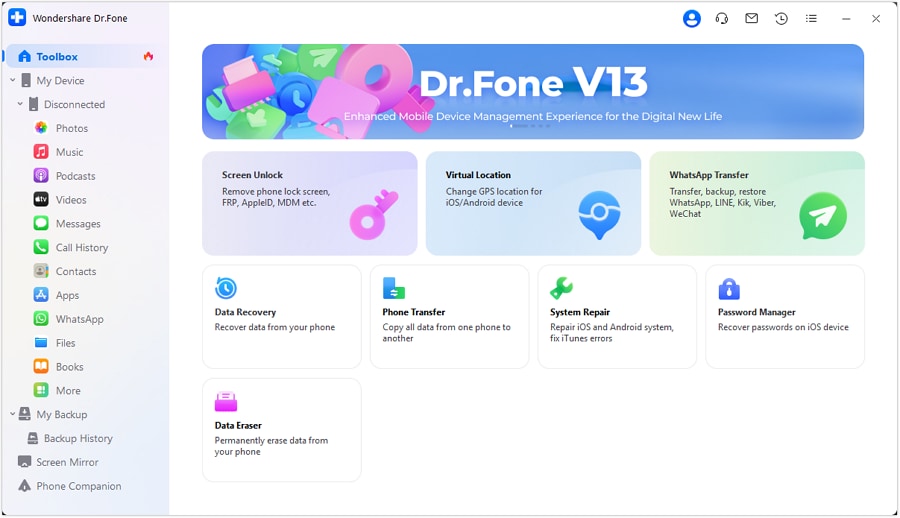
Launch Dr.Fone on your PC and connect your phone. Use a genuine USB cable to connect your phone. Once your phone is connected it will be displayed in the primary window. Now you can directly go to “Photos” on the top panel or choose the third option of transferring device photos to PC.
Step 2: Select files for transfer
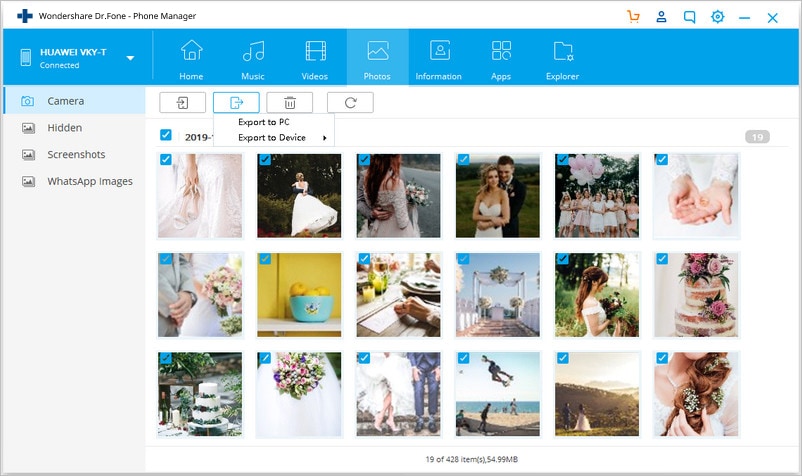
Now select photos by clicking on it that you want to transfer. The selected photos will be marked as white ticks in blue boxes.
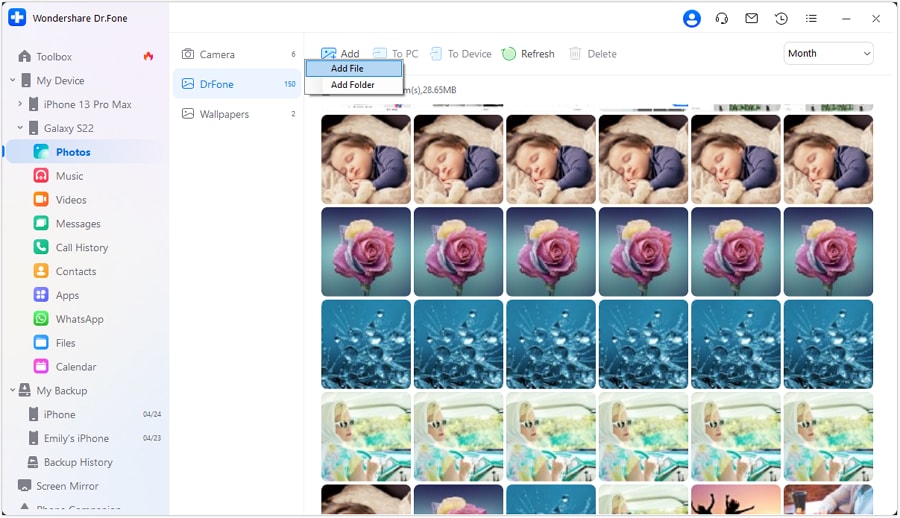
You can also select a folder or create a new folder for transferring by going to “Add Folder” and adding photos in it.
Step 3: Begin to transfer
After selecting photos click “Export to PC”.
This will open a file browser window for selecting locations. Select a path or folder for transferring your photos. Once selected click “OK” to continue.
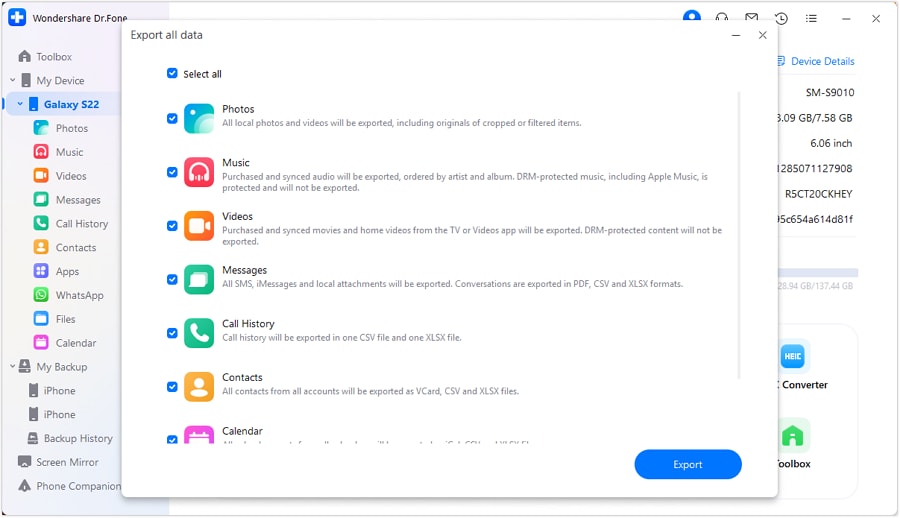
This will start the process of transferring photos. Once the process is completed you can unplug your phone and access the photos from your PC.
Part Three: Transfer with Smart Switch
If you are wondering about how to transfer photos from Samsung galaxy s7 to computer or how to transfer photos from Samsung galaxy s8 to computer and so on then Smart Switch is also one of the solutions.
Apart from a fast connection and fast data transfer, Samsung Smart Switch provides you an ability to backup your data, synchronization, software updates, and much more. It is also a reliable platform to transfer your data across various Samsung devices. It also works for Windows and Mac as well.
To transfer pictures from Samsung phone to computer follow some steps.
Step 1: Download Smart Switch from the official website and launch it on your Windows PC or Mac. Once launched, connect your phone with the help of a genuine Samsung USB cable. This will speed up your data transfer rate. Once your phone is connected it will be detected automatically and you will be provided with various options as shown in the image.
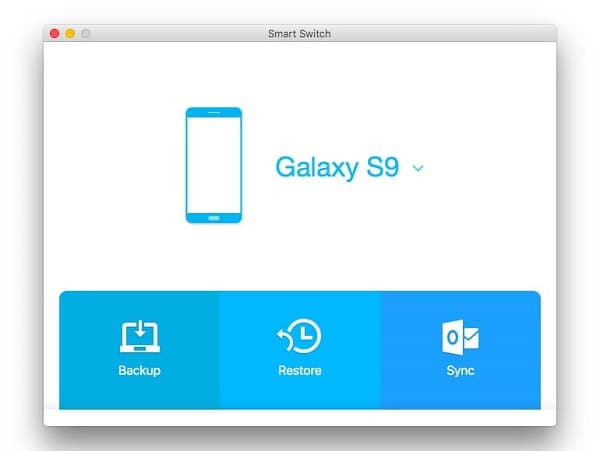
Step 2: Now just click on the “Backup”. This will start the process of transferring files from your Samsung phone to PC. It will take some time to transfer the whole data.
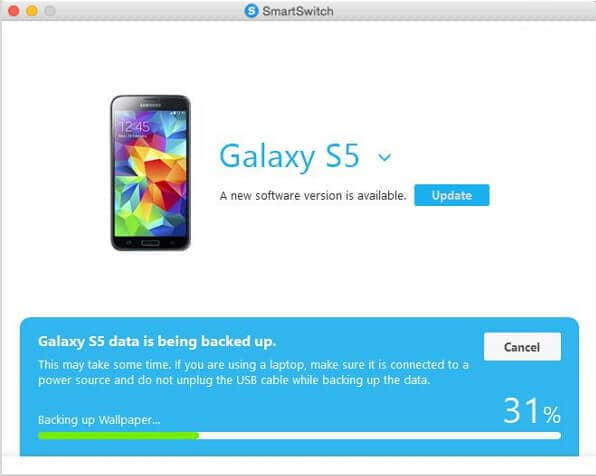
If you are using a Laptop then you are advised to connect it to a suitable power source as this process will take some time. If in case the laptop shuts down due to low battery an error can occur. In some cases, your data may be corrupted. The time taken for transfer will depend upon the size of the data to be transferred.
Once the process of transferring data from Samsung phone to PC is completed. You can unplug your phone and access your photos from the location where the data is backed up on your PC.
Conclusion:
How do I transfer pictures from my Samsung s7 to my computer or from various other galaxy devices is the main point of concern for many? There are various solutions available on the internet for the same. But most of these solutions are complex. It is easy when you want to transfer a few pictures from the same folder to the PC. As you can simply copy-paste some selected photos.
When it comes to transferring photos in large quantities and that too from different folders it becomes a difficult task to perform. To help you out on the same some efficient and trusted solutions are presented. Now transfer videos and pictures from Samsung to pc rapidly with ease using a few steps.
Samsung Manage
- Samsung Data Manage
- 1. Best Samsung Manager
- 2. Manage Contacts on S9/S8
- 3. Manage Music on Samsung
- 4. Manage Music on Samsung S8
- 5. Transfer Photos to Samsung S8
- 6. Manage Photos on Samsung S9
- 7. Best Galaxy S9 Manager
- 8. Samsung Gear Manager
- 9. Samsung Task Manager
- 10. Remove Samsung Bloatware
- Samsung Erase
- 1. Tips for Selling Old Samsung
- 2. Wipe A Samsung Phone
- 3. Tips to Erase Data
- 4. Remove Samsung Apps
- 5. Uninstall Apps on Samsung
- Samsung Mirror
- 1. Share the Phone Screen
- 2. Screen mirror to Samsung TV
- 3. Use Allshare Cast To Mirror
- 4. Samsung Mirror Screen to PC
- Samsung Record
- 1. Screen Record on Samsung A50
- 2. Screen Record on Samsung S10
- 3. Screen Record on Samsung s9
- 4. Samsung S8 Screen Record
- 5. Top Samsung Screen Recorder
- Samsung Root
- 1. Root Samsung Galaxy S7
- 2. Jailbreak Samsung Phones
- 3. Root Samsung Galaxy S3
- 4. Root Samsung Galaxy S4
- 5. Root Samsung Galaxy S5
- 6. Root Samsung Galaxy J5
- 7. Samsung Root Apps Without PC
- 8. Top 6 Samsung Root Software
- 9. Used Apps to Root Samsung Note
- 10. Root Samsung Galaxy S3 mini
- 11. Root Galaxy Tab 2 7.0
- 12. Unroot Android Devices
- Samsung to Mac
- 1. Transfer Photos to Mac
- 2. Samsung File Transfer for Mac
- 3. Transfer Photos from Samsung
- 4. Transfer Pictures to Mac
- 5. Transfer Pictures from Samsung
- 6. Transfer Files to Macbook
- Samsung to PC
- 1. Transfer Contact from Samsung
- 2. Transfer Photos to PC
- 3. Transfer Photos to Laptop
- 4. Transfer Photos from Samsung
- 5. Transfer Files to PC
- 6. Transfer Photos From Note 8 to PC
- USB Debugging
- Samsung Tips
- ● Manage/transfer/recover data
- ● Unlock screen/activate/FRP lock
- ● Fix most iOS and Android issues
- Manage Now Manage Now Manage Now


Alice MJ
staff Editor