Manage Music on Samsung Galaxy S8/S20
Jul 12, 2024 • Filed to: Manage Device Data • Proven solutions
- Introduction
- About Music Management on your Samsung Galaxy S8/S20
- How to Transfer Music from Computer to Samsung Galaxy S8/S20
- How to Transfer Music from Samsung Galaxy S8/S20 to Computer
- How to Delete Music in Batches from your Samsung Galaxy S8/S20
- How to Transfer Music from an Old Phone to your Galaxy S8/S20
Introduction
The Samsung Galaxy S series has held the reigns in the Android market for almost a decade. However, last year the internet was plagued with videos and articles dissing the battery in Samsung Galaxy S7 as there were reported cases of the phone catching fire. The phone making company was in the red as people literally stopped buying the S7.
But things have changed, and they have succeeded in redeeming themselves with their new flagship phone, the Samsung Galaxy S8/S20. Hopefully, there will be no more explosions in pockets or on planes!
Galaxy S8 is the best phone in 2017. It comes in two different sizes; the S8 has a 5.8 inch screen whereas the S8 Plus features a 6.2 inch screen, similar to the previous S7 models.
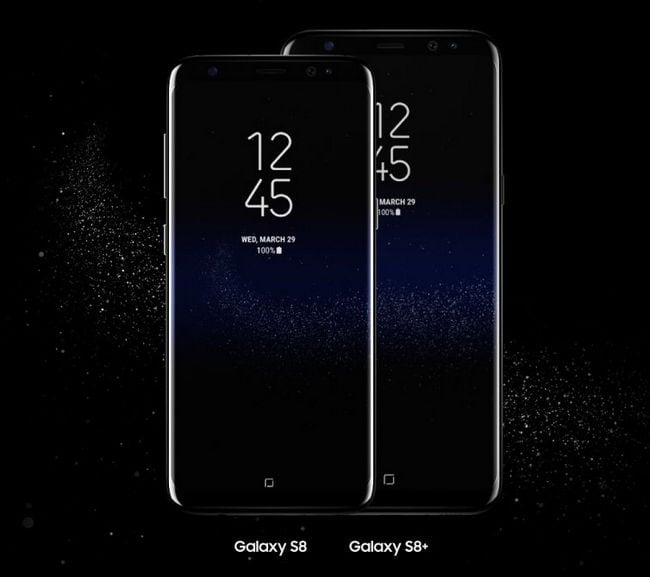
Both the models of S8/S20 will sport a dual-edged curved display with thinner bezels, giving us a screen to body ratio of 90 percent. This means better multimedia experience!
Not keyed up yet? Well, there’s more!
The phone has also scrapped the iconic home button, introduced a virtual assistant called Bixby, features a fingerprint scanner on the rear, and might even have an eye scanner! How fancy is that? Furthermore, significant improvements have been made to its camera, processing speed, and battery.
About Music Management on your Samsung Galaxy S8/S20
Transferring hundreds of songs to your PC or importing them to your phone manually is obviously not efficacious. Especially, if you have a gigantic playlist like many music lovers, you might feel the need to have a software that would help you manage and organize all of your music on Galaxy S8/S20.
Also, some people are really particular about their music library and like their files to be organized in appropriate folders. If you’re one of them, we have the perfect solution for you!
While there are plenty of media managers to choose from, Dr.Fone beats them all. There is iTunes of course, but it's optimized for only Apple products and doesn’t offer some of the most useful features that Dr.Fone has.
This software enables you to transfer your music, photos, videos, contacts, messages, and apps to your PC across platforms. It also has a “files” tab which allows you to browse through the files on your Galaxy S8/S20, almost like a flash drive.
Music lovers can also explore new music and even download it if they wish. It also features additional functions such as backing up data on your phone, create gifs using multiple photos or videos, rooting your Galaxy S8/S20. All of this and more, in just one single software!
How to Transfer Music from Computer to Samsung Galaxy S8/S20

Dr.Fone - Phone Manager (Android)
Ultimate Solution to Manage Music on Samsung Galaxy S8/S20
- Transfer files between Samsung Galaxy S8/S20 and computer, including contacts, photos, music, SMS, and more.
- Manage, export/import your music, photos, videos, contacts, SMS, Apps etc.
- Transfer iTunes to Samsung Galaxy S8/S20 (vice versa).
- Manage your Samsung Galaxy S8/S20 device on computer.
- Fully compatible with Android 13.
Once you’ve launched the Samsung Manager software and connected it to your Galaxy S8/S20, use the following steps to transfer music from PC to Galaxy S8/S20:
Step 1: Connect your Galaxy S8/S20 to computer via your USB cable, and wait until the Dr.Fone software detects your new Galaxy S8/S20.
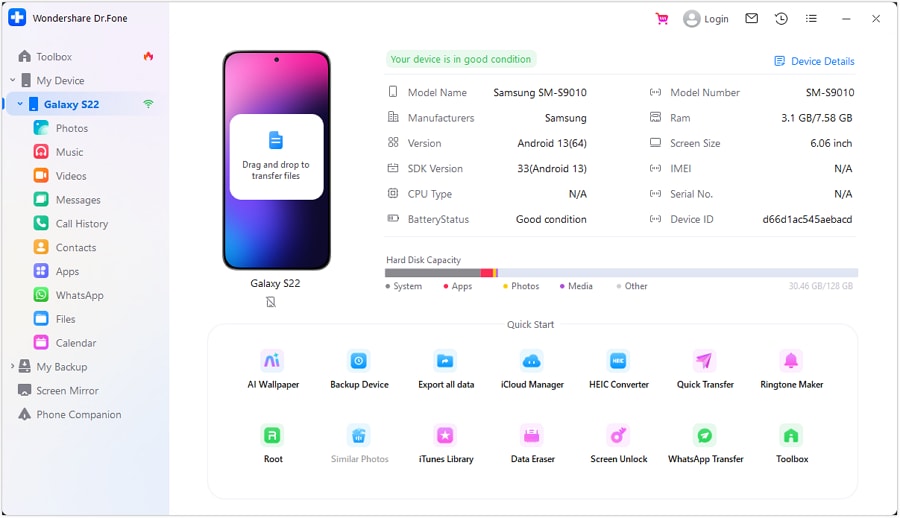
Step 2: Click on the “Music” tab, located on top. Select the “Add” icon (you could choose to add either a file or a music folder). It’ll open a window that would display your music files. Select the file or folder that you’d like to import to your Samsung Galaxy S8/S20.
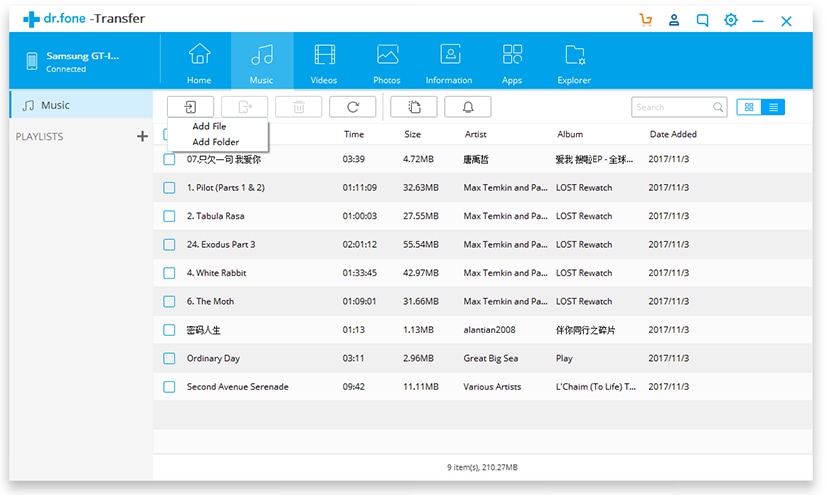
That’s all! It’ll automatically start transferring the media to your Galaxy S8/S20 and notify you once it’s done syncing. Or you can simply drag the files you wish to transfer from Windows Explorer or Finder (in the case of Mac) and drop them under the music tab on the Dr.Fone Samsung Transfer software. It will sync these files to your phone. Easy right?
How to Transfer Music from Samsung Galaxy S8/S20 to Computer
Upon connecting your device to the Samsung Transfer software, here is how you could import music from your Galaxy S8/S20 to your computer:
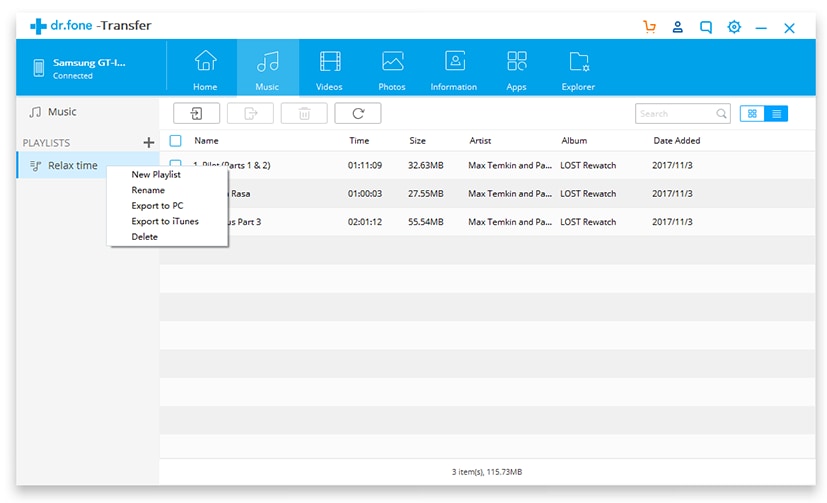
Click on the “Music” tab on Dr.Fone software and select the songs that you want to transfer to your PC. Choose the “Export > Export to PC” option. Select the destination folder where you want these files to be saved and click on “OK”. It’ll start exporting the songs to your PC and notify you once it has been completed.
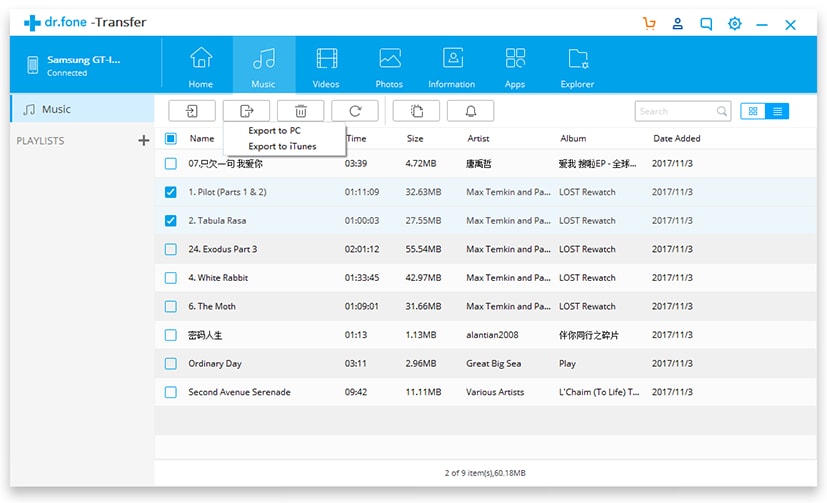
Additionally, you can also export an entire playlist by selecting the playlist you wish to export from Galaxy S8/S20 to PC. Right-click on it and choose “Export to PC.”
How to Delete Music in Batches from your Samsung Galaxy S8/S20
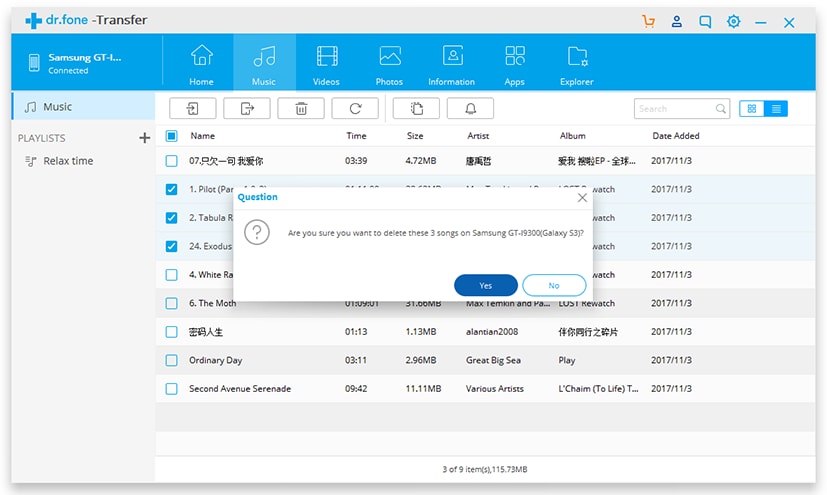
Deleting songs one by one on your smartphone can be painfully slow and tedious. But with Dr.Fone Samsung Manager, it's possible to erase music in batches. Here’s how:
As always, you need to first launch the program and connect your Samsung Galaxy S8/S20. Navigate to the “Music” tab and click on it. Tick the songs you wish to delete and simply press the “Trash” icon at the top of your screen. Click “Yes” to confirm.
How to Transfer Music from an Old Phone to your Galaxy S8/S20

Dr.Fone - Phone Transfer
One Stop Solution to Transfer Music to Galaxy S8/S20 from an Old Phone
- Easily transfer every type of data from an old phone to Galaxy S8/S20 including apps, music, videos, photos, contacts, messages, apps data, call logs etc.
- Works directly and transfer data between two cross operating system devices in real time.
- Works perfectly with Apple, Samsung, HTC, LG, Sony, Google, HUAWEI, Motorola, ZTE, Nokia and more smartphones and tablets.
- Fully compatible with major providers like AT&T, Verizon, Sprint and T-Mobile.
- Fully compatible with iOS 17 and Android 13
- Fully compatible with Windows 10 and Mac 14.
Step 1: First, you need to launch the software and connect both the phones to your computer. Now your old device has to be chosen as the source device. In the initial screen, click on the "Phone Transfer" tab.
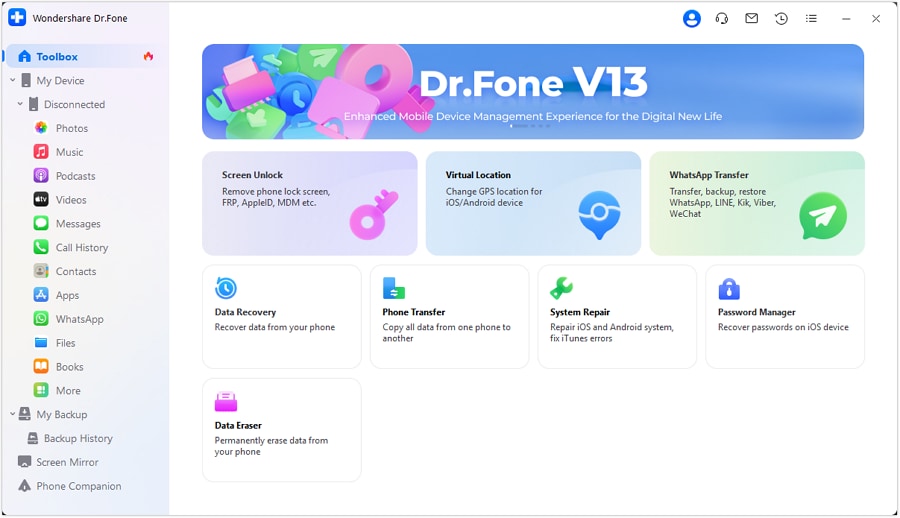
Step 2: Select your Samsung Galaxy S8/S20 device as the destination. You can find all the content types on your old phone.
Step 3: Select “Music” and hit the “Start Transfer” button.

Dr.Fone definitely stands out when compared to other media managing software, including iTunes. It's very easy to use and offers many features at a reasonable price. The best part about this Android Transfer software is that it is compatible with both iOS and Android devices.
Samsung Manage
- Samsung Data Manage
- 1. Best Samsung Manager
- 2. Manage Contacts on S9/S8
- 3. Manage Music on Samsung
- 4. Manage Music on Samsung S8
- 5. Transfer Photos to Samsung S8
- 6. Manage Photos on Samsung S9
- 7. Best Galaxy S9 Manager
- 8. Samsung Gear Manager
- 9. Samsung Task Manager
- 10. Remove Samsung Bloatware
- Samsung Erase
- 1. Tips for Selling Old Samsung
- 2. Wipe A Samsung Phone
- 3. Tips to Erase Data
- 4. Remove Samsung Apps
- 5. Uninstall Apps on Samsung
- Samsung Mirror
- 1. Share the Phone Screen
- 2. Screen mirror to Samsung TV
- 3. Use Allshare Cast To Mirror
- 4. Samsung Mirror Screen to PC
- Samsung Record
- 1. Screen Record on Samsung A50
- 2. Screen Record on Samsung S10
- 3. Screen Record on Samsung s9
- 4. Samsung S8 Screen Record
- 5. Top Samsung Screen Recorder
- Samsung Root
- 1. Root Samsung Galaxy S7
- 2. Jailbreak Samsung Phones
- 3. Root Samsung Galaxy S3
- 4. Root Samsung Galaxy S4
- 5. Root Samsung Galaxy S5
- 6. Root Samsung Galaxy J5
- 7. Samsung Root Apps Without PC
- 8. Top 6 Samsung Root Software
- 9. Used Apps to Root Samsung Note
- 10. Root Samsung Galaxy S3 mini
- 11. Root Galaxy Tab 2 7.0
- 12. Unroot Android Devices
- Samsung to Mac
- 1. Transfer Photos to Mac
- 2. Samsung File Transfer for Mac
- 3. Transfer Photos from Samsung
- 4. Transfer Pictures to Mac
- 5. Transfer Pictures from Samsung
- 6. Transfer Files to Macbook
- Samsung to PC
- 1. Transfer Contact from Samsung
- 2. Transfer Photos to PC
- 3. Transfer Photos to Laptop
- 4. Transfer Photos from Samsung
- 5. Transfer Files to PC
- 6. Transfer Photos From Note 8 to PC
- USB Debugging
- Samsung Tips
- ● Manage/transfer/recover data
- ● Unlock screen/activate/FRP lock
- ● Fix most iOS and Android issues
- Manage Now Manage Now Manage Now


James Davis
staff Editor