4 Methods to Wipe Samsung [S22 Included]
Jul 12, 2024 • Filed to: Data Wipe Solutions • Proven solutions
As the arrival of the Samsung S22 Ultra is near, so many people want to shift from their old phones to the latest release of Samsung. But before switching to a brand-new phone, you must be thinking about how to wipe Samsung.
It is necessary to erase the data permanently from the old phone as one should make sure that the personal data doesn't get misused after it gets sold. So, make sure that you wipe data factory reset Samsung before shifting to Samsung S22 Ultra. For your ease, this article has all the essential methods that one must need to wipe data on Samsung.
Part 1: Why We Need to Erase All Data on Old Phones?
This section will give some reasons that will justify that one must Samsung wipe data factory reset before changing to a new phone. The reasons are as follow:
- Precautions before Selling
Whenever you want to sell your phone, you should erase your existing data so that no one can access it after buying your phone. So, deleting the data is essential before selling the phone.
- Protect Your Privacy
Our phone consists of our private information such as pictures, videos, and business documents that should be kept secure and private. If your data still exists on your old phone, the new user can misuse your private information.
- Keep Confidentiality of Business Work
People mostly use Android devices such as Samsung S21 and Samsung S22 Ultra for their jobs and business-related work. It comprises confidential agreements, files, and other business documents. If someone accesses this information, he can leak this confidential data that can directly impact your company's reputation.
Method 1: Attach Android with PC
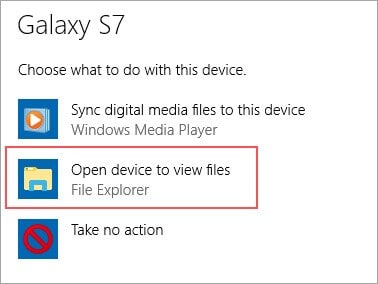
Do you find installing a new application hectic? Then you can still erase all the data permanently using your PC. For this, you need to attach your Samsung with a PC, and you can delete your selected files using "Windows File Explorer." The required steps for this method are:
Step 1: Connect your phone with a PC. Then click on "Open device to view files" from the options given on Autoplay.
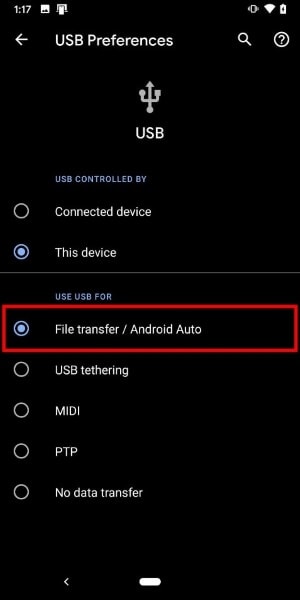
Step 2: Now, you can navigate to the "Settings" of your phone and then tap on "Connected Devices." You can see the option of "USB" and click on "Transfer Files."
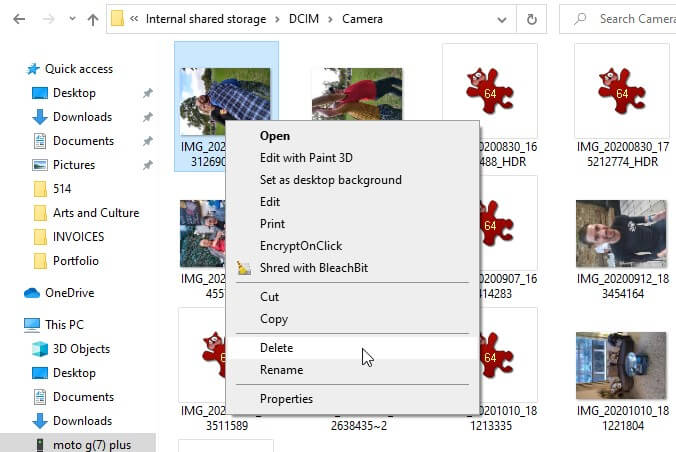
Step 3: Check the folder to find the files you want to delete permanently. For instance, if you want to delete photos or videos, it will be located on "DCIM" and then "Camera Folder." Select all the videos or photos you want to delete and right-click to select the option of "Delete" from the sub-menu and delete them. You can find them in the recycle bin.
Method 2: Delete Data from Android File Manager
Most people think that manually deleting photos or files can erase the data, which is totally their misunderstanding. These deleted photos or files get stored in the trash bin can be accessed easily. Even when you delete pictures from Google Photos, the deleted pictures would still be in the trash bin for 2 months. So, to avoid such a situation, try using the Android file manager.
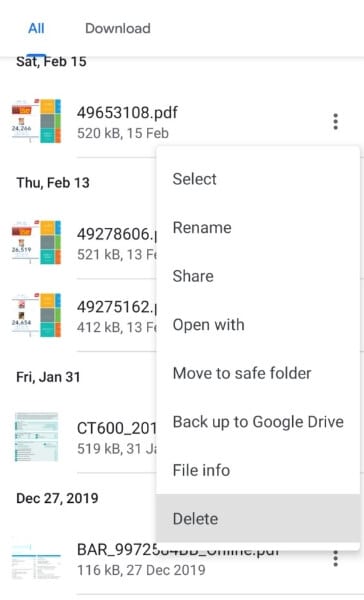
There are many options to select a reliable file manager for your Android device. You can select any of the file managers according to your will. After selecting it, choose the photos or any item you want to delete and then tap on "Delete" by going to the context menu. Now click on "Delete" again to ensure that the file has been deleted permanently.
Method 3: Use Android Factory Reset Feature
Many users prefer deleting the data by going to the factory reset feature, the safest option. It will not erase every kind of data available on your phone but also reset your phone on its default settings. Make sure that before using this feature, you have a backup of your Samsung data, as this deleted data will never be recovered. The steps to use the wipe data factory reset Samsung feature are:
Step 1: Before starting, make sure that your phone is encrypted. If not, navigate to the "Settings" of your phone and then tap on "Security." Afterward, click on "Advanced," where you can enable the encryption by clicking on "Encryption and Credentials."
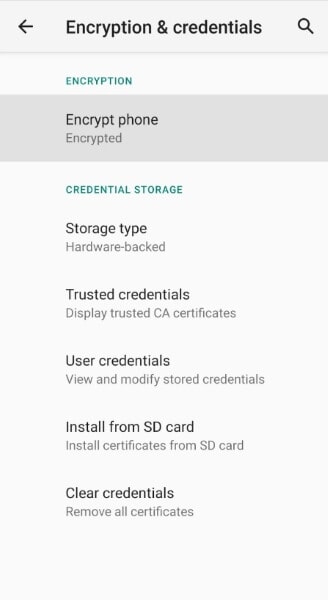
Step 2: After making your phone encrypted, find the "Settings" of your phone and then select the option of "System. " Now tap on "Advanced" to open reset settings. Now select "Reset Options" and then tap on "Erase all Data." Give your confirmation by tapping on "Delete all Data."
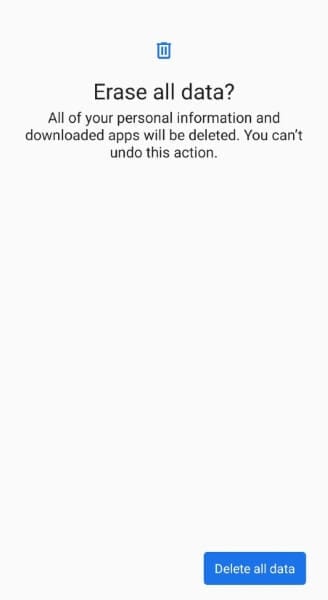
Step 3: Now, it will ask your PIN or password to proceed, so enter your password, and it will erase all your data permanently.
Method 4: Powerful Data Eraser Tool by Dr.Fone
Whenever you consider the option of wiping data on Samsung, simple deletion of files and factory reset may be the general solutions; however, these methods are not powerful enough to wipe data permanently across your device. Some software can still recover the data on your devices. You might wonder how to wipe Samsung permanently and could never be recovered otherwise? We surely have a solution for you.
Dr.Fone is an amazing tool to wipe data factory reset Samsung in a secure manner. You don't need to worry about your data privacy as this tool will execute your task in a perfect manner. Erase your call history, social media chats, photos, and many more with a few clicks. Dr.Fone gives a 100% guarantee to erase your data from the disk so that it won't get recovered in the future.
To use this efficient feature of Dr.Fone, read our following instructions carefully:
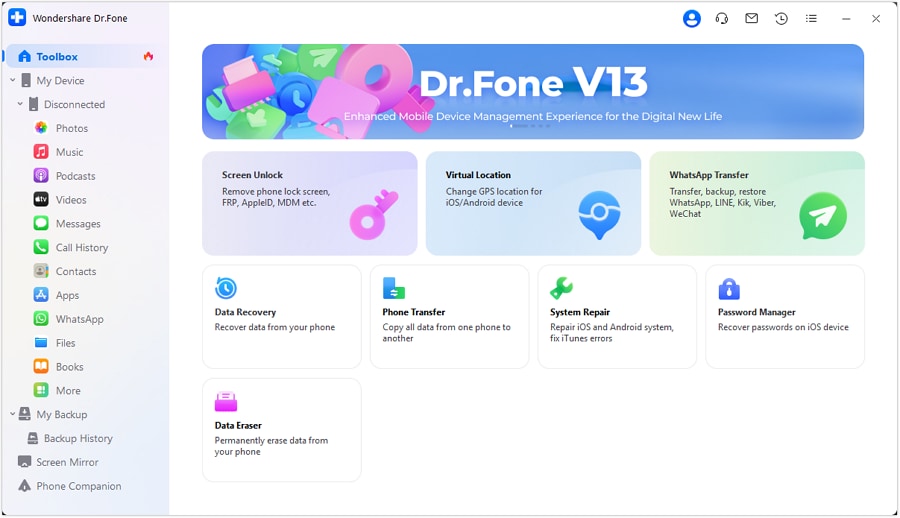
Step 1: Select Data Eraser
After opening Dr.Fone, tap on “Data Eraser” from its other available tools. Afterward, Dr.Fone will detect your Samsung S21 and will build a connection. Tap on “Erase All Data” to start the process of deleting the data.
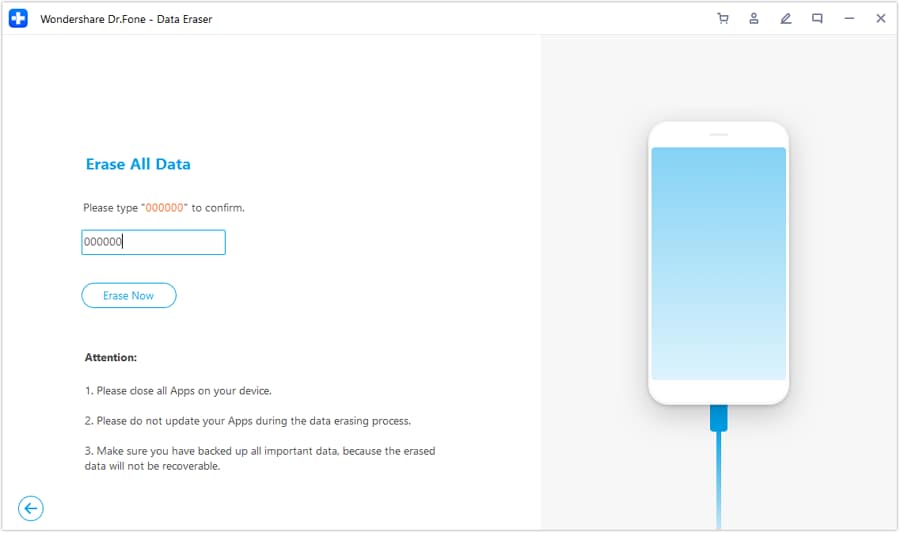
Step 2: Give Data Erase Permission
Dr.Fone will ask permission to erase the data as the deleted data won't recover. To erase the data, type "000000" on the given box to continue. Then the process will start, so you have to wait for some minutes to end it.
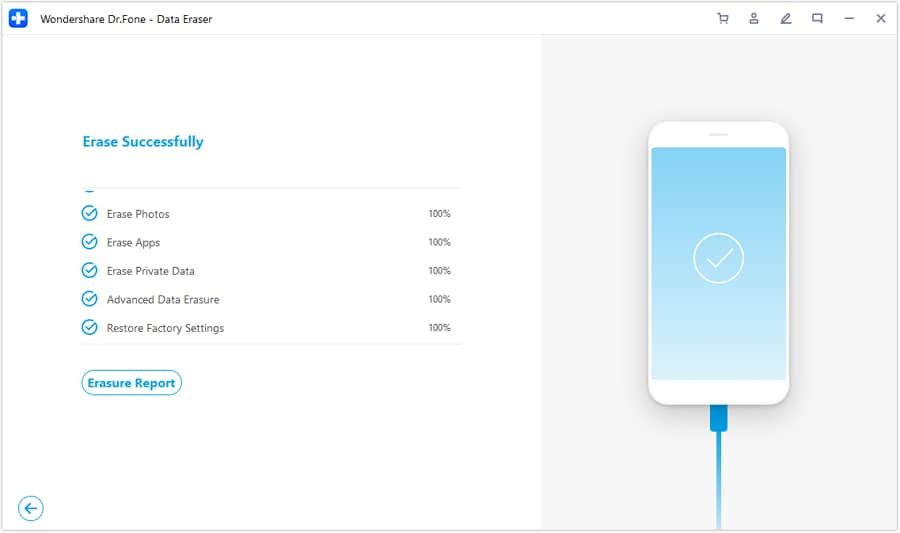
Step 3: Do Factory Reset on your Android
Once the erasing process is done, Dr.Fone will ask you to perform "Factory Reset" by tapping on it. After doing a factory reset, all of your settings and any left data will be completely deleted from your phone permanently. Now your Samsung S21 will be empty, just like a brand-new phone,
Conclusion
Are you interested in buying a new phone such as Samsung S22 Ultra or Samsung S22? Then you must be selling your old phone but keeping all your private information secured by erasing it sounds like a hectic job. Now you don't have to worry as this article has included five different methods explaining how to wipe Samsung. Using these methods will never recover your data, and your information will be safe and secured.
Samsung Manage
- Samsung Data Manage
- 1. Best Samsung Manager
- 2. Manage Contacts on S9/S8
- 3. Manage Music on Samsung
- 4. Manage Music on Samsung S8
- 5. Transfer Photos to Samsung S8
- 6. Manage Photos on Samsung S9
- 7. Best Galaxy S9 Manager
- 8. Samsung Gear Manager
- 9. Samsung Task Manager
- 10. Remove Samsung Bloatware
- Samsung Erase
- 1. Tips for Selling Old Samsung
- 2. Wipe A Samsung Phone
- 3. Tips to Erase Data
- 4. Remove Samsung Apps
- 5. Uninstall Apps on Samsung
- Samsung Mirror
- 1. Share the Phone Screen
- 2. Screen mirror to Samsung TV
- 3. Use Allshare Cast To Mirror
- 4. Samsung Mirror Screen to PC
- Samsung Record
- 1. Screen Record on Samsung A50
- 2. Screen Record on Samsung S10
- 3. Screen Record on Samsung s9
- 4. Samsung S8 Screen Record
- 5. Top Samsung Screen Recorder
- Samsung Root
- 1. Root Samsung Galaxy S7
- 2. Jailbreak Samsung Phones
- 3. Root Samsung Galaxy S3
- 4. Root Samsung Galaxy S4
- 5. Root Samsung Galaxy S5
- 6. Root Samsung Galaxy J5
- 7. Samsung Root Apps Without PC
- 8. Top 6 Samsung Root Software
- 9. Used Apps to Root Samsung Note
- 10. Root Samsung Galaxy S3 mini
- 11. Root Galaxy Tab 2 7.0
- 12. Unroot Android Devices
- Samsung to Mac
- 1. Transfer Photos to Mac
- 2. Samsung File Transfer for Mac
- 3. Transfer Photos from Samsung
- 4. Transfer Pictures to Mac
- 5. Transfer Pictures from Samsung
- 6. Transfer Files to Macbook
- Samsung to PC
- 1. Transfer Contact from Samsung
- 2. Transfer Photos to PC
- 3. Transfer Photos to Laptop
- 4. Transfer Photos from Samsung
- 5. Transfer Files to PC
- 6. Transfer Photos From Note 8 to PC
- USB Debugging
- Samsung Tips
- ● Manage/transfer/recover data
- ● Unlock screen/activate/FRP lock
- ● Fix most iOS and Android issues
- Manage Now Manage Now Manage Now


Selena Lee
chief Editor