Ultimate Guide to Managing Photos on Samsung Galaxy S9/S20
Jul 12, 2024 • Filed to: Manage Device Data • Proven solutions
Samsung Galaxy S9/S20 is one of the most advanced smartphones of the recent times and is packed with tons of new-age features. With a high-end camera, it makes it easier for us to capture timeless photos. Though, when we move from one device to another or upgrade our device, we often end up messing up our photos. Therefore, it is important to know how to manage photos on S9/S20. From transferring your photos between your computer and S9/S20 to taking their backup, it is of utmost importance to manage photos on S9/S20 and S9/S20 Edge. In this comprehensive guide, we will let you know how to do it in different ways.
Part 1: How to move photos into a folder/album?
Too many times, our smartphone photo gallery can get a little cluttered due to the presence of so many photos. Even though Android automatically creates dedicated albums for camera, social media, WhatsApp, downloads, and so on, chances are that you might find it hard to manage photos on S9/S20. The most straight-forward solution is to create new albums (folders) on S9/S20 gallery and move or copy your photos there. In this way, you can manage your photos easily by making different folders for every occasion. You can manually move your photos to a new folder and manage photos on S9/S20 by following these steps.
1. To start with, unlock your device and go to Samsung S9/S20 Gallery app.
2. This will display all the existing albums. Simply enter the album from where you wish to move photos.
3. Tap on the Add folder icon to create a new album on S9/S20. In some versions, you can go to more options and choose to create a new folder.
4. Give the folder a name and choose to create it.
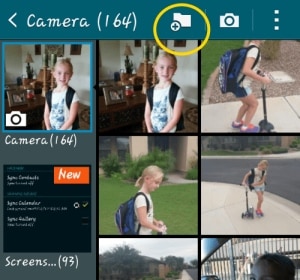

5. Great! Once the folder is created, you can manually select the photos that you wish to move into albums on S9/S20. If you want, you can also select the photos, go to its options and copy/move them.

6. If you drag the photos to a folder, you will get an option to either copy or move the photos. Simply tap on the option of your choice.
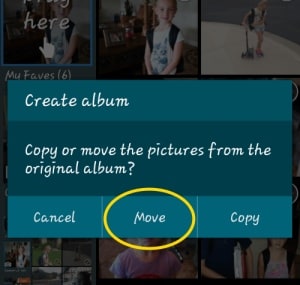
7. That’s it! This will automatically move your selected photos to a new folder. You can visit the album from the Gallery and add other photos to it as well.
Part 2: How to save S9/S20 photos to SD card?
One of the best things about Android devices is the inclusion of an SD card slot. Galaxy S9/S20 also supports an expandable memory of up to 400 GB as users can simply add an external SD card to their device. This lets them manage photos on S9/S20, move it to another system, or take its backup easily. All you need to do is follow these steps to save your photos from S9/S20 memory to an SD card.
1. Move photos from phone storage to SD card
If you wish to copy your photos from the phone storage to SD card, then go to the Gallery app and manually select the photos you wish to copy. You can also select all photos at once as well.
Go to its option and choose to either copy or move your selected photos.
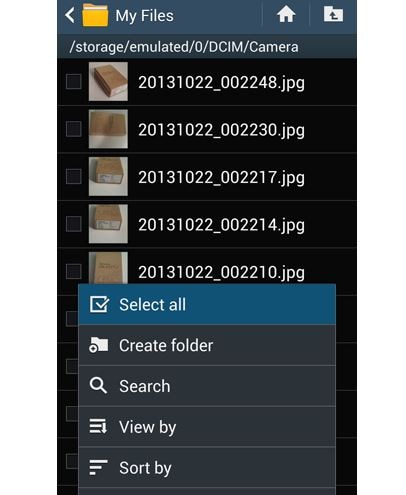
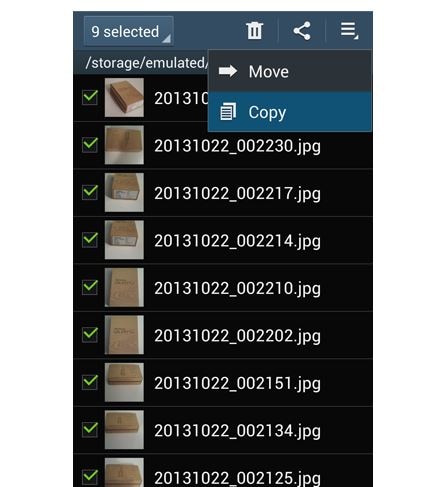
Now, go to the destination folder (in this case, the SD card) and paste your photos. In some versions, you can also directly send your photos to the SD card.
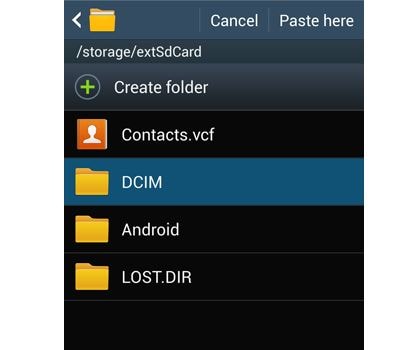
2. Save photos on SD card
You can also make your SD card as the default storage location for your photos as well. In this way, you don’t need to manually copy your photos every now and then. To do this, simply go to the Camera Settings on your device. Under the “Storage” option, you can set the SD card as the default location.
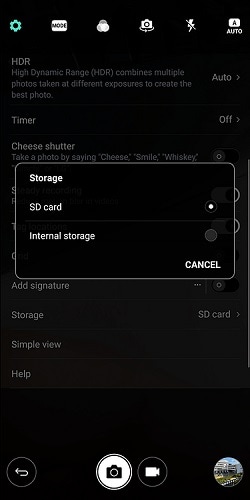
This will generate a warning message as your action will alter the default camera storage. Tap on the “Change” button to confirm your choice. This will automatically save photos taken from the S9/S20 camera on the SD card by default. In this way, you can easily manage photos on S9/S20.
Part 3: How to manage S9/S20 photos on computer?
As you can see, both of the above-mentioned techniques are a bit tedious and time-consuming. Therefore, to make the most of your time, you can use a third-party solution like Dr.Fone - Phone Manager (Android). It is a complete Android device manager that will let you import, export, delete, and manage your data seamlessly. You can easily manage photos on S9/S20 and other kinds of data as well such as contacts, messages, videos, music, etc. Since it has a user-friendly interface, no prior technical knowledge is needed to use it. You can simply connect your S9/S20 to your system, launch Dr.Fone - Phone Manager (Android) and manage photos on S9/S20 seamlessly.

Dr.Fone - Phone Manager (Android)
Manage S9/S20 Photos, Videos, Contacts, Messages on Computer.
- Transfer files between Android and computer, including contacts, photos, music, SMS, and more.
- Manage, export/import your music, photos, videos, contacts, SMS, Apps etc.
- Create photo albums, delete photos, import and export photos on S9/S20.
- Manage your Android device on computer.
- Fully compatible with Android 8.0.
1. Import photos to S9/S20
By using Dr.Fone - Phone Manager (Android), you can easily add photos to S9/S20 from your computer. To do this, connect S9/S20 to your system, launch Dr.Fone - Phone Manager (Android) and go to its Photos tab.
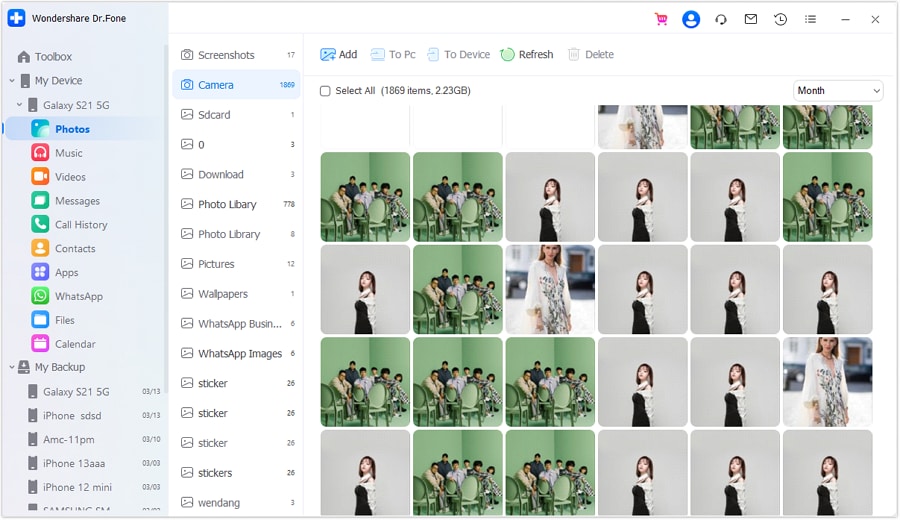
Go to the Import icon and choose to add files or an entire folder.
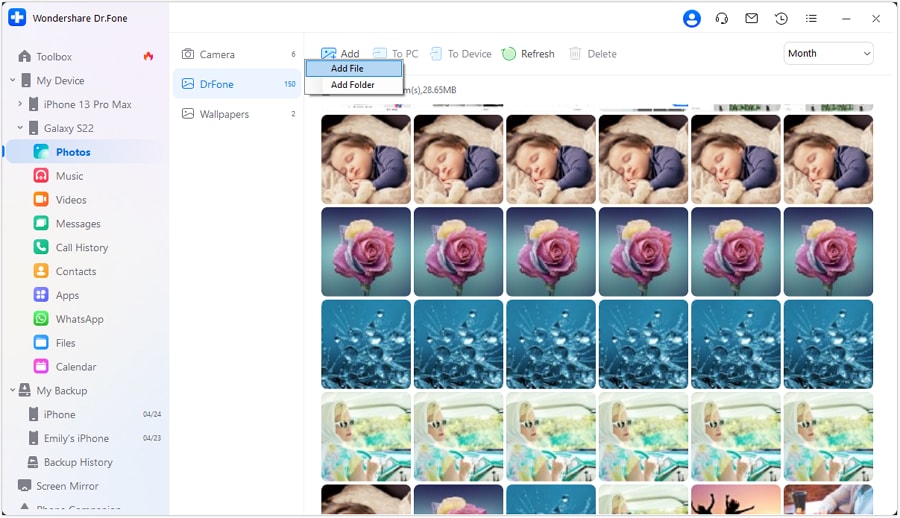
This will launch a file explorer from where you can choose to import your photos. In no time, your photos will be added to your device.
2. Export photos from S9/S20
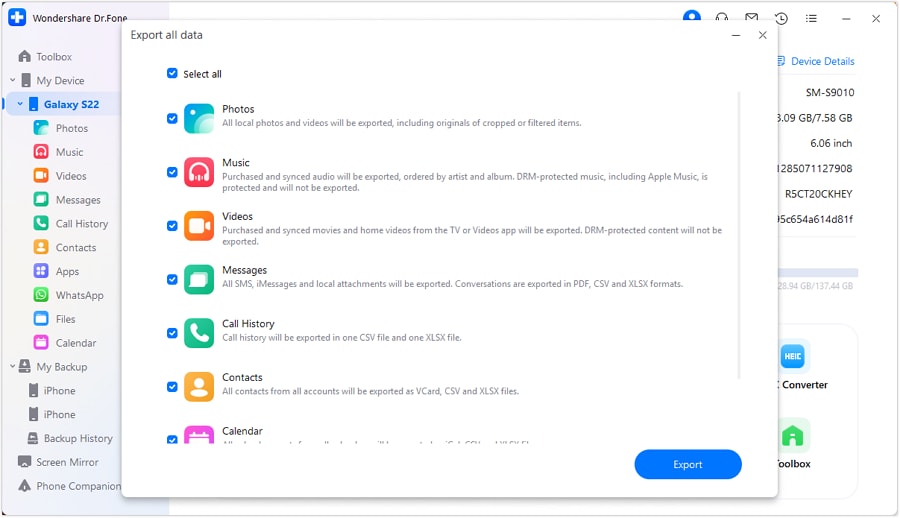
You can also choose to transfer your photos from your Android device to computer as well. On the welcome screen of Dr.Fone - Phone Manager (Android), you can click on the shortcut “Transfer device photos to PC”. This will automatically transfer the photo from your S9/S20 to the computer in one go.
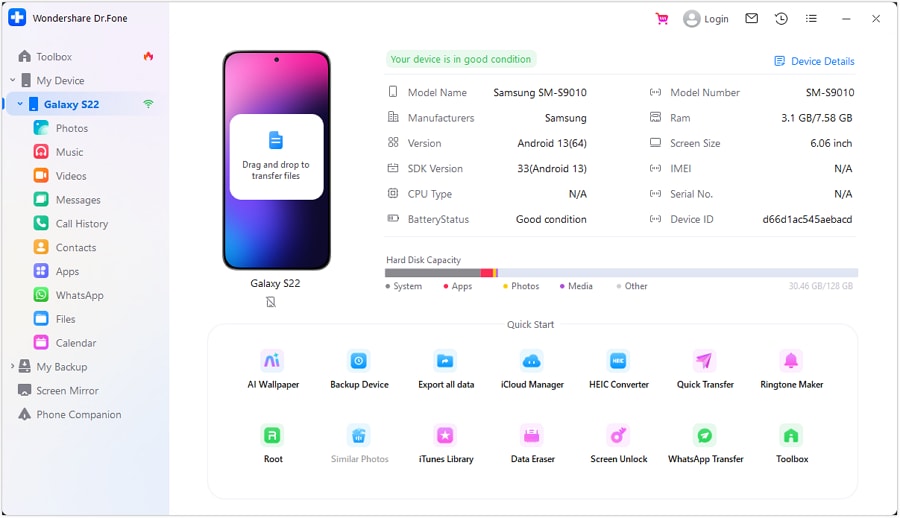
If you want to selectively export photos from S9/S20 to computer, then go to the Photos tab and select the pictures you wish to transfer. Now, go to the Export icon and choose to export the selected photos to either your computer or another connected device.
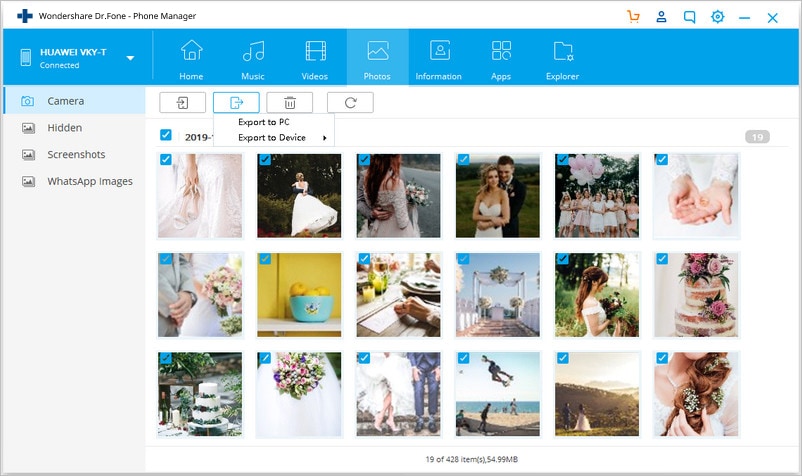
If you choose to export photos to PC, then a pop-up browser will open. From here, you can select the destination folder where you wish to save your photos.
3. Create albums on Galaxy S9/S20
As you can see, Dr.Fone - Phone Manager (Android) already segregates your device photos into different folders. You can simply go to any album from its left panel in order to manage photos on S9/S20. If you wish to create a new album, then select the respective category (for instance, Camera). Right-click it and choose New Album to create a new folder. Later, you can simply drag and drop photos from any other source to the newly created album.

4. Delete Photos on S9/S20
In order to manage photos on S9/S20, chances are that you would have to get rid of some unwanted pictures as well. To do this, simply go to the photo album of your choice and select the photos that you wish to get rid of. Afterward, click on the “Delete” icon on the toolbar.

This will generate a pop-up warning. Just confirm your choice and choose to delete the selected photos from your device.
As you can see, with Dr.Fone - Phone Manager (Android), you can easily manage photos on S9/S20. It is a highly secure and advanced tool that will let you import, export, delete, and manage your photos easily. You can add photos from your computer to S9/S20, create albums, move photos from one album to another, take the backup of your photos, and do so much more. This will certainly save your time and resources and make it easier for you to manage photos on S9/S20 for sure.
Samsung Manage
- Samsung Data Manage
- 1. Best Samsung Manager
- 2. Manage Contacts on S9/S8
- 3. Manage Music on Samsung
- 4. Manage Music on Samsung S8
- 5. Transfer Photos to Samsung S8
- 6. Manage Photos on Samsung S9
- 7. Best Galaxy S9 Manager
- 8. Samsung Gear Manager
- 9. Samsung Task Manager
- 10. Remove Samsung Bloatware
- Samsung Erase
- 1. Tips for Selling Old Samsung
- 2. Wipe A Samsung Phone
- 3. Tips to Erase Data
- 4. Remove Samsung Apps
- 5. Uninstall Apps on Samsung
- Samsung Mirror
- 1. Share the Phone Screen
- 2. Screen mirror to Samsung TV
- 3. Use Allshare Cast To Mirror
- 4. Samsung Mirror Screen to PC
- Samsung Record
- 1. Screen Record on Samsung A50
- 2. Screen Record on Samsung S10
- 3. Screen Record on Samsung s9
- 4. Samsung S8 Screen Record
- 5. Top Samsung Screen Recorder
- Samsung Root
- 1. Root Samsung Galaxy S7
- 2. Jailbreak Samsung Phones
- 3. Root Samsung Galaxy S3
- 4. Root Samsung Galaxy S4
- 5. Root Samsung Galaxy S5
- 6. Root Samsung Galaxy J5
- 7. Samsung Root Apps Without PC
- 8. Top 6 Samsung Root Software
- 9. Used Apps to Root Samsung Note
- 10. Root Samsung Galaxy S3 mini
- 11. Root Galaxy Tab 2 7.0
- 12. Unroot Android Devices
- Samsung to Mac
- 1. Transfer Photos to Mac
- 2. Samsung File Transfer for Mac
- 3. Transfer Photos from Samsung
- 4. Transfer Pictures to Mac
- 5. Transfer Pictures from Samsung
- 6. Transfer Files to Macbook
- Samsung to PC
- 1. Transfer Contact from Samsung
- 2. Transfer Photos to PC
- 3. Transfer Photos to Laptop
- 4. Transfer Photos from Samsung
- 5. Transfer Files to PC
- 6. Transfer Photos From Note 8 to PC
- USB Debugging
- Samsung Tips
- ● Manage/transfer/recover data
- ● Unlock screen/activate/FRP lock
- ● Fix most iOS and Android issues
- Manage Now Manage Now Manage Now


Alice MJ
staff Editor