
3 Effective Tips on Samsung Knox Disable
Jul 12, 2024 • Filed to: Remove Screen Lock • Proven solutions
Samsung Knox is a security feature pre-installed on most Samsung smartphones since the 4.3 Jellybean OS version. While Knox is great for security, it does have several drawbacks. For instance, it can hinder root access and customizing your OS. If you love tinkering with your phone, this can be frustrating.
In such situations, you'll want to disable the Knox feature on your Samsung device. This article will guide you through simple methods for Samsung Knox disable and show you how to remove Samsung Knox effortlessly. Let's get started and regain control over your device!
- Part 1: Before Disabling Samsung Knox Mobile Enrollment, All You Need to Know [Simple Overview]
- Part 2: How to Remove/Bypass Samsung Knox Mobile Enrollment
- Part 3: Access Locked Android Phone from PC
- Bonus Tip: How to Utilize KME for Google FRP Removal
- Q&A: Everything You May want to Know on Screen Unlock Issues
Part 1: Before Disabling Samsung Knox Mobile Enrollment, All You Need to Know [Simple Overview]
What is Knox?
Samsung KNOX is an Android-based security feature aimed at offering improved security of the open-source platform. After the Jellybean 4.3 OS version was released, the KNOX app was pre-installed on Samsung smartphones. In addition, Knox offers data security, device management, and VPN options. Furthermore, for better control of the device, web-based services are also provided by Knox.
Benefits of having the Knox services
There will be some inconvenience that Knox brings. However, solutions like Knox Manage and KPE provide IT departments with powerful capabilities that can save time and avoid headaches associated with new mobile initiatives. And there are several ways Knox can help you secure and manage your mobile. Some of the key benefits are listed below.
- Hardware-based security
- Advanced data protection features
- Customizable configurations
- Enrollment, management, and firmware updates
- Enterprise-grade security
- Advanced biometric options
What will happen when disabling Knox's enrolment?
Besides offering multiple benefits, the Knox feature can also lead to a few issues like difficulty getting root access to the device, modifying the OS, customizing the Android OS, and others. So, to avoid all these and related issues, you can disable the Knox enrolment. However, while undermining the Knox enrolment, all the data stored on your Android phone may be lost.
Thus, it is suggested to take a backup of your phone before trying to disable the feature.
Part 2: How to Remove or Bypass Samsung Knox Mobile Enrollment
There are different ways by which you can remove or Turn off Knox Mobile Enrolment. Below listed are the methods.
Method 1. Disable Knox on Stick Samsung Android (Unrooted)
For older Samsung devices.
This method applies to old Samsung devices like Galaxy S6 Edge, S3, S4, S5, note 3, Note 4, and Note 5. The steps are as below.
Step 1. On your Samsung devices, open the Knox app and then click on the settings.
Step 2. Choose the Knox Settings tab. Next, click on Uninstall Knox option.
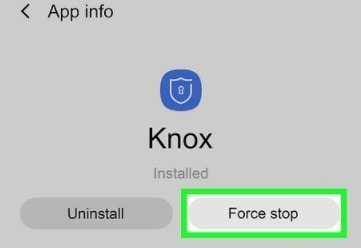
Step 3. While the app is being uninstalled, an option to get the backup of the Knox data will appear. Click on Backup Now, and the date will be saved to the app folder of the device. Next, click on the OK button.
So, use the above steps to Disable Knox on Samsung Galaxy Devices and other devices.
For newer Samsung devices
For the newer versions of the Android devices, the steps for disabling the Knox app are as follows.
Step 1. On your Android phone, navigate to Settings > Apps.
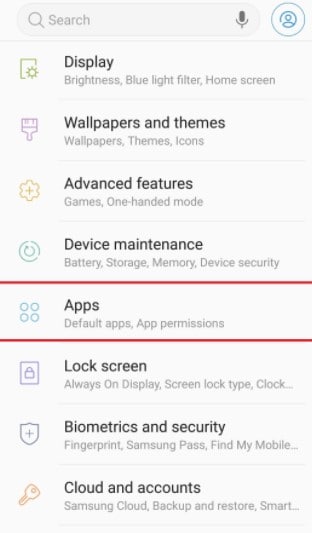
Step 2. Click on the Menu button and choose Show System Apps. Look for the Knox option in the search bar, and then all the related apps will appear.
Step 3. Start to disable them one by one. Reboot your phone, and you are done.
Method 2: Disable Knox on Stock Samsung Android (Rooted)
If your Android device is already rooted, things will become simpler. First, you have to remove the app by uninstalling it rather than disabling the Knox. Then, you can use the Titanium Backup app or the Explorer app to get the task done. The steps for the process are as follows.
Step 1. Download and install the Titanium Backup app from the Google Play Store on your phone.

Step 2. Open the app and look for the Knox and all the related apps will be shown using the search button.
Step 3. Next, using the Titanium backup app, you need to freeze the following:
- com.sec.enterprise.Knox.attestation
- com.sec.Knox.eventsmanager
- KLMS Agent
- Knox Notification Manager
- Knox Store.
Step 4. Choose all the files and remove them. Now finally, reboot the phone.
Method 3: Unable KME with Third-party Apps like Android Terminal Emulator
Third-party apps like Terminal Emulator can be used to enter the command and freeze and uninstall the Knox app. The steps for the process are as follows.
Step 1. Install the Android Terminal Emulator app from the Google Play Store.
Step 2. Then get a prompt for SuperSU access to allow root access. Grant the permission.
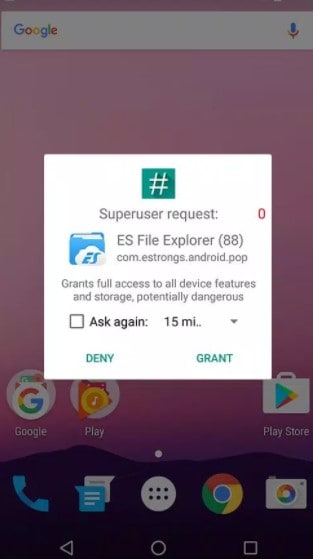
Step 3. Next, you need to enter and execute the terminal editor commands that will permanently uninstall the app.
Part 3: Access Locked Android Phone from PC with Dr.Fone - Screen Unlock (Android)
If you’ve forgotten your Android phone’s screen lock code or bought a second-hand device with a locked screen, Dr.Fone - Screen Unlock (Android) can come to your rescue. This user-friendly software for Windows and Mac lets you remove all types of screen locks effortlessly.
Key features of Dr.Fone - Screen Unlock (Android):
- Remove all types of screen locks: pattern, PIN, password, and fingerprints.
- Compatible with all Android brands, models, and versions, including Samsung, LG, and Huawei.
- No technical expertise needed to unlock your device.
- Bypass FRP on Samsung devices without using Google accounts or PIN codes.
- Works seamlessly on both Windows and Mac.
Steps to access locked Android phone using Dr.Fone - Screen Unlock
Step 1. Launch the installed software and choose the Screen Unlock feature. Connect the locked Android device to your PC using a USB cable, and then from the software interface, choose the “Unlock Android Screen” option.
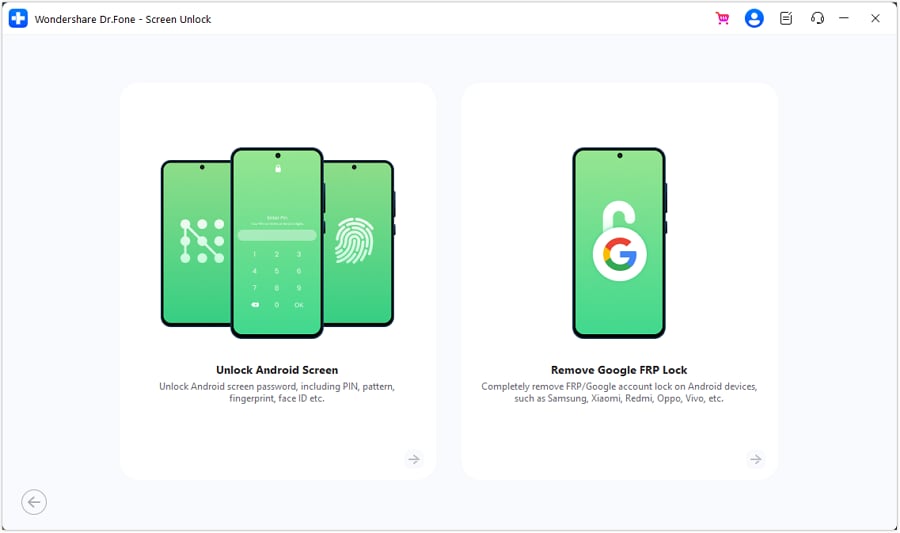
Step 2. The list of supported device models will appear from which select the correct one.

Step 3. Next, you need to get your connected phone into recovery mode. The specific steps for different device model are different. You can just follow the instructions you will see.
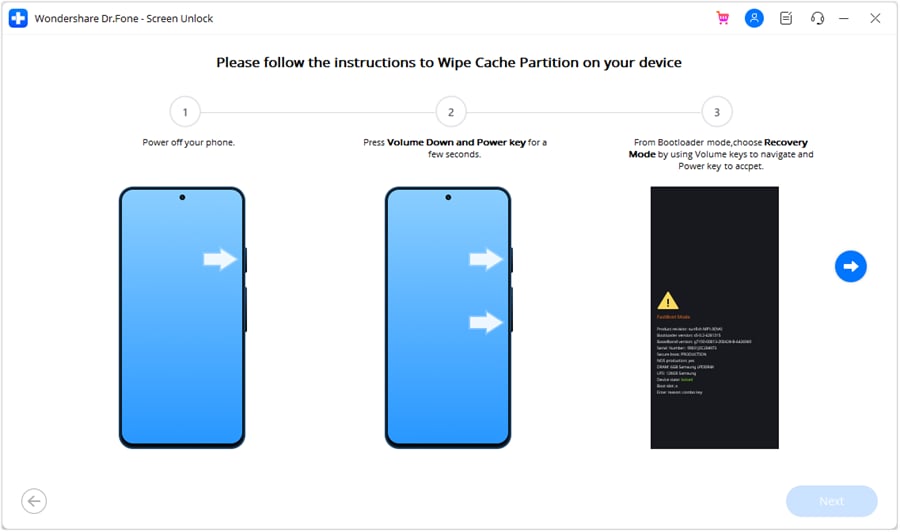
Step 4. After the process is complete, you can have access to your Android phone without a password, PIN, or pattern.
Bonus Tip: How to Utilize KME for Google FRP Removal
Factory Reset Protection (FRP) is a security feature of Android that uses the Google Account is automatically installed on Android 5.0 and above devices. Once this feature is enabled, the device can be factory reset only using the Google account password.
Removing the FRP feature arises in several situations, and one of the methods for disabling FRP is by using KME.
Note: Google FRP removal can be done using KME only on the devices that utilize Knox version 2.7.1 or above.
The steps for the process are as follows:
Step 1: Ensure your device has a KME profile with the following options:
- Verified "Skip Setup Wizard" enabled.
- For DO KME profiles, settings are enabled by default. For DA KME profiles, enable manually.
- Uncheck "Allow end user to cancel enrollment."
Step 2: Perform a hard factory reset using the appropriate button combination for your device.
Step 3: After powering on, connect your device to the network. You'll see a prompt to reboot.
Step 4: Reboot the device. Enrollment will proceed without prompting for Google account login credentials.
Part 4: Frequently Asked Questions and Answers
Q1: I recently got a new Samsung tablet from school with a Knox manager on it, and it doesn't allow me to do anything. Is removing this Knox app on a tablet possible?
The feature of Knox comes built-in with the Samsung devices, and the Knox manager cannot be removed. The tablets and other devices received from the school are for educational purposes and not other uses.
Q2: How do I remove MDM from the Samsung tablet?
The system administrators use mobile Device Management (MDM) to manage the devices through commands sent from the central server. Since MDM sets restrictions for installing apps on the devices, the need for removing or uninstalling the feature arises. The steps to remove MDM from Android devices are as below.
- Step 1. Go to Settings on the Android device and navigate to Security.
- Step 2. Choose Device Administrator and disable it.
- Step 3. Go to Applications, choose ManageEngine Mobile Device Manager Plus in the Settings section, and then Uninstall the MDM agent.
Q3: How can I bypass the FRP (Factory Reset Protection) lock on Android Devices?
The FRP on Android devices can be bypassed using the Google Account, but if you do not have the login details, the best tool used here is Dr. Fone-Screen Unlock. The FRP removal function of this Windows and Mac-based software will help you bypass and remove the FRP on Android in a quick, hassle-free manner.
Wrap it Up!
So, whenever the Knox feature on your Samsung device causes issues, you can use any of the methods mentioned above to disable the Knox security feature from your phone. If you face trouble unlocking your screen, try Dr.Fone - Screen Unlock (Android). This tool helps you remove all types of screen locks easily. By following these steps, you'll regain control of your device without hassle. Enjoy a smoother and more personalized experience with your Samsung phone!
Samusng Unlock
- Samsung Code
- 1. Samsung Unlock Code List
- 2. Samsung Reset Code List
- 3. Samsung Secret Code List
- 4. Check Screen Using Secret Codes
- 5. Samsung Unlock Code Generators
- 6. Free Samsung Unlock Code
- 7. Free Samsung Unlock Code Generators
- 8. Samsung Galaxy S2 Unlock Code
- Samsung A Series FRP Bypass
- 1. Samsung A01 FRP Bypass
- 2. Samsung A01 Core FRP Bypass
- 3. Samsung A02/A02s FRP Bypass
- 4. Samsung A2 Core FRP Bypass
- 5. Samsung A10/A10s FRP Bypass
- 6. Samsung A11 FRP Bypass
- 7. Samsung A12 FRP Bypass
- 8. Samsung A20/A20S FRP Bypass
- 9. Samsung A30/30s FRP Bypass
- 10. Samsung A50 FRP Bypass
- 11. Samsung A51 FRP Bypass
- Samsung J Series FRP Bypass
- 1. Samsung J2 FRP Bypass
- 2. Samsung J4 FRP Bypass
- 3. Samsung J5 Prime FRP Bypass
- 4. Samsung J6 FRP Bypass
- 5. Samsung J7 FRP Bypass
- 6. Samsung J7 Prime FRP Bypass
- 7. Samsung J250 FRP Bypass
- Samsung FRP Bypass for Others
- 1. Samsung S7 FRP Bypass
- 2. Samsung S22 FRP Bypass
- 3. Samsung M01 FRP Bypass
- 4. Samsung M11 FRP Bypass
- 5. Samsung G532F FRP Bypass
- 6. Samsung G531F/G531H FRP Bypass
- 7. Samsung Google Verification Bypass
- 8. HushSMS APK FRP Unlock
- 9. Samsung Android 11 FRP Bypass
- 10. Samsung FRP Bypass Without PC
- 11. Bypass Samsung S24 FRP Lock
- Samsung Factory/Hard Reset
- 1. Reboot Samsung
- 2. Hard Reset Samsung
- 3. Reset Locked Samsung Phone
- 4. Reset Samsung Tablet
- 5. Reset Samsung Without Password
- 6. Reset Samsung Account Password
- 7. Reset Samsung Galaxy S3
- 8. Reset Samsung Galaxy S4
- 9. Reset Samsung Galaxy S5
- 10. Reset Samsung Galaxy S9/S10
- 11. Reset Samsung Galaxy J5/J7
- 12. Reset Samsung A12
- 13. Factory Reset Samsung Tablet
- Samsung S Series Screen Unlock
- 1. Samsung S2 Screen Unlock
- 2. Samsung S3 Screen Unlock
- 3. Samsung S4 Screen Unlock
- 4. Samsung S5 Screen Unlock
- 5. Samsung S6 Screen Unlock
- 6. Samsung S7/S8 Screen Unlock
- 7. Samsung S20 Screen Unlock
- 8. Samsung S22 Ultra Screen Unlock
- 9. Hack Samsung Galaxy S6/S5/S4/S3
- Samsung Screen Unlock Tools
- 1. Best Samsung Unlock Software
- 2. Forgot Samsung Galaxy Password
- 3. Bypass Samsung Lock Screen PIN
- 4. Unlock Samsung Galaxy Phones
- 5. Unlock Bootloader on Samsung
- 6. Unlock Home Screen Layout
- 7. Unlock Samsung Password
- 8. Remove Google Account
- 9. MDM Remove Tools
- 10. Samsung Knox Disable Guide
- 11. Samsung Reactivation Lock
- Samsung SIM Unlock
- ● Manage/transfer/recover data
- ● Unlock screen/activate/FRP lock
- ● Fix most iOS and Android issues
- Unlock Now Unlock Now Unlock Now


Selena Lee
chief Editor